

 English
 Translate
Finger Robot
Introduction
The Finger Robot is a physical-button control accessory for NanoKVM Go. Attach it next to the physical power button of the target device, and NanoKVM Go can drive its arm to press the button. This lets you remotely power the target device on or off, or trigger another action assigned to its power button.
It is useful when the target device is powered off, the operating system is unresponsive, or software-based power control is unavailable.
Holding a computer power button for an extended period usually forces the computer to power off and may cause unsaved data to be lost. Before operating the Finger Robot, check the press hold duration and the power-button behavior configured on the target device.
Preparation
Prepare the following items before installation:
- NanoKVM Go;
- The Finger Robot and the required arm;
- A full-featured USB Type-C cable;
- A computer, tablet, or phone that can open the NanoKVM Go web control page.
Make sure NanoKVM Go is powered on and its web control page is accessible.
Connect the Devices
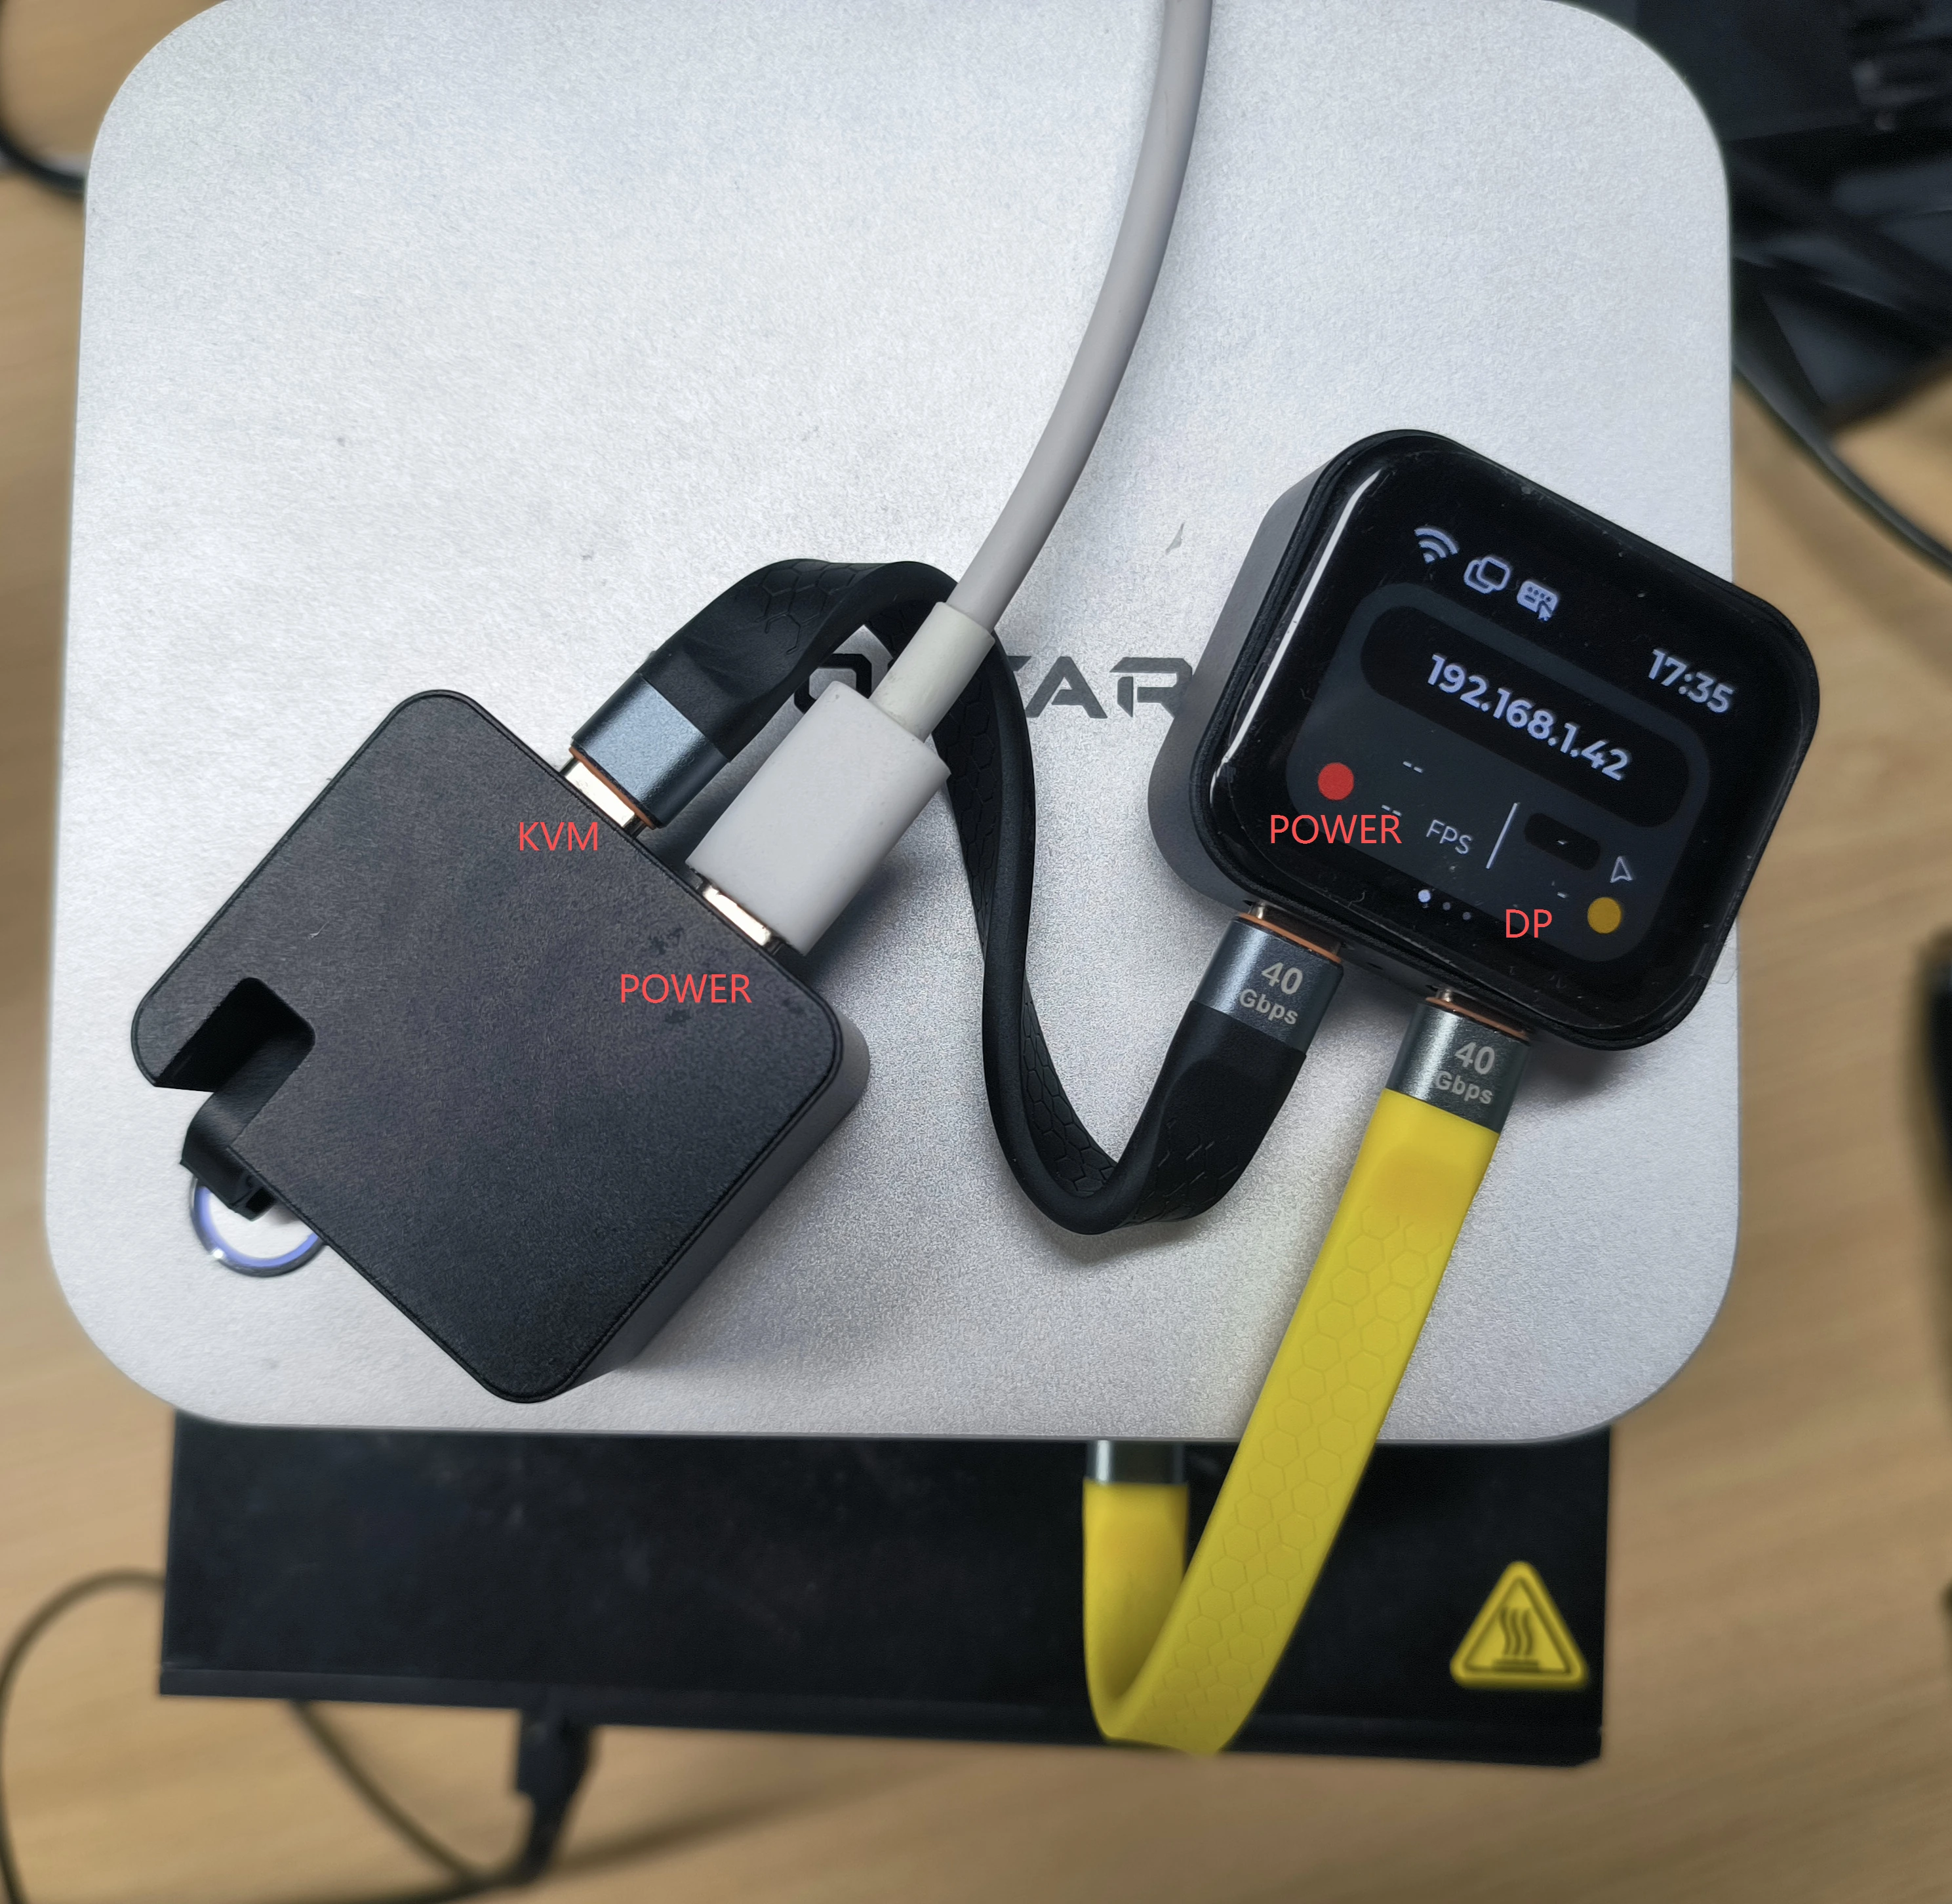
Connect the devices as shown below.
Arm Models for 3D Printing
STEP models of the long arm and the short arm are available for download. You can print spare arms or adapt them to your installation:
The two files are two length variants of the arm that share the same mounting point. Print only the one that fits your setup:
- Long arm: for devices whose power button sits in an awkward spot, so the Finger Robot cannot be mounted right next to it. A typical case is the Mac mini (M4), whose power button is on the bottom of the chassis and needs a longer arm to reach;
- Short arm: for the common case where the power button is on the front or top panel and the Finger Robot can be attached right beside it, such as a regular desktop PC case.
After installing the printed arm, set Select the Arm in the web control page to the arm type you actually installed. This option changes the arm travel range.
Install the Finger Robot
- Choose the long arm or short arm based on the distance to the power button and the available installation space.
- Place the Finger Robot next to the target device's power button. Align the arm with the center of the button when pressed.
- Make sure the released arm does not remain in contact with or hold down the power button.
- Clean and dry the mounting surface, and then attach the Finger Robot securely.
- After mounting it, test with a low press strength first and increase the level only when necessary.
Enable the Feature
- Log in to the NanoKVM Go web control page in a browser.
- Click the Settings icon on the floating toolbar.

- Open
Settings → Appearance.
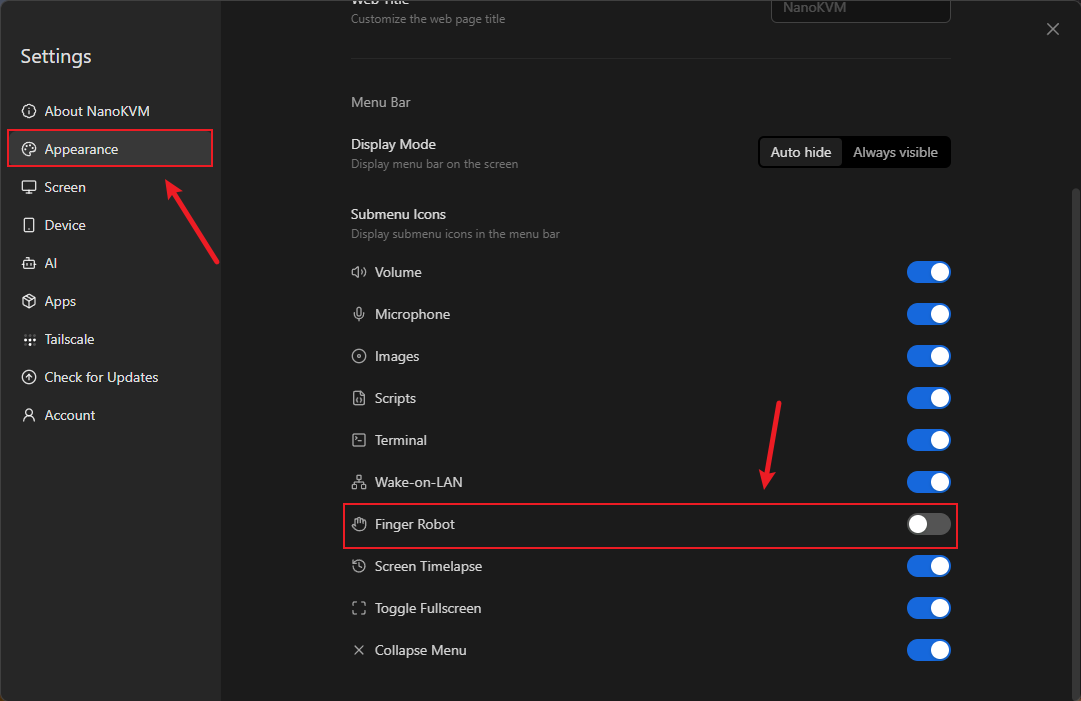
- Turn on the
Finger Robotswitch.
After the switch is enabled, a Finger Robot icon appears on the floating toolbar. Click the icon to open the Finger Robot configuration panel.

Configuration and Operation
The Finger Robot configuration options are shown below.
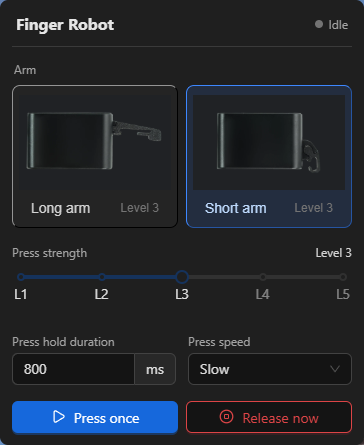
Connection Status
The top of the panel shows the Finger Robot connection status. If the page reports that the Finger Robot is not connected, check whether the cables are connected correctly.
Test the press operation only after the connection succeeds. The operation buttons at the bottom of the panel are unavailable while the Finger Robot is disconnected.
Select the Arm
Select Long Arm or Short Arm to match the arm that is physically installed. This setting affects the Finger Robot's movement range and must match the actual arm.
After changing the arm type, check its alignment with the power button again and begin testing with a low press strength.
Adjusting the Press Stroke
The Press Stroke offers 1 to 5 levels. The higher the level, the greater the press stroke of the swing arm.
For the first test, it is recommended to start from level 1. If the swing arm does not fully press the power button, increase the level by one step and retest. Do not directly use a high level to avoid unnecessary stress on the swing arm, the button, or the adhesive points.
Set the Press Hold Duration
Press Hold Duration controls how long the arm remains pressed during each operation. The value is measured in milliseconds (ms).
- A short press can power on the target device or trigger the shutdown, sleep, or other action assigned to its power button by the operating system;
- A longer press may force the target device to power off.
The exact behavior depends on the target device hardware and operating-system settings. Begin with a short duration and adjust it only when necessary.
Set the Press Speed
Press Speed controls how quickly the arm presses and releases. After first installation or position adjustment, use a slower speed so that you can check whether the arm reaches the power button correctly.
Perform a Press
- Click
Press Onceto perform one press-and-release cycle using the selected arm type, press strength, hold duration, and speed; - Click
Release Nowto end the current hold and release the arm. Use this button if the configured hold duration is unsuitable or you need to stop a press early.
First Test
After installation, test the Finger Robot in the following order:
- Make sure the top of the panel shows that the Finger Robot is connected.
- Select the arm type that matches the installed arm.
- Set the press strength to level 1 and select a slow press speed.
- Set a short press hold duration.
- Click
Press Onceand check whether the arm is aligned with and fully presses the power button. - If the power button is not triggered, check the mounting position first and then increase the press strength one level at a time.
- After both pressing and releasing work correctly, adjust the hold duration and speed for the target device as needed.
Observe the Finger Robot next to the device during initial testing. Use it unattended only after confirming that the configuration works correctly.
Troubleshooting
The Arm Moves but Does Not Trigger the Power Button
- Make sure the selected long or short arm matches the installed arm;
- Check that the arm is aligned with the center of the power button;
- Make sure the Finger Robot is attached securely;
- Increase the press strength one level at a time, and test after each adjustment.
The Arm Does Not Release Promptly
Click Release Now first. Then reduce the press strength or press hold duration and check the installation position again. Continue using the Finger Robot only after confirming that the arm releases correctly.