User Guide
Update history
| Date | Version | Author | Update content |
|---|---|---|---|
| 2024/12/10 | v0.1 | BuGu |
|
OLED Interface
On the NanoKVM-PCIe, the OLED has two interfaces: the main interface and the WiFi configuration interface, which can be switched by long-pressing the BOOT button for 2 seconds.
Main Interface:
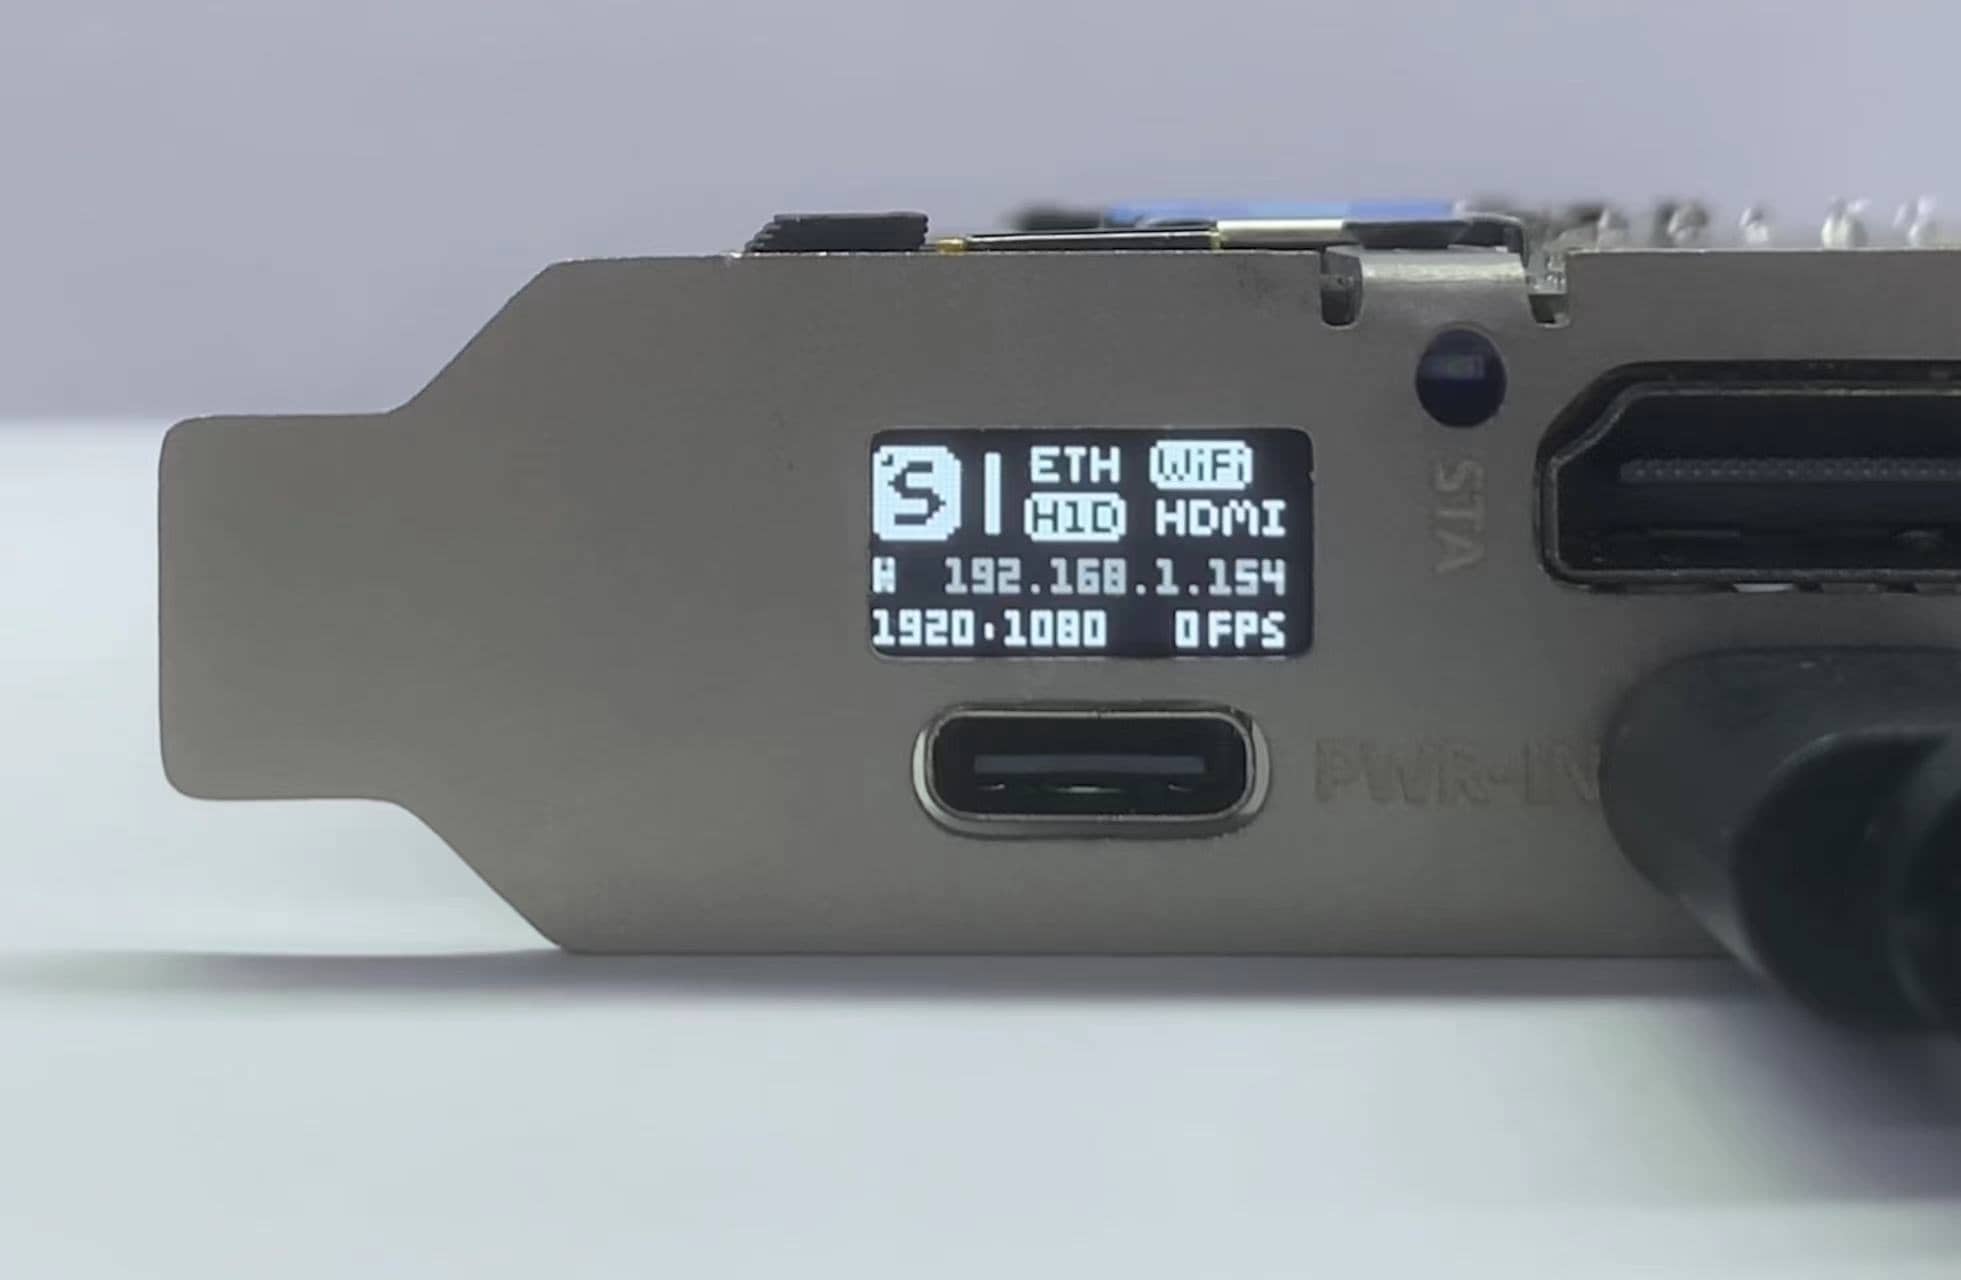
- Displays the connection status for Ethernet, USB, and HDMI. The icons will change to an inverted color when connected.
- IP: After connecting the Ethernet, the NanoKVM will automatically obtain an IP address and display it on the OLED. The WiFi version will automatically switch the IP.
- Resolution: Displays the physical resolution of the HDMI, such as 1920x1080.
- FPS: Shows the real-time transmission frame rate.
- The main interface provides an OLED sleep function to prevent screen burn-in. You can short-press the BOOT button to turn the OLED off or on.
- After applying version
2.1.4, the OLED automatic sleep feature has been added: After setting the sleep time in the settings, the OLED will automatically enter sleep mode after the set time. Pressing the BOOT button can temporarily wake up the OLED.
WiFi Configuration Interface (not available for versions without WiFi):
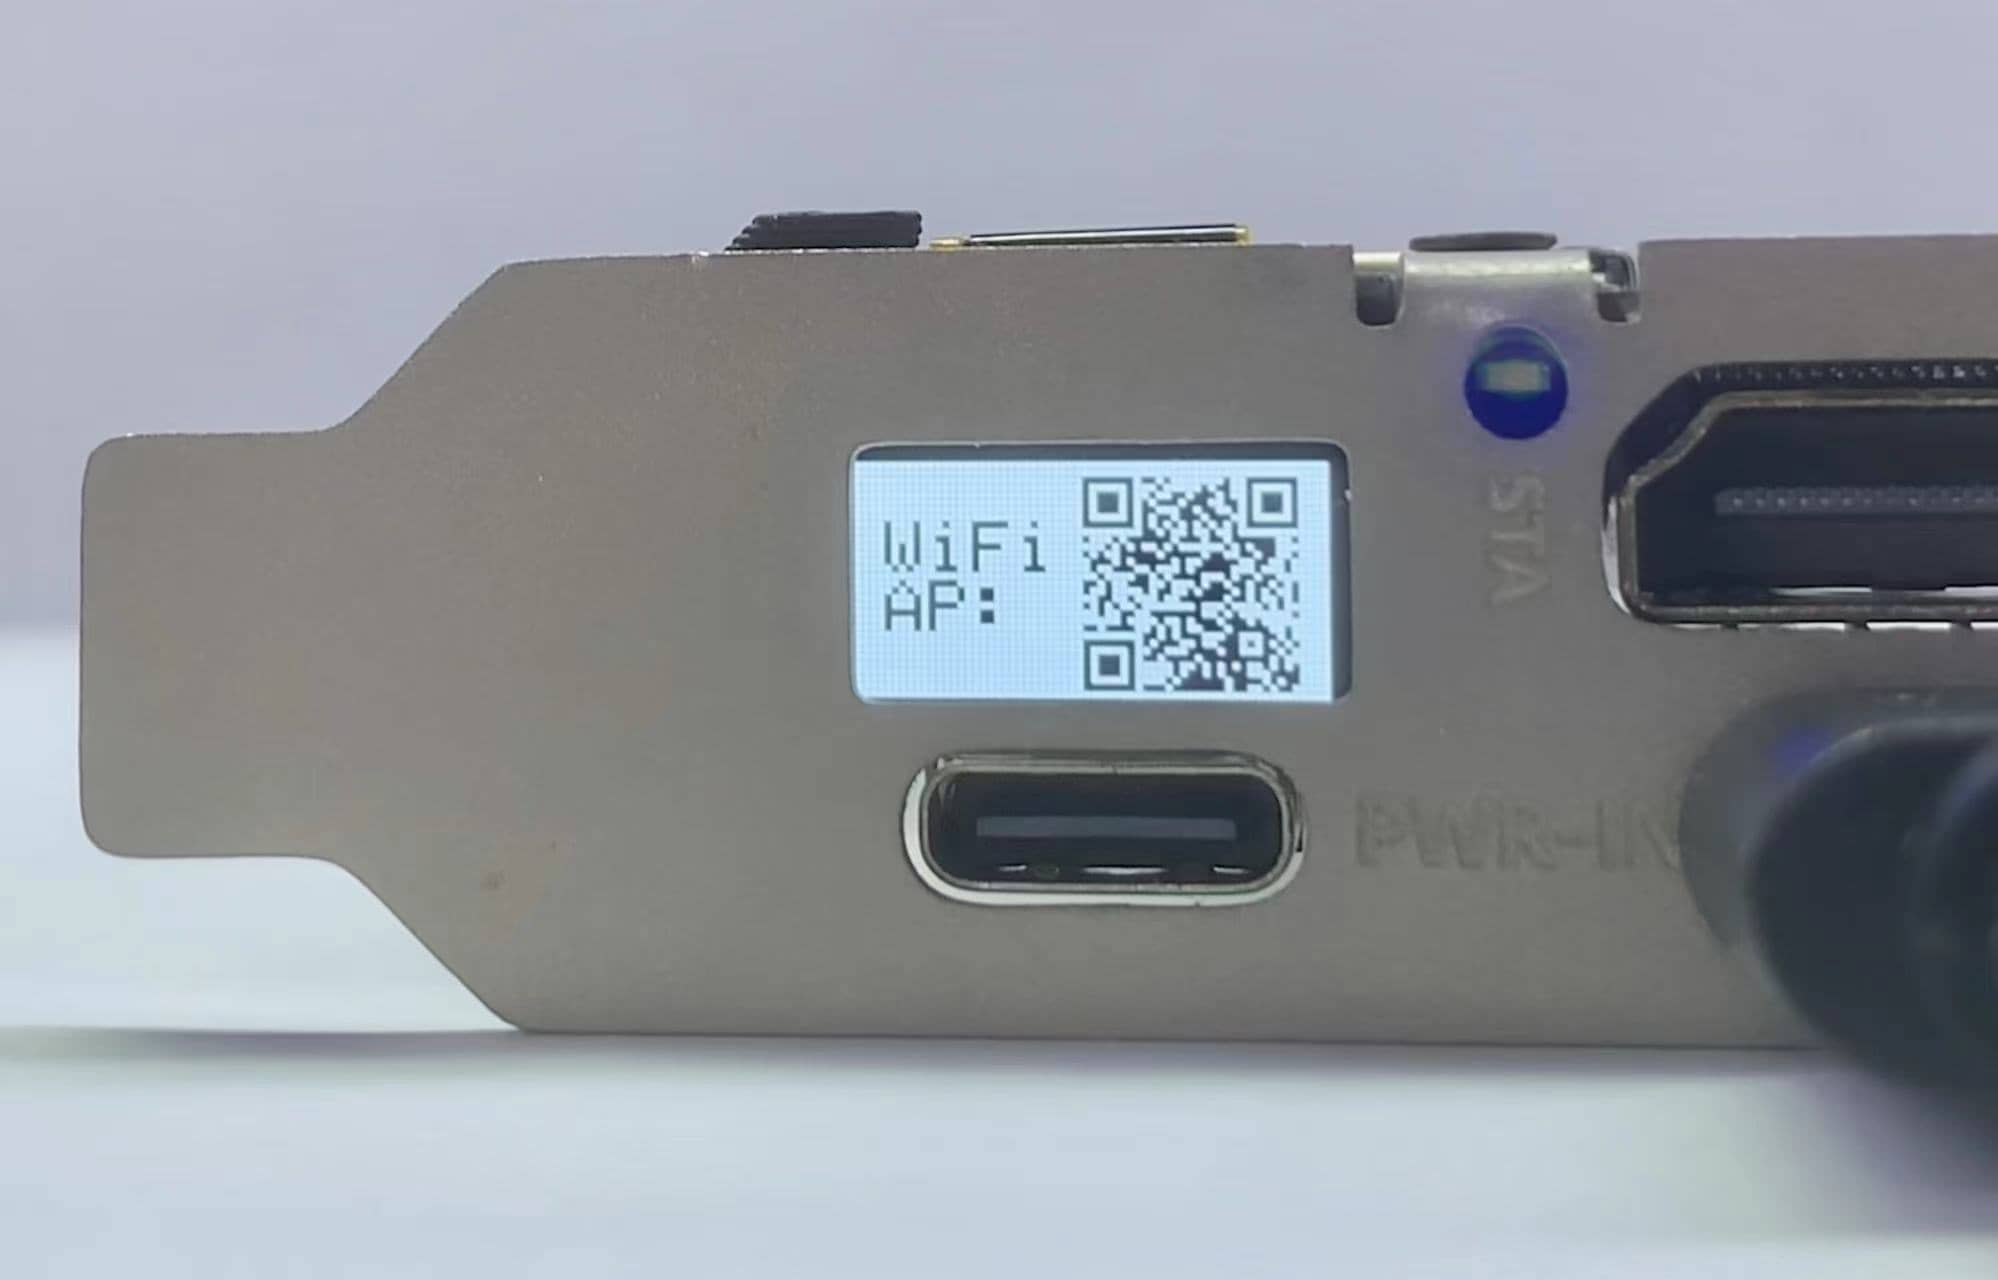
- Sequentially displays the WiFi configuration process: Creating WiFi AP -> WiFi QR code -> Web QR code.
- After a successful WiFi connection, it will automatically exit this interface.
- For detailed WiFi configuration steps, please refer to Configuring WiFi.
Management Page Functions
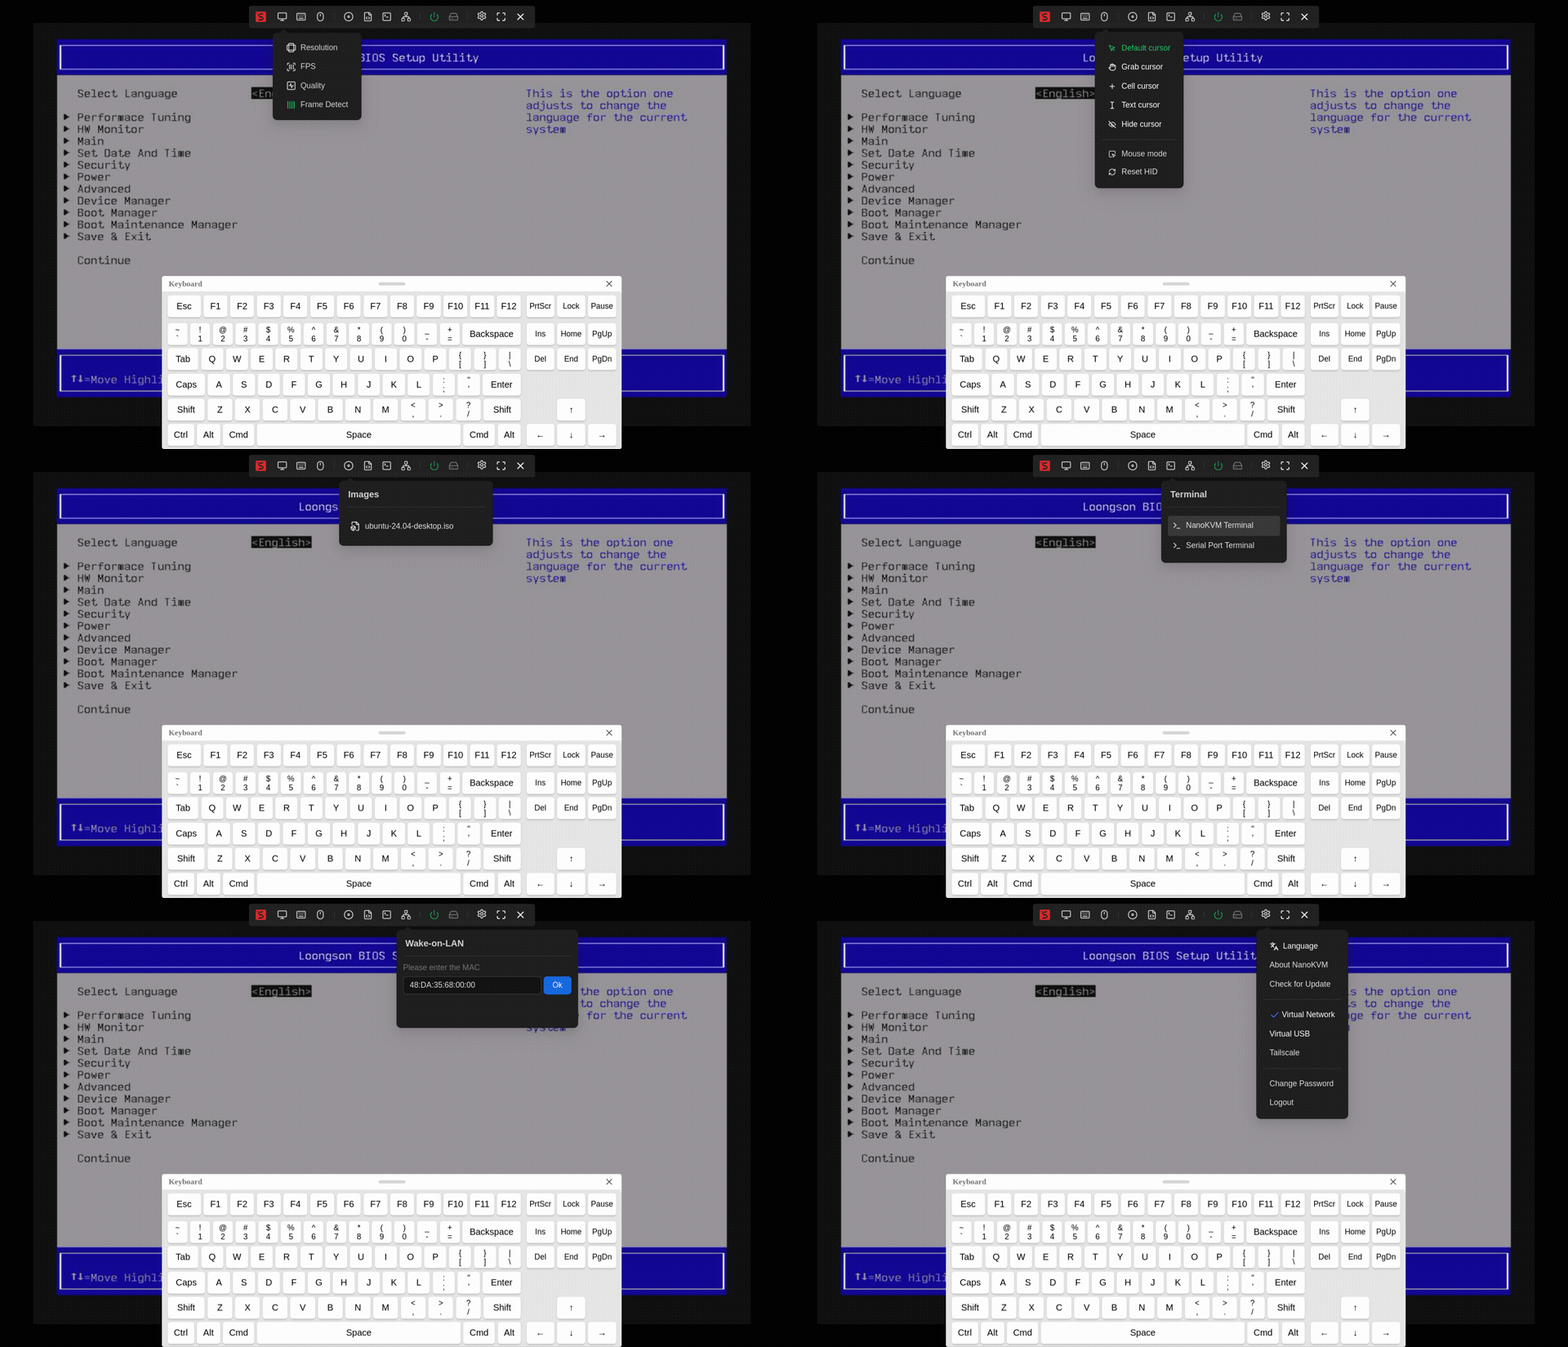
The floating toolbar from left to right includes: image settings, on-screen keyboard, mouse style, image mounting, custom scripts, KVM web terminal, WOL, ATX control/indicator, settings, full screen, and hide floating toolbar.
Resolution, Format, Frame Rate, and Image Quality Settings
NanoKVM supports image transmission at 1080P, 720P, 600P, and 480P resolutions. You can select different resolutions in the image settings under "Resolution." Higher resolutions require more bandwidth and result in lower real-time frame rates. In Auto mode, the transmission resolution will follow the physical resolution of the host's HDMI.
- Note: This only modifies the size of the transmitted image and does not change the size of the HDMI input image. For adjustments, please go to the host system's settings menu.
Format Settings: Currently, NanoKVM supports two formats: MJPEG and H264.
- MJPEG format transmits each frame of the image, offering relatively high image quality with predictable latency, but it consumes more bandwidth.
- H264 format transmits video stream data, resulting in smaller data size and lower latency, especially noticeable at high quality.
The frame rate setting option allows you to modify the maximum frame rate of the transmission. This can help limit network bandwidth usage, but lower frame rates may result in choppy images. Please configure this based on your network conditions. Full version users can see the real-time video frame rate on the OLED.
The image quality option modifies the compression ratio of the image. If you find the image choppy or experiencing high latency, you can lower the image quality.
- In MJPEG format, low, medium, high, and lossless correspond to image compression ratios of 50%, 60%, 80%, and 100%, respectively.
- In H264 format, low, medium, high, and lossless correspond to transmission bit rates of 1000Kbps, 2000Kbps, 3000Kbps, and 5000Kbps, respectively.
Virtual Keyboard and Mouse Usage
- The USB interface of NanoKVM simulates keyboard and mouse devices. Once you open the browser page, the system will automatically capture keyboard and mouse inputs and synchronize the actions in real time to the host connected to NanoKVM. Users can choose to hide the mouse or change its display style on the screen.
- For users who find it inconvenient to use a keyboard, we provide an on-screen keyboard that can be accessed by clicking the keyboard icon in the floating toolbar.
- In rare cases, the HID keyboard and mouse may not control the host. Please click "Reset HID" and try again.
- Some BIOS require the mouse to operate in relative movement mode. Please modify this in the web interface under "Mouse Mode."
- Some BIOS require the keyboard and mouse to operate in a mode with the BIOS mark. Please execute
/touch /boot/BIOS && rebootin the web terminal.
ISO Image Mounting and Remote Installation
The USB-C port of Nano KVM not only simulates keyboard and mouse devices but also simulates a USB drive, mounting a portion of the TF card's storage space for installation purposes. This USB drive is formatted as exFAT by default, and the Full version of NanoKVM has a built-in TF card with a simulated USB drive size of approximately 21GB.
Unlike a regular USB drive, the virtual USB drive of NanoKVM can store multiple images simultaneously. Before booting, you can select the system image to mount via the web page options.
Users need to download the desired installation image (usually ending with .iso) in advance, insert the NanoKVM USB-C into the computer, and copy the downloaded image directly to the USB drive (multiple systems can be copied). You can then safely remove it.
Follow the steps above to connect the remote host with Nano KVM. After logging into the system via the browser, click the disk icon and select the system to be installed to achieve ISO mounting.
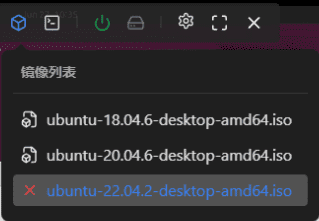
Next, start the installation process by clicking Power On, then quickly press the F11 key on the keyboard (the key may vary depending on the host, please refer to the host's documentation). Select the corresponding image to boot and complete the installation process.

Note:
- The virtual USB drive function is enabled by default. If not needed, it can be disabled by clicking
Settings->Virtual USB Drive. - Please safely eject the existing 21GB virtual USB drive on the host before mounting the image to avoid data loss.
- The virtual USB drive can also be used as a regular USB drive. When no image is selected on the web interface, the entire 21GB virtual USB drive is mounted by default.
- Users can also use the conventional method to burn the image onto a card, but this is not recommended.
- The speed of copying images into NanoKVM is limited by the USB 2.0 transfer speed and SG2002 card writing speed, which may be relatively slow. Users can remove the TF card, insert it into a computer, and unhide the third partition of the TF card to directly copy the image into it.
- The virtual USB drive is also mounted to the NanoKVM’s
/datadirectory, allowing users to read and write directly to that partition within the NanoKVM terminal. - Canceling the virtual USB drive operation in the settings will forcibly eject the USB drive. Please safely eject the USB drive first before making changes to avoid data loss.
Web Terminal
- Users can open the web terminal by clicking the
Terminal->NanoKVM Terminalicon in the floating toolbar, allowing direct access to the NanoKVM system without needing SSH. - When the NanoKVM disconnects and reconnects to the network or after a system restart, the web terminal interface will prompt for re-login, with the username
rootand passwordroot.

Serial Terminal
NanoKVM is built on the LicheeRV Nano platform, which has a total of three serial ports. UART0 is used by default for outputting system logs. In the NanoKVM Full version, UART1 and UART2 are also available for users to expand functionality (the first batch of beta versions only has openings on the casing).
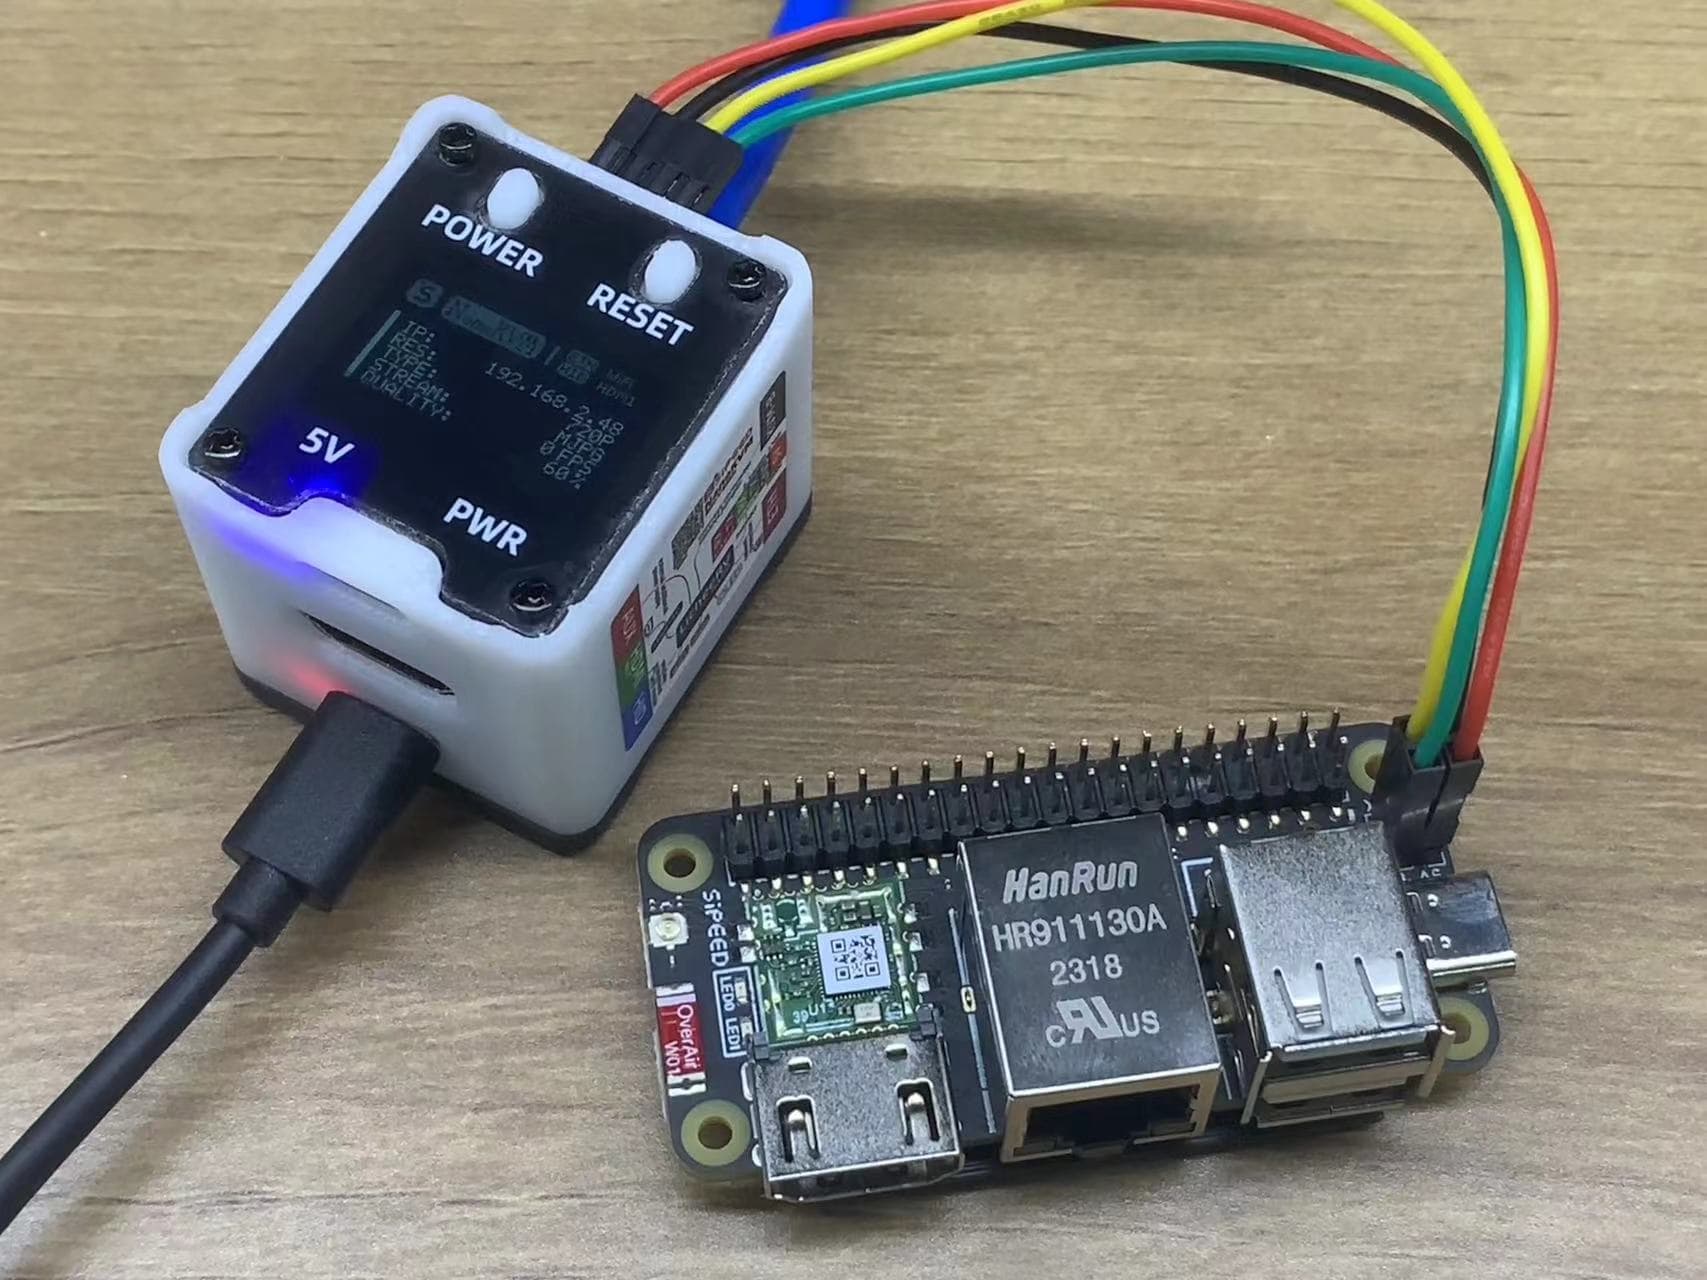
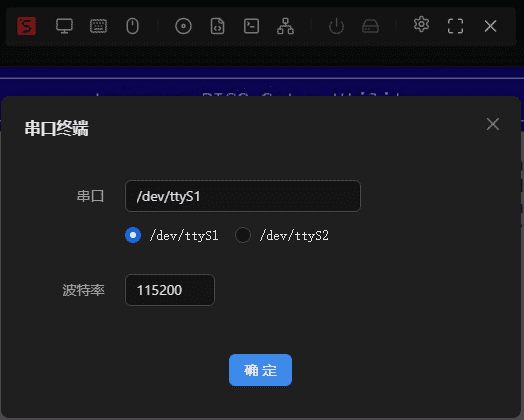
Click on Terminal in the management page, select Serial Terminal, choose the serial port you want to use, enter the baud rate, and click Start to begin using it.
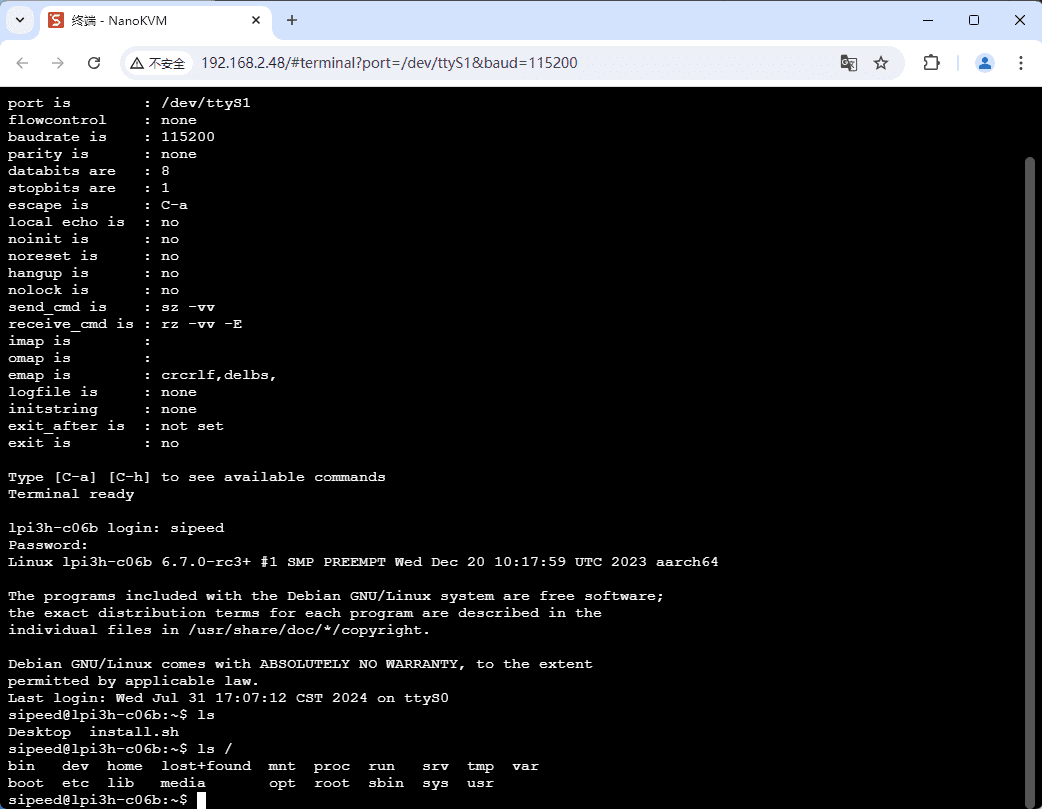
Note: The serial terminal function is built using WebSSH and picocom, and its usage is the same as that of picocom.
RNDIS
The USB of NanoKVM will default to virtualizing an RNDIS USB network card (as a device). This can be used for system maintenance when the NanoKVM service is abnormal. Please refer to here for connecting to a computer, and feel free to explore more uses.
If you do not wish to use the RNDIS function, you can click Settings -> RNDIS to disable it.
Note: The NCM connection method was added after version 2.1.5, but the default remains RNDIS. To enable it, use: touch /boot/usb.ncm or create an empty file named usb.ncm in the /boot partition.
ATX Power Control
- On the right side of the floating toolbar, there are power and hard drive icons. Under normal circumstances, they are gray; after powering on, the power icon turns green.
- Clicking the power icon shows the restart button and power button (long/short press).
- The ATX control board for the Full version is limited by the number of pins in the extension cable, only allowing for the power, restart button, and power indicator to be connected. It is normal for the hard drive light not to be illuminated.
Settings
- Switch between Chinese and English.
- About NanoKVM: Click to open the Wiki.
- Check for updates: When updates are available, users can click to update. After about 15 seconds, the webpage will automatically refresh and re-login to complete the update.
- Version 2.2.5 introduces a preview update feature. Enable this option to pull the latest preview version.
About SSH
In version 2.1.6 and later, SSH can be enabled or permanently disabled through the web interface. You can do this in Settings -> Devices -> SSH.
In version 1.4.0 and later, SSH is disabled by default.
- Permanently Disable: Execute
touch /etc/kvm/ssh_stopto disable SSH login on the next boot of NanoKVM. To enable it again, delete the file usingrm /etc/kvm/ssh_stop. - Temporarily Enable: Execute
touch /boot/start_ssh_onceor create an empty file namedstart_ssh_oncein the /boot partition. This will enable SSH on the next boot of NanoKVM, and the file will be automatically deleted.
Setting DNS
- If you need to set a DNS list, create
/boot/resolv.conf. This will enforce your own DNS configuration after booting.
About mDNS
mDNS (Multicast DNS) is a protocol used for name resolution within a local network, allowing devices to discover and communicate with each other using hostnames instead of IP addresses, without needing a central DNS server.
NanoKVM generates mDNS hostnames based on the device code to minimize conflicts when multiple devices are present.
The device name for NanoKVM can be modified in the settings and will take effect after a restart.
mDNS services can lead to higher CPU usage in complex network environments, affecting image smoothness. It is recommended to disable it when not in use: Settings -> Devices -> mDNS.
About the Watchdog
- The watchdog system was added in version 2.2.2 to continuously monitor the server service. If the service encounters an exception, the system will restart. By default, it is disabled. You can enable it by executing
touch /etc/kvm/watchdogin the web terminal and disable it withrm /etc/kvm/watchdog.
More Features Coming Soon!
Hardware and Structure
The NanoKVM-PCIe consists of two parts: the mainboard and the USB interface board, connected via a 2P+4P ribbon cable. The USB interface board only exposes the USB-HID and USB-PWR interfaces. When the USB-HID needs to connect to the internal pins of the mainboard, the 4P ribbon cable can be disconnected.
The PCIe full-height bracket is secured to the mainboard with two screws. To replace it with a half-height bracket, please unscrew the screws and replace it.
Due to the positioning of interfaces in PCIe specifications, the HDMI and lower USB ports are relatively close together. Some HDMI connectors may be thick and could interfere with the USB interface. Please use the HDMI cable provided in the packaging to connect.


 English
 Translate