

 English
Burn images
Update history
| Date | Version | Author | Update content |
|---|---|---|---|
| 2023-12-08 | v1.0 | ztd |
|
Preparation
Get the Image
Refer to the previous sectionimages, and download the desired image.
Get the Flashing Tool
The commonly used tools for flashing images to an SD card are balenaEtcher, Rufus, etc. Here, we'll use balenaEtcher as an example. First, go to the balenaEtcher official website to download and install the software.
For Linux, you can also use the dd command to write the image directly.
Flashing the Linux Image to SD cards
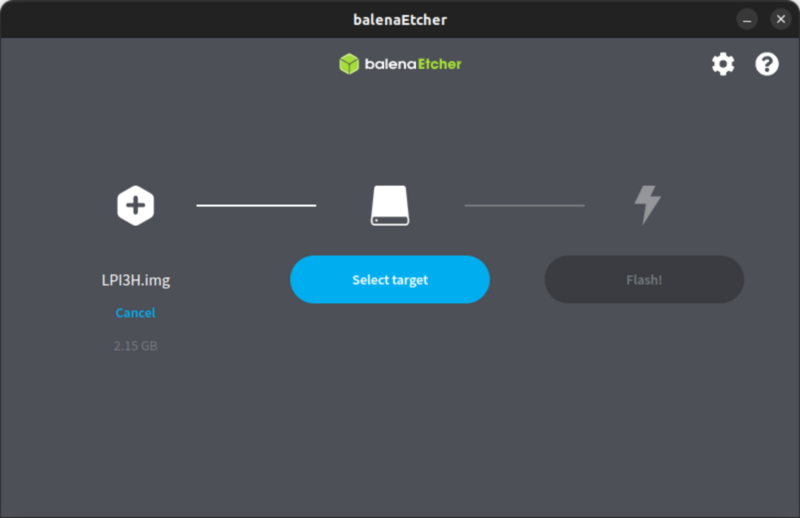
After preparing the image to be flashed, open balenaEtcher. First, select the image file you want to flash:
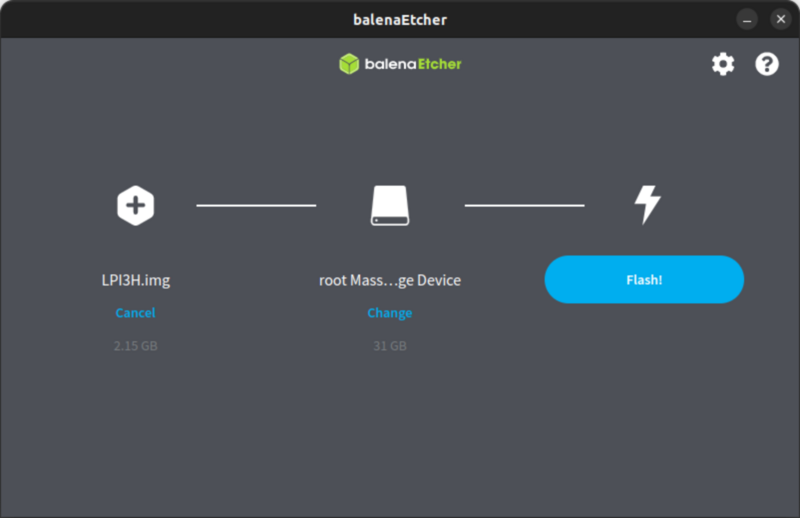
Then, select the target device:
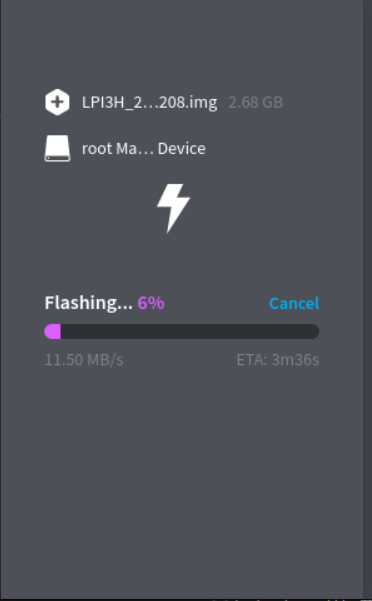
Finally, click on "Flash" and wait for the flashing process to complete. Once it's done, you'll have an SD card with the bootable image:
The steps for Windows and Linux are similar.
Flashing the Linux image to EMMC
Note that you need to use the image version 20240106 and above
First prepare a boot TF card, login to the system, and then use SCP or other tools to copy the EMMC image file to the system running on the TF card , and then use the dd command to write the image file to EMMC:
# Assuming the image file is copied to /opt/ directory
dd if=/opt/your_image_file of=/dev/mmcblk1
sync
When the burning is finished, unplug the SD card and you can enter the system from the EMMC.
If you want to boot with EMMC and use SD card for expansion, you need to make sure that the SD card is formatted and does not contain a boot image, otherwise it may be changed to SD card boot due to priority issues.
Flashing the Android image to SD card
Note: Android images cannot be flashed using balenaEtcher. Please use PhoenixCard to flash the image before it can be booted.
First, download the PhoenixCard tool from the cloud storage. Once downloaded, open the tool and select the second option: 启动卡. Then click the 烧卡 button to burn the Android image to the TF card, and it will be ready for use.

Flashing the Android image to EMMC
Open PhoenixCard and select the first option: 量产卡. Then click the 烧卡 button to burn the Android image to the TF card, and then insert the TF card into the board. Power on the board, and the Android image will be automatically flashed to the eMMC. After the flashing process is complete, remove the TF card, and the Android image in the eMMC will be ready for use.

