

 English
Typical Application
Update history
| Date | Version | Author | Update content |
|---|---|---|---|
| 2023-09-12 | v1.2 | ztd |
|
| 2023-07-21 | v1.1 | ztd |
|
| 2023-05-08 | v1.0 | wonder |
|
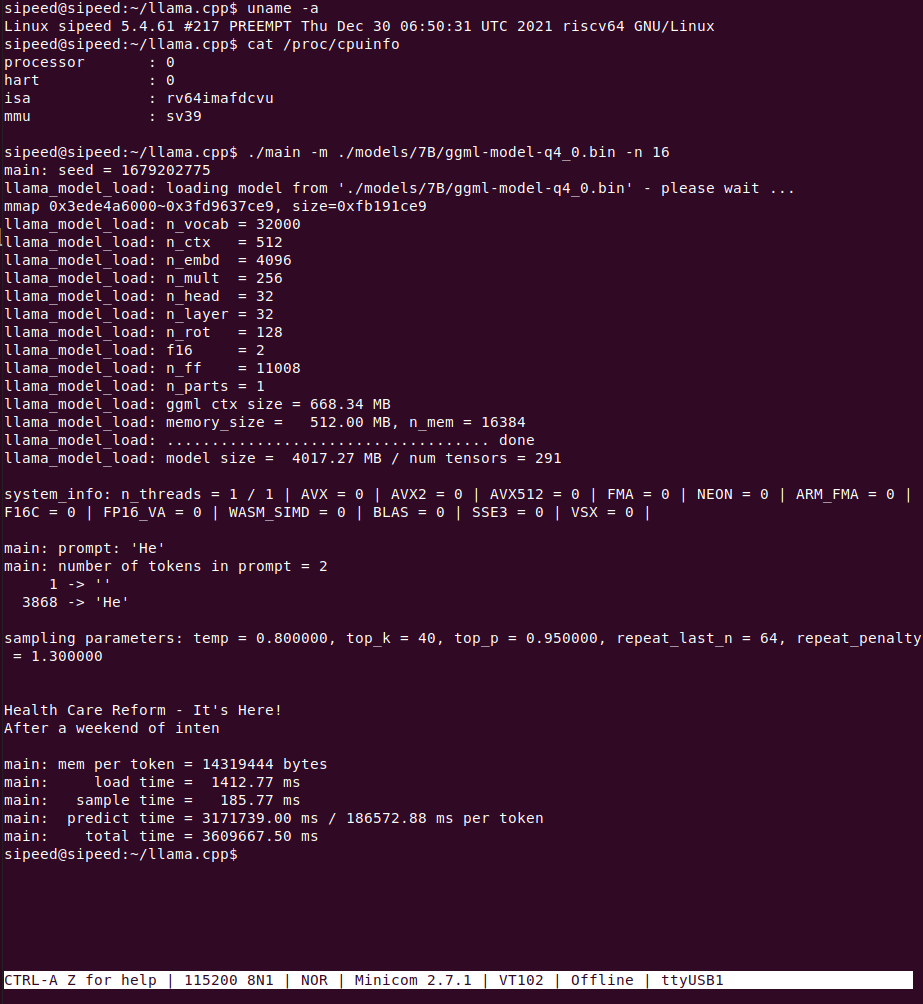
llama.cpp
llama is the META Open Source Large Language Model, and llama.cpp is the ggerganov Open Source pure cpp runtime llama inference project.
Thanks to llama.cpp, an excellent project, we can run LLM on LicheePi 4A.
Zepan slightly modified llama.cpp https://github.com/Zepan/llama.cpp earlier to allow it to run the 7B model with less memory (down to about 700MB).
You can see that TH1520 takes about 6s to compute a token (without V-extension acceleration, which is expected to accelerate it by a factor of 4-8, so feel free to pitch in if you've added V-extension support!)

The feasibility of running the 7B model on an entry-level C906 core was also briefly tested, and due to the small amount of memory in the D1 and the use of mmap read-only extensions, a large number of low-speed IO operations were introduced, which slowed down the speed of the run, ending up at only 18s/token.
YOLOX Target Detection
This tutorial is an example of how to deploy the YOLOX model to accomplish target detection on the LPi4A (LicheePi 4A) development board platform(CPU inference).
Included in the tutorial:
- Installing the Python environment on the LPi4A development board
- Executing the model using the source code from the YOLOX project.
The tutorial follows the usual model deployment process:
- Basic Python environment configuration on LPi4A. 2.
- Obtaining the yolox source code and models
- Installing python packages that yolox depends on
- Example execution using HHB-onnxruntime on LPi4A
Basic Python Environment Configuration
Basic Hardware and Software Configuration
Refer to the description in LPi4A's "Out-of-the-box experience", install the development board correctly, and enter with root privileges after powering on and booting up.
Ensure that you are connected to the Internet, and update the apt source.
sudo apt update
Install some software for subsequent use in the example
sudo apt install wget git vim
Installing the SHL Library
wget https://github.com/T-head-Semi/csi-nn2/releases/download/v2.4-beta.1/c920.tar.gz
tar xf c920.tar.gz
cp c920/lib/* /usr/lib/riscv64-linux-gnu/ -rf
Python Environment Configuration
Python version 3.11 is installed by default on the system where LPi4A is burned. You can confirm this with the following command
python --version
We will use python 3.11 as an example, but for other versions, you will need to change to the corresponding version of the command when installing dependencies.
Most of the packages that the various python programs depend on can be installed via pip, which can be installed with the following command
apt install python3-pip
Before installing other python packages, install the venv package, which is used to create a python virtual environment
apt install python3.11-venv
Create a python virtual environment and activate it
cd /root
python3 -m venv ort
source /root/ort/bin/activate
At this point, the basic python environment has been created. Similar to other architectures, you can install pure python packages directly via pip install.
The opencv installation will depend on other python packages, so if pip does not download them automatically, you can install the dependencies manually first. See download riscv whl for more information on how to get the packages.
Get YOLOX
YOLOX is a YOLO-like target detection model with quite excellent performance.
The source code and model can be downloaded directly from github
git clone https://github.com/Megvii-BaseDetection/YOLOX.git
cd YOLOX/demo/ONNXRuntime
wget https://github.com/Megvii-BaseDetection/YOLOX/releases/download/0.1.1rc0/yolox_s.onnx
Modify the source code
This tutorial will use the HHB-onnxruntime execution model, so switch to. In the onnxruntime example directory in the source code, modify the beginning of the file demo/ONNXRuntime/onnx_inference.py to add two new lines of code
#!/usr/bin/env python3
# Copyright (c) Megvii, Inc. and its affiliates.

+import sys
+sys.path.insert(0, "../../")
+
import argparse
import os
The code uses sys.path.insert to specify the search path, thus eliminating the need to install the YOLOX installer from the source code.
**Installing dependencies
The python ecosystem for the RISC-V architecture is still lacking, but in the future, packages dependent on YOLOX can be installed directly from the requirements.txt file. requirements.txt) file.
The YOLOX example in this tutorial relies on a large number of python packages, download the pre-compiled python packages
git clone -b python3.11 https://github.com/zhangwm-pt/prebuilt_whl.git
cd prebuilt_whl
It can be handled manually in the following order.
pip install numpy-1.25.0-cp311-cp311-linux_riscv64.whl
pip install opencv_python-4.5.4+4cd224d-cp311-cp311-linux_riscv64.whl
pip install kiwisolver-1.4.4-cp311-cp311-linux_riscv64.whl
pip install Pillow-9.5.0-cp311-cp311-linux_riscv64.whl
pip install matplotlib-3.7.2.dev0+gb3bd929cf0.d20230630-cp311-cp311-linux_riscv64.whl
pip install pycocotools-2.0.6-cp311-cp311-linux_riscv64.whl
pip3 install loguru-0.7.0-py3-none-any.whl
pip3 install torch-2.0.0a0+gitc263bd4-cp311-cp311-linux_riscv64.whl
pip3 install MarkupSafe-2.1.3-cp311-cp311-linux_riscv64.whl
pip3 install torchvision-0.15.1a0-cp311-cp311-linux_riscv64.whl
pip3 install psutil-5.9.5-cp311-abi3-linux_riscv64.whl
pip3 install tqdm-4.65.0-py3-none-any.whl
pip3 install tabulate-0.9.0-py3-none-any.whl
The installation process will involve other pure python dependencies, which pip will automatically download from the official sources.
Installation of HHB-onnxruntime
HHB-onnxuruntime is a port of the SHL backend (execution providers) that allows onnxruntime to reuse the high-performance optimized code in SHL for the Gentei CPU.
wget https://github.com/zhangwm-pt/onnxruntime/releases/download/riscv_whl/onnxruntime-1.14.1-cp311-cp311-linux_riscv64.whl
pip install onnxruntime-1.14.1-cp311-cp311-linux_riscv64.whl
Execute
Execute the onnx_inference.py example in the example directory
python3 onnx_inference.py -m yolox_s.onnx -i soccer.jpg -o outdir -s 0.3 --input_shape 640,640
python3 onnx_inference.py -m yolox_s.onnx -i soccer.jpg -o outdir -s 0.3 --input_shape640,640
Parameter Description:
-m: specify model
-i: specify image
-o: specify output directory
--s: specify the detection threshold
--input_shape: specify the size of the image to be used for detection
Reference results
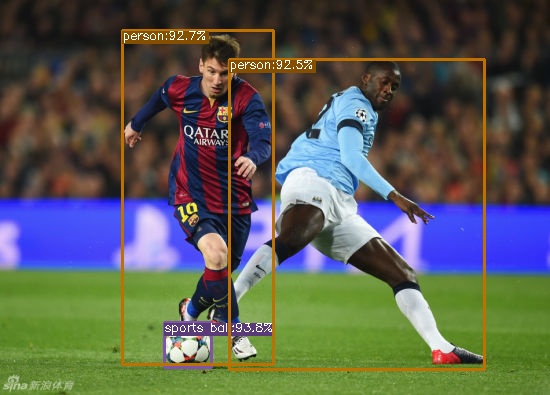
The input for this tutorial is the following image, which is an image of an athlete playing soccer, and the expected detection result is to detect two people and a soccer ball.
Image from the web

After the example executes normally, the result image soccer.jpg will be generated in the outdir directory. the image will draw the detected target with a box and labeled with the probability, and the effect is as shown in the following figure:
MobilenetV2
This tutorial is an example of how to deploy the mobilenetv2 model for image classification on the LicheePi4A platform.
The tutorial includes:
- Compiling the onnx model into a binary available on LicheePi4A using HHB
- Preprocessing the mobilenetv2 model using opencv c++ version on LicheePi4A
- Differences between using CPU and NPU on LicheePi4A
NPU
Setup
After setting up the NPU environment according to the peripheral documentation, we can go to the Docker image of HHB environment.
First, we need to get the model of this tutorial, which is downloaded to the example directory /home/example/th1520_npu/onnx_mobilenetv2_c++: mobilenetv2-12.onnx
To get the libraries for the optimized version of opencv used in this tutorial, go to github and download them to the directory /home/example/th1520_npu/.
cd /home/example/th1520_npu/
git clone https://github.com/zhangwm-pt/prebuilt_opencv.git
Compile
HHB Compiling Model:
To cross-compile the ONNX model into an executable program on the NPU, you need to use the hhb command. Note that the NPU only supports 8-bit or 16-bit fixed point operations, which in this case are int8 asymmetric quantization. To compile, you need to go to the directory /home/example/th1520_npu/onnx_mobilenetv2_c++:
cd /home/example/th1520_npu/onnx_mobilenetv2_c++
hhb -D --model-file mobilenetv2-12.onnx --data-scale 0.017 --data-mean "124 117 104"  --board th1520  --postprocess save_and_top5 --input-name "input" --output-name "output" --input-shape "1 3 224 224" --calibrate-dataset persian_cat.jpg  --quantization-scheme "int8_asym"
The options are:
- -D: Specifies that the HHB process will run until the executable is generated
- --model-file: Specifies the mobilenet model that has been downloaded in the current directory
- --data-mean: Specifies the mean value
- --data-scale: Specifies the scale value
- --board: Specifies that the target platform is th1520
- --input-name: The input name of the model
- --output-name: The output name of the model
- --input-shape: The input size of the model
- --postprocess: Saves the output results and prints the top5 results
- --calibrate-dataset: Specifies the calibration images required for quantization
- --quantization-scheme: Specifies the quantization scheme as int8 asymmetric
After the command is executed, the hhb_out subdirectory will be generated in the current directory, which includes hhb_runtime, model.c and other files:
- hhb. bm: The HHB model file, including the quantized weight data and other information
- hhb_runtime: The executable on the th1520 platform, compiled from the c file in the directory
- main. c: A temporary file, the reference entry of the sample program
- model. c: A temporary file, the model structure file, related to the model structure
- model.params: A temporary file, the weight values
- io. c: A temporary file, the auxiliary functions for reading and writing files
- io. h: A temporary file, the auxiliary functions for reading and writing files declaration
- process. c: A temporary file, the image preprocessing function
- process. h: A temporary file, the image preprocessing function declaration
For more detailed HHB options, refer to the command line options in the HHBUserManual.
g++ Compiling
riscv64-unknown-linux-gnu-g++ main.cpp -I../prebuilt_opencv/include/opencv4 -L../prebuilt_opencv/lib -lopencv_imgproc -lopencv_imgcodecs -L../prebuilt_opencv/lib/opencv4/3rdparty/ -llibjpeg-turbo -llibwebp -llibpng -llibtiff -llibopenjp2 -lopencv_core -ldl -lpthread -lrt -lzlib -lcsi_cv -latomic -static -o mobilenetv2_example
The mobilenetv2_example file is generated in the example directory after the compilation command is executed correctly.
Execute
After the cross-compilation is complete, you can copy the files needed for program execution to the directory of the development board. The scp command can be used:
scp -r ../onnx_mobilenetv2_c++ sipeed@your_ip:~
First confirm whether the driver in the development board is loaded:
lsmod
If there are 'img_mem', 'vha' and 'vha_info' in the output of the three modules, the NPU driver is loaded successfully.
Refer to YOLOX Install and configure the python virtual environment:
sudo apt update
sudo apt install wget git vim

wget https://github.com/T-head-Semi/csi-nn2/releases/download/v2.4-beta.1/c920.tar.gz
tar xf c920.tar.gz
cp c920/lib/* /usr/lib/riscv64-linux-gnu/ -rf

sudo apt install python3-pip
sudo apt install python3.11-venv

cd /root
python3 -m venv ort
source /root/ort/bin/activate

git clone -b python3.11 https://github.com/zhangwm-pt/prebuilt_whl.git
cd prebuilt_whl

pip install numpy-1.25.0-cp311-cp311-linux_riscv64.whl
pip install opencv_python-4.5.4+4cd224d-cp311-cp311-linux_riscv64.whl
pip install kiwisolver-1.4.4-cp311-cp311-linux_riscv64.whl
pip install Pillow-9.5.0-cp311-cp311-linux_riscv64.whl
pip install matplotlib-3.7.2.dev0+gb3bd929cf0.d20230630-cp311-cp311-linux_riscv64.whl
pip install pycocotools-2.0.6-cp311-cp311-linux_riscv64.whl
pip3 install loguru-0.7.0-py3-none-any.whl
pip3 install torch-2.0.0a0+gitc263bd4-cp311-cp311-linux_riscv64.whl
pip3 install MarkupSafe-2.1.3-cp311-cp311-linux_riscv64.whl
pip3 install torchvision-0.15.1a0-cp311-cp311-linux_riscv64.whl
pip3 install psutil-5.9.5-cp311-abi3-linux_riscv64.whl
pip3 install tqdm-4.65.0-py3-none-any.whl
pip3 install tabulate-0.9.0-py3-none-any.whl
Run the just-compiled example in the appropriate directory on the development board:
./mobilenetv2_example
After the execution, the terminal will prompt the stages of the execution:
- Preprocessing
- Model execution
- Post-processing
The files used in the execution of mobilenetv2_example are:
- persian_cat.jpg: the input image
- input_img.bin: the intermediate results generated by the input image during the preprocessing stage
- hhb_out/hhb_runtime: the file used in the model execution stage, generated by HHB on the x86 host
- hhb_out/hhb. bm: the file used in the model execution stage, generated by HHB on the x86 host
- input_img.bin_output0_1_1000.txt: the output file of the model execution stage, including 1000 results of the model execution output
Results
(ort) root@lpi4a:/home/sipeed/onnx_mobilenetv2_c++# ./mobilenetv2_example
 ********** preprocess image **********
 ********** run mobilenetv2 **********
INFO: NNA clock:792000 [kHz]
INFO: Heap :ocm (0x18)
INFO: Heap :anonymous (0x2)
INFO: Heap :dmabuf (0x2)
INFO: Heap :unified (0x5)
Run graph execution time: 7.87149ms, FPS=127.04

=== tensor info ===
shape: 1 3 224 224
data pointer: 0x857ca0

=== tensor info ===
shape: 1 1000
data pointer: 0x3fc9abe000
The max_value of output: 16.053827
The min_value of output: -8.026914
The mean_value of output: -0.001889
The std_value of output: 9.203342
 ============ top5: ===========
283: 16.053827
281: 14.165141
287: 11.709850
285: 11.615416
282: 11.332113
 ********** postprocess result **********
 ********** probability top5: **********
n02123394 Persian cat
n02123045 tabby, tabby cat
n02127052 lynx, catamount
n02124075 Egyptian cat
n02123159 tiger cat
CPU
Replace the HHB compile command in the NPU step above with:
hhb -D --model-file mobilenetv2-12.onnx --data-scale 0.017 --data-mean "124 117 104" --board c920 --postprocess save_and_top5 --input-name "input" --output-name "output" --input-shape "1 3 224 224"
g++ compilation command replaced with:
riscv64-unknown-linux-gnu-g++ main.cpp -I../prebuilt_opencv/include/opencv4 -L../prebuilt_opencv/lib -lopencv_imgproc -lopencv_imgcodecs -L../prebuilt_opencv/lib/opencv4/3rdparty/ -llibjpeg-turbo -llibwebp -llibpng -llibtiff -llibopenjp2 -lopencv_core -ldl -lpthread -lrt -lzlib -lcsi_cv -latomic -static -o mobilenetv2_example
Then send the compiled binary file to the development board to run. The reference results are as follows:
(ort) root@lpi4a:/home/sipeed/onnx_mobilenetv2_c++# ./mobilenetv2_example
 ********** preprocess image **********
 ********** run mobilenetv2 **********
Run graph execution time: 79.77252ms, FPS=12.54

=== tensor info ===
shape: 1 3 224 224
data pointer: 0x259240

=== tensor info ===
shape: 1 1000
data pointer: 0x1c5200
The max_value of output: 16.843750
The min_value of output: -7.414062
The mean_value of output: 0.001131
The std_value of output: 9.056762
 ============ top5: ===========
283: 16.843750
281: 13.789062
287: 12.257812
282: 10.898438
285: 10.765625
 ********** postprocess result **********
 ********** probability top5: **********
n02123394 Persian cat
n02123045 tabby, tabby cat
n02127052 lynx, catamount
n02123159 tiger cat
n02124075 Egyptian cat
Yolov5n
NPU
Setup
Refer to PeripheralAfter the NPU usage environment is set up, the document enters the Docker image of the HHB environment.
First get the model for this tutorial and download it to the sample directory /home/example/th1520_npu/yolov5n :
git clone https://github.com/ultralytics/yolov5.git
cd yolov5
pip3 install ultralytics
python3 export.py --weights yolov5n.pt --include onnx
Compile
HHB Compile
To cross-compile the ONNX model into an executable program on the NPU, you need to use the hhb command. Note that only 8-bit or 16-bit fixed-point operations are supported on the NPU, which is defined as int8 asymmetric quantization in this example. When compiling, you need to go to the directory where the sample is stored /home/example/th1520_npu/yolov5n:
cd /home/example/th1520_npu/yolov5n
hhb -D --model-file yolov5n.onnx --data-scale-div 255 --board th1520 --input-name "images" --output-name "/model.24/m.0/Conv_output_0;/model.24/m.1/Conv_output_0;/model.24/m.2/Conv_output_0" --input-shape "1 3 384 640" --calibrate-dataset kite.jpg  --quantization-scheme "int8_asym"
Option description:
- -D: specify the HHB process to generate the executable file until the end
- --model-file: specify the yolov5 model that has been downloaded in the current directory
- --data-mean: specify the mean value
- --data-scale: specify the scale value
- --board: specify the target platform as th1520
- --input-name: the input name of the model
- --output-name: the output name of the model
- --input-shape: the input size of the model
- --postprocess: save the output results and print the top5 results
- --calibrate-dataset: specify the calibration images required for quantization
- --quantization-scheme: specify the quantization scheme as int8 asymmetric
After the command is executed, the hhb_out subdirectory will be generated in the current directory, which includes hhb_runtime, model. c and other files:
- hhb. bm: HHB model file, including the weight data after quantization
- hhb_runtime: the executable file on the th1520 platform, compiled from the c file in the directory
- main. c: temporary file, the reference entry of the sample program
- model. c: temporary file, model structure file, related to the model structure
- model. params: temporary file, weight value
- io. c: temporary file, auxiliary functions for reading and writing files
- io. h: temporary file, auxiliary function declaration for reading and writing files
- process. c: temporary file, image preprocessing function
- process. h: temporary file, image preprocessing function declaration
For more detailed HHB options, refer to the command line options in the HHBUserManual.
g++ compile
riscv64-unknown-linux-gnu-gcc yolov5n.c -o yolov5n_example hhb_out/io.c hhb_out/model.c -Wl,--gc-sections -O2 -g -mabi=lp64d -I hhb_out/ -L /usr/local/lib/python3.8/dist-packages/hhb/install_nn2/th1520/lib/ -lshl -L /usr/local/lib/python3.8/dist-packages/hhb/prebuilt/decode/install/lib/rv -L /usr/local/lib/python3.8/dist-packages/hhb/prebuilt/runtime/riscv_linux -lprebuilt_runtime -ljpeg -lpng -lz -lstdc++ -lm -I /usr/local/lib/python3.8/dist-packages/hhb/install_nn2/th1520/include/ -mabi=lp64d -march=rv64gcv0p7_zfh_xtheadc -Wl,-unresolved-symbols=ignore-in-shared-libs
The yolov5n_example file is generated in the example directory after the compilation command is executed correctly.
Excute
After the cross-compilation is complete, you can copy the files needed for program execution to the directory of the development board. The scp command can be used:
scp -r ../yolov5n sipeed@your_ip:~
First confirm whether the driver in the development board is loaded:
lsmod
If there are 'img_mem', 'vha' and 'vha_info' in the output of the three modules, the NPU driver is loaded successfully.
Refer to [YOLOX](https://wiki.sipeed.com/hardware/en/lichee/th1520/lpi4a/8_application.html#YOLOX-Target-Detection) Install and configure the python virtual environment:
```shell
sudo apt update
sudo apt install wget git vim

wget https://github.com/T-head-Semi/csi-nn2/releases/download/v2.4-beta.1/c920.tar.gz
tar xf c920.tar.gz
cp c920/lib/* /usr/lib/riscv64-linux-gnu/ -rf

sudo apt install python3-pip
sudo apt install python3.11-venv

cd /root
python3 -m venv ort
source /root/ort/bin/activate

git clone -b python3.11 https://github.com/zhangwm-pt/prebuilt_whl.git
cd prebuilt_whl

pip install numpy-1.25.0-cp311-cp311-linux_riscv64.whl
pip install opencv_python-4.5.4+4cd224d-cp311-cp311-linux_riscv64.whl
pip install kiwisolver-1.4.4-cp311-cp311-linux_riscv64.whl
pip install Pillow-9.5.0-cp311-cp311-linux_riscv64.whl
pip install matplotlib-3.7.2.dev0+gb3bd929cf0.d20230630-cp311-cp311-linux_riscv64.whl
pip install pycocotools-2.0.6-cp311-cp311-linux_riscv64.whl
pip3 install loguru-0.7.0-py3-none-any.whl
pip3 install torch-2.0.0a0+gitc263bd4-cp311-cp311-linux_riscv64.whl
pip3 install MarkupSafe-2.1.3-cp311-cp311-linux_riscv64.whl
pip3 install torchvision-0.15.1a0-cp311-cp311-linux_riscv64.whl
pip3 install psutil-5.9.5-cp311-abi3-linux_riscv64.whl
pip3 install tqdm-4.65.0-py3-none-any.whl
pip3 install tabulate-0.9.0-py3-none-any.whl
Run the just-compiled example in the appropriate directory on the development board:
python3 inference.py
After the execution, the terminal will prompt the stages of the execution:
- Preprocessing: fill and scale the original image to 384 * 640
- Model execution and post-processing: perform model inference and do post-processing such as nms
- Frame: draw the detection results on the 384 * 640 size graph and output the new image
Files used in the execution of inference.py:
- kite.jpg: the input image
- image_preprocessed.bin: the intermediate results generated from the input image in the preprocessing stage
- yolov5n_example: the file used in the model execution stage, compiled by gcc on an x86 host
- hhb_out/hhb.bm: the file used in the model execution stage, generated by HHB on an x86 host
- detect.txt: the output file of the post-processing stage, including the four targets detected in the image
- kite_result.jpg: the output image, which adds the detection frame to the results of the input graph
Results
(ort) root@lpi4a:/home/sipeed/yolov5n_npu# python3 inference.py
********** preprocess image **********
******* run yolov5 and postprocess *******
INFO: NNA clock:792000 [kHz]
INFO: Heap :ocm (0x18)
INFO: Heap :anonymous (0x2)
INFO: Heap :dmabuf (0x2)
INFO: Heap :unified (0x5)
Run graph execution time: 5.36258ms, FPS=186.48
detect num: 4
id: label score x1 y1 x2 y2
[0]: 0 0.895277 273.492188 161.245056 359.559814 330.644257
[1]: 0 0.887368 79.860062 179.181244 190.755692 354.304474
[2]: 0 0.815214 222.054550 224.477600 279.828979 333.717285
[3]: 33 0.563324 67.625580 173.948883 201.687988 219.065765
********** draw bbox **********
[273.492188, 161.245056, 359.559814, 330.644257, 0.895277, 0]
[79.860062, 179.181244, 190.755692, 354.304474, 0.887368, 0]
[222.05455, 224.4776, 279.828979, 333.717285, 0.815214, 0]
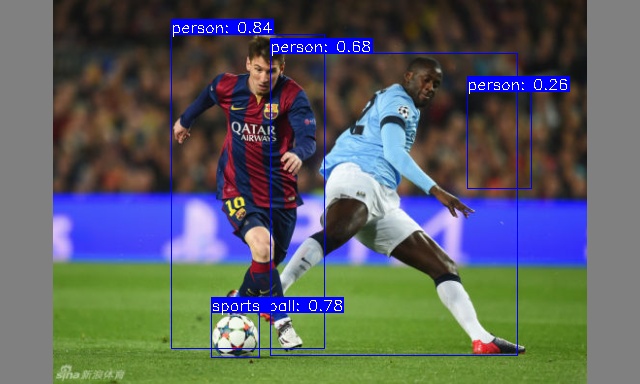
[67.62558, 173.948883, 201.687988, 219.065765, 0.563324, 33]
The sample image is from the web.
CPU
Replace the HHB compile command in the NPU step above with:
hhb -D --model-file yolov5n.onnx --data-scale-div 255 --board c920 --input-name "images" --output-name "/model.24/m.0/Conv_output_0;/model.24/m.1/Conv_output_0;/model.24/m.2/Conv_output_0" --input-shape "1 3 384 640"
gcc compile command replaced with:
riscv64-unknown-linux-gnu-gcc yolov5n.c -static -o yolov5n_example hhb_out/io.c hhb_out/model.c -Wl,--gc-sections -O2 -g -mabi=lp64d -I hhb_out/ -L /usr/local/lib/python3.8/dist-packages/hhb/install_nn2/c920/lib/ -lshl -static -L /usr/local/lib/python3.8/dist-packages/hhb/prebuilt/decode/install/lib/rv -L /usr/local/lib/python3.8/dist-packages/hhb/prebuilt/runtime/riscv_linux -lprebuilt_runtime -ljpeg -lpng -lz -lstdc++ -lm -I /usr/local/lib/python3.8/dist-packages/hhb/install_nn2/c920/include/ -mabi=lp64d -march=rv64gcv0p7_zfh_xtheadc
Then send the compiled binary file to the development board to run. The reference results are as follows:
(ort) root@lpi4a:/home/sipeed/yolov5n_cpu# python3 inference.py
 ********** preprocess image **********
 ******* run yolov5 and postprocess *******
Run graph execution time: 387.34067ms, FPS=2.58
detect num: 4
id:     label   score           x1              y1              x2              y2
[0]:    0       0.901887        274.524475      158.559036      359.169312      332.431702
[1]:    0       0.879545        80.073883       184.767792      190.130157      349.906281
[2]:    0       0.845192        219.378418      221.662415      283.860413      333.798584
[3]:    33      0.666908        67.099136       174.128189      202.971451      220.213608
 ********** draw bbox **********
[274.524475, 158.559036, 359.169312, 332.431702, 0.901887, 0]
[80.073883, 184.767792, 190.130157, 349.906281, 0.879545, 0]
[219.378418, 221.662415, 283.860413, 333.798584, 0.845192, 0]
[67.099136, 174.128189, 202.971451, 220.213608, 0.666908, 33]
Yolov5s
Referring to the compilation steps for yolov5n, simply replace the yolov5n. onnx file with yolov5s. onnx and change the arguments yolov5n. onnx to yolov5s. onnx in the HHB and GCC compilation commands.
Setup
On an x86 host, after setting up the NPU usage environment according to the peripheral documentation, go into the Docker image of the HHB environment.
On the 1520, configure the python virtual environment refer to YOLOX.
CPU
Compile
HBB Compile
hhb -D --model-file yolov5s.onnx --data-scale-div 255 --board c920 --input-name "images" --output-name "/model.24/m.0/Conv_output_0;/model.24/m.1/Conv_output_0;/model.24/m.2/Conv_output_0" --input-shape "1 3 384 640"
In the HHB command, extract up to the last convolution layer. The post-processing after the convolution layers is handled by the yolov5s.c file. The yolov5s.c file can refer to the yolov5n.c file under the yolov5n example.
GCC Compile
riscv64-unknown-linux-gnu-gcc yolov5s.c -static -o yolov5s_example hhb_out/io.c hhb_out/model.c -Wl,--gc-sections -O2 -g -mabi=lp64d -I hhb_out/ -L /usr/local/lib/python3.8/dist-packages/hhb/install_nn2/c920/lib/ -lshl -static -L /usr/local/lib/python3.8/dist-packages/hhb/prebuilt/decode/install/lib/rv -L /usr/local/lib/python3.8/dist-packages/hhb/prebuilt/runtime/riscv_linux -lprebuilt_runtime -ljpeg -lpng -lz -lstdc++ -lm -I /usr/local/lib/python3.8/dist-packages/hhb/install_nn2/c920/include/ -mabi=lp64d -march=rv64gcv0p7_zfh_xtheadc
Results
(ort) root@lpi4a:/home/sipeed/yolov5s# python3 inference.py
 ********** preprocess image **********
 ******* run yolov5 and postprocess *******
Run graph execution time: 821.20135ms, FPS=1.22
detect num: 4
id:     label   score           x1              y1              x2              y2
[0]:    0       0.932165        275.538910      159.163147      359.211151      329.072205
[1]:    0       0.888989        219.883255      222.074265      285.310486      334.005676
[2]:    0       0.840487        85.319901       184.137268      186.844284      346.103210
[3]:    33      0.783095        70.033737       176.102921      202.740250      218.405075
 ********** draw bbox **********
[275.53891, 159.163147, 359.211151, 329.072205, 0.932165, 0]
[219.883255, 222.074265, 285.310486, 334.005676, 0.888989, 0]
[85.319901, 184.137268, 186.844284, 346.10321, 0.840487, 0]
[70.033737, 176.102921, 202.74025, 218.405075, 0.783095, 33]
NPU
Compile
Refer to yolov5n.
HHB Compile
hhb -D --model-file yolov5s.onnx --data-scale-div 255 --board th1520 --input-name "images" --output-name "/model.24/m.0/Conv_output_0;/model.24/m.1/Conv_output_0;/model.24/m.2/Conv_output_0" --input-shape "1 3 384 640" --calibrate-dataset kite.jpg --quantization-scheme "int8_asym"
GCC Compile
In the HHB command, extract up to the last convolution layer. The post-processing after the convolution layers is handled by the yolov5s.c file. The yolov5s.c file can refer to the yolov5n.c file under the yolov5n example.
riscv64-unknown-linux-gnu-gcc yolov5s.c -o yolov5s_example hhb_out/io.c hhb_out/model.c -Wl,--gc-sections -O2 -g -mabi=lp64d -I hhb_out/ -L /usr/local/lib/python3.8/dist-packages/hhb/install_nn2/th1520/lib/ -lshl -L /usr/local/lib/python3.8/dist-packages/hhb/prebuilt/decode/install/lib/rv -L /usr/local/lib/python3.8/dist-packages/hhb/prebuilt/runtime/riscv_linux -lprebuilt_runtime -ljpeg -lpng -lz -lstdc++ -lm -I /usr/local/lib/python3.8/dist-packages/hhb/install_nn2/th1520/include/ -mabi=lp64d -march=rv64gcv0p7_zfh_xtheadc -Wl,-unresolved-symbols=ignore-in-shared-libs
Results
(ort) root@lpi4a:/home/sipeed/yolov5s_npu# python3 inference.py
 ********** preprocess image **********
 ******* run yolov5 and postprocess *******
INFO: NNA clock:792000 [kHz]
INFO: Heap :ocm (0x18)
INFO: Heap :anonymous (0x2)
INFO: Heap :dmabuf (0x2)
INFO: Heap :unified (0x5)
Run graph execution time: 9.85487ms, FPS=101.47
detect num: 4
id:     label   score           x1              y1              x2              y2
[0]:    0       0.933075        276.321838      157.925751      358.274475      329.757538
[1]:    0       0.893568        219.203781      221.895264      286.790039      334.801636
[2]:    0       0.848185        83.283234       182.688538      187.325684      346.702515
[3]:    33      0.800765        68.743454       175.539230      204.108292      218.260056
 ********** draw bbox **********
[276.321838, 157.925751, 358.274475, 329.757538, 0.933075, 0]
[219.203781, 221.895264, 286.790039, 334.801636, 0.893568, 0]
[83.283234, 182.688538, 187.325684, 346.702515, 0.848185, 0]
[68.743454, 175.53923, 204.108292, 218.260056, 0.800765, 33]
BERT
CPU
Setup
Refer to PeripheralAfter the NPU usage environment is set up, the document enters the Docker image of the HHB environment.
The model used in this tutorial is from the google bert repository and has been converted to the onnx version of the BERT model, which can be downloaded to the /home/example/c920/bert_small directory with the following command:
cd home/example/c920/bert_small
wget https://github.com/zhangwm-pt/bert/releases/download/onnx/bert_small_int32_input.onnx
Compile
HHB Compile
To cross-compile the ONNX model into an executable program on the NPU, you need to use the hhb command. Note that only 8-bit or 16-bit fixed-point operations are supported on the NPU, which is defined as int8 asymmetric quantization in this example. To compile, you need to first go to the directory where the sample is located /home/example/c920/bert_small :
cd /home/example/c920/bert_small
hhb --model-file bert_small_int32_input.onnx --input-name "input_ids;input_mask;segment_ids" --input-shape '1 384;1 384;1 384' --output-name "output_start_logits;output_end_logits" --board c920 --quantization-scheme "float16" --postprocess save_and_top5 -D --without-preprocess
The options are:
- -D: Specifies that the HHB process will run until the executable is generated
- --model-file: Specifies that the bert model has been downloaded in the current directory
- --data-mean: Specifies the mean value
- --data-scale: Specifies the scale value
- --board: Specifies that the target platform is th1520
- --input-name: The input name of the model
- --output-name: The output name of the model
- --input-shape: The input size of the model
- --postprocess: Saves the output results and prints the top 5 results
- --calibrate-dataset: Specifies the calibration images required for quantization
- --quantization-scheme: Specifies that the quantization scheme is int8 asymmetric
After the command is executed, the hhb_out subdirectory will be generated in the current directory, which includes hhb_runtime, model.c and other files:
- hhb. bm: The HHB model file, including the quantized weight data and other information
- hhb_runtime: The executable on the th1520 platform, compiled from the c file in the directory
- main. c: A temporary file, the reference entry of the sample program
- model. c: A temporary file, the model structure file, related to the model structure
- model.params: A temporary file, the weight values
- io. c: A temporary file, the auxiliary functions for reading and writing files
- io. h: A temporary file, the auxiliary functions for reading and writing files declaration
- process. c: A temporary file, the image preprocessing function
- process. h: A temporary file, the image preprocessing function declaration
For more detailed HHB options, refer to the command line options in the HHBUserManual.
After the compilation command is executed correctly, an executable file is generated in the example directory. You can copy the example directory to the development board and run it.
scp -r ../bert_small sipeed@your_ip:~
Excute
The preceding steps to execute the example program are the same as YOLOv5n, which will not be described here.
After the preceding steps are correct, you can run commands in the example directory
python3 inference.py
Results
The reference input in this example comes from the SQuAD dataset, a reading comprehension dataset consisting of questions posed by a set of Wikipedia articles, where the answer to each question is a piece of text from the corresponding reading article or question.
The input for this example is as follows. The article describes the game of a rugby game and asks the question of who participated in the game.
[Context]:  Super Bowl 50 was an American football game to determine the champion of the National Football League (NFL) for the 2015 season. The American Football Conference (AFC) champion Denver Broncos defeated the National Football Conference (NFC) champion Carolina Panthers 24–10 to earn their third Super Bowl title. The game was played on February 7, 2016, at Levi's Stadium in the San Francisco Bay Area at Santa Clara, California. As this was the 50th Super Bowl, the league emphasized the "golden anniversary" with various gold-themed initiatives, as well as temporarily suspending the tradition of naming each Super Bowl game with Roman numerals (under which the game would have been known as "Super Bowl L"), so that the logo could prominently feature the Arabic numerals 50.

[Question]:  Which NFL team represented the AFC at Super Bowl 50?
Based on the reading comprehension results, the expected output would be the Denver Broncos
(ort) root@lpi4a:/home/sipeed/bert_small_cpu# python3 inference.py
 ********** preprocess test **********
[Context]:  Super Bowl 50 was an American football game to determine the champion of the National Football League (N
FL) for the 2015 season. The American Football Conference (AFC) champion Denver Broncos defeated the National Footba
ll Conference (NFC) champion Carolina Panthers 24–10 to earn their third Super Bowl title. The game was played on Fe
bruary 7, 2016, at Levi's Stadium in the San Francisco Bay Area at Santa Clara, California. As this was the 50th Sup
er Bowl, the league emphasized the "golden anniversary" with various gold-themed initiatives, as well as temporarily
 suspending the tradition of naming each Super Bowl game with Roman numerals (under which the game would have been k
nown as "Super Bowl L"), so that the logo could prominently feature the Arabic numerals 50.
[Question]:  Which NFL team represented the AFC at Super Bowl 50?
 ******* run bert *******
Run graph execution time: 1713.15491ms, FPS=0.58

=== tensor info ===
shape: 1 384
data pointer: 0x183d60

=== tensor info ===
shape: 1 384
data pointer: 0x185380

=== tensor info ===
shape: 1 384
data pointer: 0x1869a0

=== tensor info ===
shape: 1 384
data pointer: 0x2a8610
The max_value of output: 3.826172
The min_value of output: -9.968750
The mean_value of output: -8.412353
The std_value of output: 5.128320
 ============ top5: ===========
 46: 3.826172
 57: 3.142578
 39: 1.303711
 38: 1.179688
 27: 0.624512

=== tensor info ===
shape: 1 384
data pointer: 0x2a8300
The max_value of output: 3.617188
The min_value of output: -9.625000
The mean_value of output: -7.798176
The std_value of output: 4.820137
 ============ top5: ===========
 47: 3.617188
 58: 3.482422
 32: 2.523438
 29: 1.541992
 41: 1.473633
 ********** postprocess **********
[Answer]:  Denver Broncos
Docker
First install the required packages
sudo apt-get update
sudo apt-get install docker docker-compose
Once the installation is complete, use the sudo docker info command to verify that the installation was successful:
sipeed@lpi4a:~$ sudo docker info
Client:
 Context: default
 Debug Mode: false
Server:
 Containers: 0
  Running: 0
  Paused: 0
  Stopped: 0
 Images: 0
 Server Version: 20.10.24+dfsg1
 Storage Driver: overlay2
  Backing Filesystem: extfs
  Supports d_type: true
  Native Overlay Diff: true
  userxattr: false
 Logging Driver: json-file
 Cgroup Driver: systemd
 Cgroup Version: 2
 Plugins:
  Volume: local
  Network: bridge host ipvlan macvlan null overlay
  Log: awslogs fluentd gcplogs gelf journald json-file local logentries splunk syslog
 Swarm: inactive
 Runtimes: io.containerd.runc.v2 io.containerd.runtime.v1.linux runc
 Default Runtime: runc
 Init Binary: docker-init
 containerd version: 1.6.20~ds1-1+b1
 runc version: 1.1.5+ds1-1+b1
 init version:
 Security Options:
  seccomp
Profile: default
  cgroupns
 Kernel Version: 5.10.113-gfac22a756532
 Operating System: Debian GNU/Linux 12 (bookworm)
 OSType: linux
 Architecture: riscv64
 CPUs: 4
 Total Memory: 15.47GiB
 Name: lpi4a
 ID: MCKE:SEGQ:EBUX:ZMLC:P2WK:GIJ7:XAEQ:F56H:73HK:C3L5:IA5A:7GJI
 Docker Root Dir: /var/lib/docker
 Debug Mode: false
 Registry: https://index.docker.io/v1/
 Labels:
 Experimental: false
 Insecure Registries:
  127.0.0.0/8
 Live Restore Enabled: false
If you want a normal user to have Docker execution privileges as well, you can execute the following command to do so:
sudo groupadd docker
sudo usermod -aG docker $USER
newgrp docker
These commands add a username with normal user privileges to the docker user group and activate group privileges. If you don't add them, you'll need to execute Docker-related commands with sudo privileges every time you execute them.
Next, let's pull up the hello-world image to get a taste of Docker:
sipeed@lpi4a:~$ docker pull hello-world
Using default tag: latest
latest: Pulling from library/hello-world
b102dd09f2b3: Pull complete
Digest: sha256:926fac19d22aa2d60f1a276b66a20eb765fbeea2db5dbdaafeb456ad8ce81598
Status: Downloaded newer image for hello-world:latest
docker.io/library/hello-world:latest
Next, start the container you just pulled off:
sipeed@lpi4a:~$ docker run hello-world
Hello from Docker!
This message shows that your installation appears to be working correctly.

To generate this message, Docker took the following steps:
 1. The Docker client contacted the Docker daemon.
 2. The Docker daemon pulled the "hello-world" image from the Docker Hub.
    (amd64)
 3. The Docker daemon created a new container from that image which runs the
    executable that produces the output you are currently reading.
 4. The Docker daemon streamed that output to the Docker client, which sent it
    to your terminal.

To try something more ambitious, you can run an Ubuntu container with:
 $ docker run -it ubuntu bash

Share images, automate workflows, and more with a free Docker ID:
 https://hub.docker.com/

For more examples and ideas, visit:
 https://docs.docker.com/get-started/
View information about the hello-world mirror:
sipeed@lpi4a:~$ docker images hello-world
REPOSITORY TAG IMAGE ID CREATED SIZE
hello-world latest eb6f80695a28 2 months ago 4.98kB
To experience a more complete image, go here and search for the name of the distribution you want to use and pull it.
K3s-RISCV
This chapter will show how to run the lightweight Kubernetes distribution K3s on LPi4A.
First download the precompiled K3s package:
https://github.com/CARV-ICS-FORTH/k3s/releases
Then merge the downloaded packages into a .gz file and decompress it. After completion, add execution permission to k3s:
wget https://github.com/CARV-ICS-FORTH/k3s/releases/download/20230721/k3s-riscv64.gz.aa
wget https://github.com/CARV-ICS-FORTH/k3s/releases/download/20230721/k3s-riscv64.gz.ab
wget https://github.com/CARV-ICS-FORTH/k3s/releases/download/20230721/k3s-riscv64.gz.ac
# The following commands need root user to execute
sudo -i
cat k3s-riscv64.gz.* | gunzip > /usr/local/bin/k3s
chmod +x /usr/local/bin/k3s
exit
Verify whether it can run successfully. The typical output of a successful run is as follows:
sipeed@lpi4a:~$ k3s
NAME:
    k3s-riscv64 - Kubernetes, but small and simple

USAGE:
    k3s-riscv64 [global options] command [command options] [arguments...]

VERSION:
    v1.27.3+k3s-9d376dfb-dirty (9d376dfb)

COMMANDS:
    server Run management server
    agent Run node agent
    kubectl Run kubectl
    crictl Run crictl
    ctr Run ctr
    check-config Run config check
    token Manage bootstrap tokens
    etcd-snapshot
    secrets-encrypt Control secrets encryption and keys rotation
    certificate Manage K3s certificates
    completion Install shell completion script
    help, h Shows a list of commands or help for one command

GLOBAL OPTIONS:
    --debug (logging) Turn on debug logs [$K3S_DEBUG]
    --data-dir value, -d value (data) Folder to hold state (default: /var/lib/r)
    --help, -h show help
    --version, -v print the version
Now, download and run the k3s install script:
curl -sfL https://get.k3s.io > k3s-install.sh
chmod +x k3s-install.sh
INSTALL_K3S_EXEC="server --disable metrics-server" INSTALL_K3S_SKIP_DOWNLOAD="true" bash -x ./k3s-install.sh
After running, use the following command to check whether k3s is running normally. Typical output is as follows:
sipeed@lpi4a:~$ systemctl status k3s
● k3s.service - Lightweight Kubernetes
      Loaded: loaded (8;;file://lpi4a/etc/systemd/system/k3s.service/etc/systemd)
      Active: active (running) since Mon 2023-07-31 06:48:34 UTC; 6s ago
        Docs: 8;;https://k3s.iohttps://k3s.io8;;
     Process: 3240 ExecStartPre=/bin/sh -xc ! /usr/bin/systemctl is-enabled --qu>
     Process: 3242 ExecStartPre=/sbin/modprobe br_netfilter (code=exited, status>
     Process: 3243 ExecStartPre=/sbin/modprobe overlay (code=exited, status=0/SU>
    Main PID: 3244 (k3s-server)
       Tasks: 37
      Memory: 529.5M
         CPU: 54.841s
      CGroup: /system.slice/k3s.service
              ├─3244 "/usr/local/bin/k3s server"
              └─3361 "containerd
Next, we create a new configuration file to run the k3s container:
vi hello-lpi4a.yaml
The content of the file is as follows (refer to https://raw.githubusercontent.com/CARV-ICS-FORTH/kubernetes-riscv64/main/examples/hello-kubernetes.yaml):
apiVersion: v1
kind: Service
metadata:
   name: hello
spec:
   type: ClusterIP
   ports:
   - port: 8080
   selector:
     app: hello
---
apiVersion: apps/v1
kind: Deployment
metadata:
   name: hello
spec:
   replicas: 1
   selector:
     matchLabels:
       app: hello
   template:
     metadata:
       labels:
         app: hello
     spec:
       containers:
       - name: hello-kubernetes
         image: carvicsforth/hello-kubernetes:1.10.1
         env:
         - name: MESSAGE
           value: "Hello Lichee Pi 4A!"
Then start a container with this configuration file. A typical input is as follows:
sipeed@lpi4a:~$ sudo kubectl apply -f hello-lpi4a.yaml
service/hello created
deployment.apps/hello created
Then check the status of pods (if the IP address is not displayed in the output, you can wait a little longer and check again):
sipeed@lpi4a:~$
NAME READY STATUS RESTARTS AGE IP NODE NOMINATED NODE READINESS GATES
hello-5b576d45d7-fdjgh 1/1 Running 0 16m 10.42.0.6 lpi4a <none> <none>
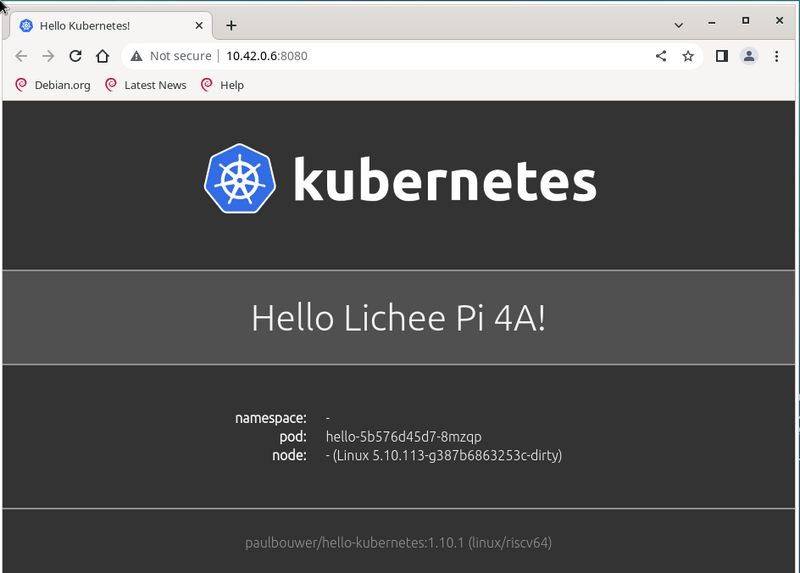
Next, use curl to test whether the k3s container runs successfully. The typical output is as follows:
sipeed@lpi4a:~$ curl 10.42.0.6:8080
<!DOCTYPE html>
<html>
<head>
     <title>Hello Kubernetes!</title>
     <link rel="stylesheet" type="text/css" href="/css/main.css">
     <link rel="stylesheet" href="https://fonts.googleapis.com/css?family=Ubuntu:300">
</head>
<body>

   <div class="main">
     <img src="/images/kubernetes.png"/>
     <div class="content">
       <div id="message">
   Hello Lichee Pi 4A!
</div>
<div id="info">
   <table>
     <tr>
       <th>namespace:</th>
       <td>-</td>
     </tr>
     <tr>
       <th>pod:</th>
       <td>hello-5b576d45d7-fdjgh</td>
     </tr>
     <tr>
       <th>node:</th>
       <td>- (Linux 5.10.113-gfac22a756532)</td>
     </tr>
   </table>
</div>
<div id="footer">
   paulbouwer/hello-kubernetes:1.10.1 (linux/riscv64)
</div>
     </div>
   </div>

</body>
</html>
So far, the k3s container has run successfully.
The page shows as follows:
Minecraft Server
Here we take 1.20.1 version as an example, LPi4A as Server and PC (Ubuntu 22.04) as Client.
First download the Fizzed optimized nitro JDK 19 from here, extract it, rename the folder and move it to the /opt/ directory:
tar xvf fizzed19.36-jdk19.0.1-linux_riscv64.tar.gz
sudo mv fizzed19.36-jdk19.0.1-linux_riscv64 /opt/jdk_19
Test if this JDK is available:
sipeed@lpi4a:~$ /opt/jdk_19/bin/java -version
openjdk version "19.0.1" 2022-09-20
OpenJDK Runtime Environment Fizzed19.36 (build 19.0.1+10)
OpenJDK 64-Bit Server VM Fizzed19.36 (build 19.0.1+10, mixed mode)
If the version number appears, it is available. If you have already pre-installed a different version of the JDK, you can change the softlinks by checking the original softlinks and making a note of them so that you can change them back later:
sipeed@lpi4a:~$ ls /usr/bin/java -l
lrwxrwxrwx 1 root root 22 Apr 26 10:40 /usr/bin/java -> /etc/alternatives/java
Then change the softlink to point to the JDK you just installed:
sudo rm /usr/bin/java
sudo ln -s /opt/jdk_19/bin/java /usr/bin/java
Verify that the soft link was configured successfully with the command
java -version
If the version appears, the configuration was successful.
Next, download the original server-side jar file to LPi4A at here, noting that the version is 1.20.1, and then execute it on LPi4A first:
java -jar server.jar nogui
If prompted
[ServerMain/WARN]: Failed to load eula.txt
[ServerMain/INF0]:You need to agree to the EULA in order to run the server. Go to e ula.txt for more info.
Go to eula.txt for more info.

Changes false to true on the corresponding line in the `eula.txt` file in the current directory:
```shell
eula=true
Save and exit, restart the server, the first startup will be slower, be patient, the startup time will be displayed after the startup is complete (the following time is not the first startup time):
[03:51:02] [Server thread/INFO]: Time elapsed: 36394 ms
[03:51:02] [Server thread/INFO]: Done (52.927s)! For help, type "help"
Next, you can connect after launching the client on the PC, we recommend using the third-party client launcher HMCL (download link https://hmcl.huangyuhui.net/download/).
Once the download is complete, launch HMCL:
java -jar HMCL-3.5.5.jar
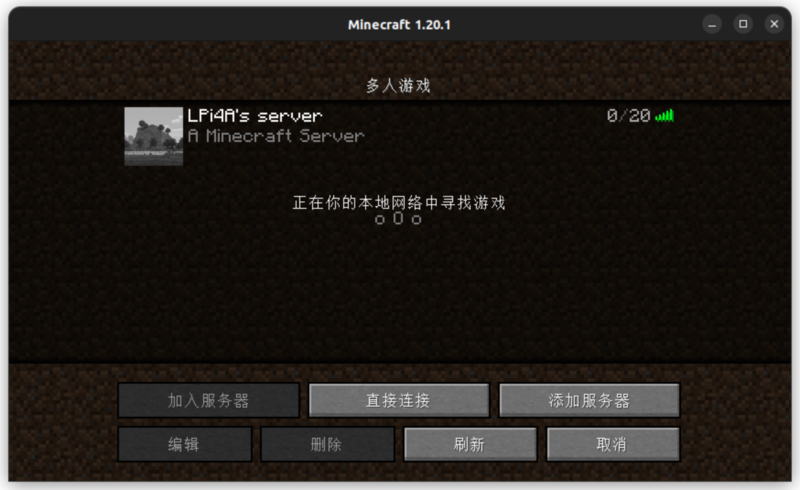
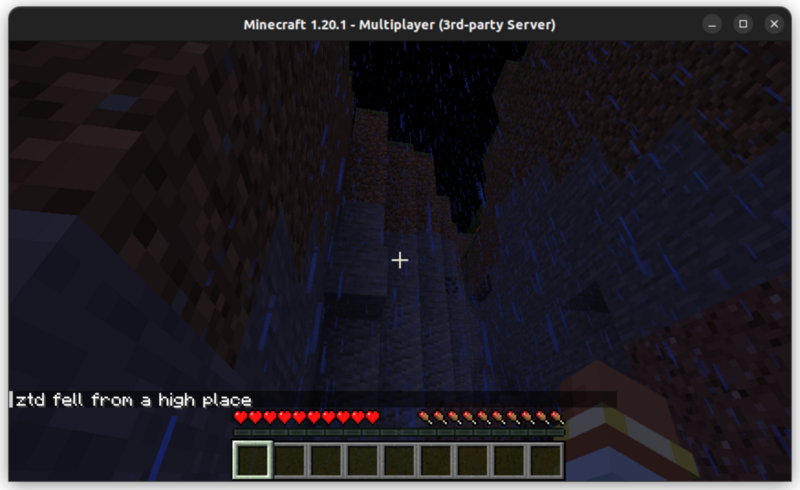
You can download 1.20.1 version directly in the launcher and configure the game account, then you can enter the game, after entering the game, enter the server IP (LPi4A's IP) to add the server to connect (make sure that the computer and LPi4A are under the same network), the effect is as follows:
Note that if you want to change back to the original version of the JDK, run:
sudo rm /usr/bin/java
sudo ln -s /opt/jdk_19/bin/java /etc/alternatives/java
Wine-CE
First download here the wine-ce_dlls_8.9.0.all.tar.xz, wine-ce_core_8.9.0.riscv64.tar.xz files. Both files are assumed to be downloaded to the user's home directory (the latest version is 8.9 at the time of writing this document).
Then follow the steps in the documentation to install them:
sudo apt install fonts-liberation fonts-wine glib-networking libpulse0 gstreamer1.0-plugins-good gstreamer1.0-x libaa1 libaom3 libasound2-plugins  libcaca0 libcairo-gobject2 libcodec2-1.0 libdav1d6 libdv4 libgdk-pixbuf-2.0-0 libgomp1 libgpm2 libiec61883-0 libjack-jackd2-0 libmp3lame0 libncurses6 libncursesw6 libnuma1 libodbc2 libproxy1v5 libraw1394-11 librsvg2-2 librsvg2-common libsamplerate0 libshine3 libshout3 libslang2 libsnappy1v5 libsoup2.4-1 libsoxr0 libspeex1 libspeexdsp1 libtag1v5 libtag1v5-vanilla libtwolame0 libva-drm2 libva-x11-2 libva2 libvdpau1 libvkd3d-shader1 libvkd3d1 libvpx7 libwavpack1 libwebpmux3 libx265-199 libxdamage1 libxvidcore4 libzvbi-common libzvbi0 mesa-va-drivers mesa-vdpau-drivers va-driver-all vdpau-driver-all vkd3d-compiler

sudo tar -Jxvf wine-ce_core_8.9.0.riscv64.tar.xz -C /opt/
sudo tar -Jxvf wine-ce_dlls_8.9.0.all.tar.xz -C /opt/
sudo ln -sf /opt/wine-ce/bin/wine /usr/bin/wine
sudo ln -sf /opt/wine-ce/bin/winecfg /usr/bin/winecfg
rm -rf ~/.wine
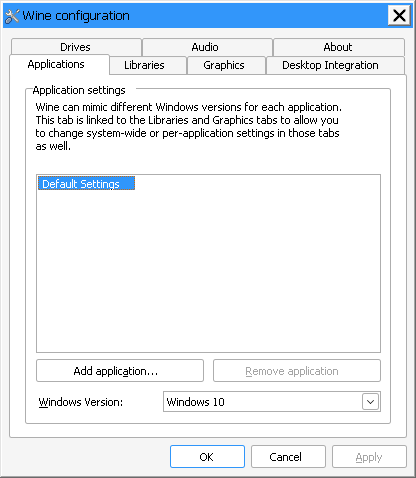
Next some initialization settings:
winecfg
The settings used here are as follows:
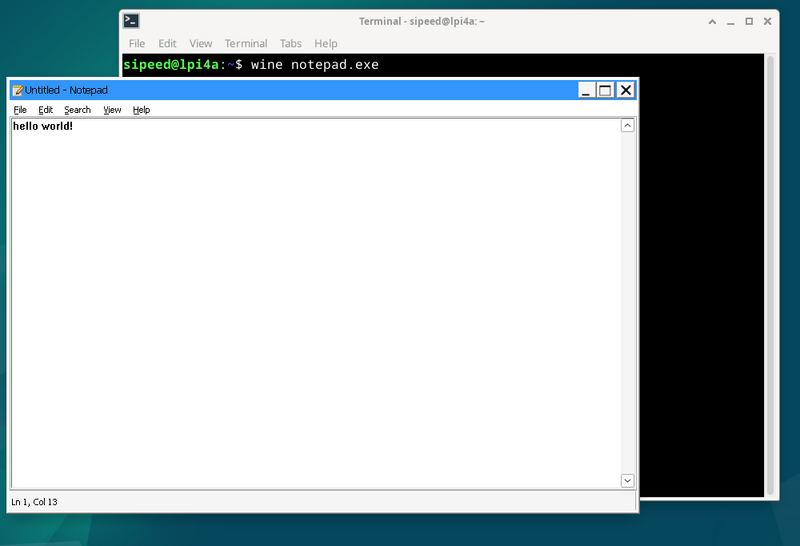
Once the settings are complete, you can run programs under Windows, such as the command here to run Notepad under Windows:
wine notepad.exe
Use optimized GCC toolchain
If you find problems with experimental features, you can report issue.
Installation steps
# Add optimization source
sudo sed -i '1ideb https://mirror.iscas.ac.cn/revyos/revyos-c910v/ revyos-c910v main' /etc/apt/sources.list
# update software
sudo apt update
# install gcc-10 or gcc-13
sudo apt install -y build-essential # gcc-10
sudo apt install -y gcc-13 g++-13 # gcc-13
# Restart to avoid other problems
sudo reboot
Test gcc-10 (gcc10.4 enables xtheadc+v0p7)
gcc -v
Using built-in specs.
COLLECT_GCC=gcc
COLLECT_LTO_WRAPPER=/usr/lib/gcc/riscv64-linux-gnu/10/lto-wrapper
Target: riscv64-linux-gnu
Configured with: ../src/configure -v --with-pkgversion='Debian 10.4.0-8revyos2.3' --with-bugurl=file:///usr/share/doc/gcc-10/README.Bugs --enable-languages=c,ada,c++,go,d,fortran,objc,obj-c++,m2 --prefix=/usr --with-gcc-major-version-only --program-suffix=-10 --program-prefix=riscv64-linux-gnu- --enable-shared --enable-linker-build-id --libexecdir=/usr/lib --without-included-gettext --enable-threads=posix --libdir=/usr/lib --enable-nls --enable-clocale=gnu --enable-libstdcxx-debug --enable-libstdcxx-time=yes --with-default-libstdcxx-abi=new --enable-gnu-unique-object --disable-libitm --disable-libsanitizer --disable-libquadmath --disable-libquadmath-support --enable-plugin --enable-default-pie --with-system-zlib --enable-libphobos-checking=release --with-target-system-zlib=auto --enable-objc-gc=auto --enable-multiarch --disable-werror --disable-multilib --with-arch=rv64gcv0p7_zfh_xtheadc --with-abi=lp64d --enable-checking=release --build=riscv64-linux-gnu --host=riscv64-linux-gnu --target=riscv64-linux-gnu
Thread model: posix
Supported LTO compression algorithms: zlib zstd
gcc version 10.4.0 (Debian 10.4.0-8revyos2.3)
Test gcc-13 (gcc13.2 enables xthead extension)
gcc-13 -v
Using built-in specs.
COLLECT_GCC=gcc-13
COLLECT_LTO_WRAPPER=/usr/libexec/gcc/riscv64-linux-gnu/13/lto-wrapper
Target: riscv64-linux-gnu
Configured with: ../src/configure -v --with-pkgversion='Debian 13.2.0-1revyos1' --with-bugurl=file:///usr/share/doc/gcc-13/README.Bugs --enable-languages=c,ada,c++,go,d,fortran,objc,obj-c++,m2 --prefix=/usr --with-gcc-major-version-only --program-suffix=-13 --program-prefix=riscv64-linux-gnu- --enable-shared --enable-linker-build-id --libexecdir=/usr/libexec --without-included-gettext --enable-threads=posix --libdir=/usr/lib --enable-nls --enable-clocale=gnu --enable-libstdcxx-debug --enable-libstdcxx-time=yes --with-default-libstdcxx-abi=new --enable-gnu-unique-object --disable-libitm --disable-libquadmath --disable-libquadmath-support --enable-plugin --enable-default-pie --with-system-zlib --enable-libphobos-checking=release --with-target-system-zlib=auto --enable-objc-gc=auto --enable-multiarch --disable-werror --disable-multilib --with-arch=rv64gc_zfh_xtheadba_xtheadbb_xtheadbs_xtheadcmo_xtheadcondmov_xtheadfmemidx_xtheadfmv_xtheadint_xtheadmac_xtheadmemidx_xtheadmempair_xtheadsync --with-abi=lp64d --enable-checking=release --build=riscv64-linux-gnu --host=riscv64-linux-gnu --target=riscv64-linux-gnu --with-build-config=bootstrap-lto-lean --enable-link-serialization=16
Thread model: posix
Supported LTO compression algorithms: zlib zstd
gcc version 13.2.0 (Debian 13.2.0-1revyos1)
gcc-10/gcc-13 differences:
Except for v0p7, other optimizations can use gcc-13 instead of gcc-10.
The latter optimization can report problems on the mainline, which is a function that has been mainlined.
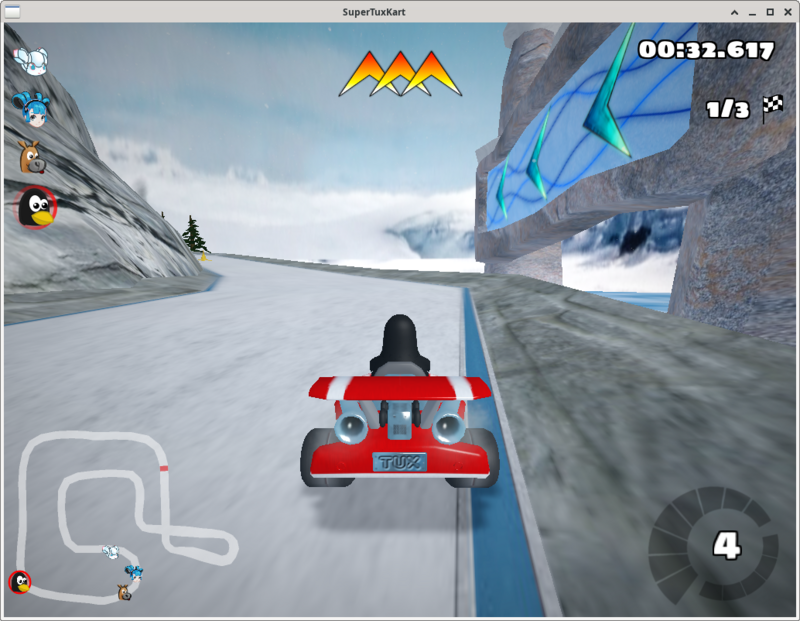
SuperTuxKart
SuperTuxKart is a 3D open-source arcade racer with a variety characters, tracks, and modes to play. It can also be experienced on LPi4A by compiling the source code:
First install dependencies:
sudo apt-get install build-essential cmake libbluetooth-dev libsdl2-dev \
libcurl4-openssl-dev libenet-dev libfreetype6-dev libharfbuzz-dev \
libjpeg-dev libogg-dev libopenal-dev libpng-dev \
libssl-dev libvorbis-dev libmbedtls-dev pkg-config zlib1g-dev
Next, refer to documentation step to compile:
# clone and configure src
git clone https://github.com/supertuxkart/stk-code stk-code
svn co https://svn.code.sf.net/p/supertuxkart/code/stk-assets stk-assets

# go into the stk-code directory
cd stk-code

# create and enter the cmake_build directory
mkdir cmake_build
cd cmake_build

# run cmake to generate the makefile
cmake .. -DBUILD_RECORDER=off -DNO_SHADERC=on

#compile
make -j$(nproc)
After compiling, you can find the supertuxkart program in the bin/ folder in the current directory. Just run:
./bin/supertuxkart
The effect is as follows:
llama2.c
project_link
We can run a small model of Llama 2 by following the steps in the project link documentation.
First, clone the project and switch to the changed project directory:
git clone https://github.com/karpathy/llama2.c.git
Then download the model.bin file and place it in the specified directory:
wget https://karpathy.ai/llama2c/model.bin -P out
Then compile and run:
gcc -O3 -o run run.c -lm
./run out/model.bin
You can get the following output:
<s>
 Once upon a time, there was a little girl named Lily. She loved to play with her dolls and teddy bea
rs. One day, she saw her friend Lucy playing with her favorite doll.
Lily: "Lucy, can I play with you?"
Lucy: "Sure, but can you be careful with my doll?"
Lily: "Sure, I promise I won't break her."
Lucy: "That's very original. I really love it."
Lily smiled and showed her doll to her mom. Her mom said, "That's nice, Lily. Let's put your doll on
the shelf and play with her some more."
From that day on, Lily and her doll played together every day. They were the best of friends and didn
't break anyone's possession.
<s>
 Once upon a time, there was a little boy named Timmy. Timmy loved to eat sandwiches. One day, Timmy'
s mom made him a sandwich for lunch. It was so yummy and tasty! But then, something unexpected happen
ed. Timmy's little sister spilled some juice on his sandwich. Tim
achieved tok/s: 30.955260
You can also modify some compilation parameters to speed things up:
sipeed@lpi4a:~/llama2.c$ gcc -Ofast -fopenmp run.c  -lm  -o run
sipeed@lpi4a:~/llama2.c$ OMP_NUM_THEADS=4 ./run out/model.bin
<s>
 Once upon a time, there was a boy named Tom. He liked to run fast. One day, he saw a big tree. Under
 the tree, he found a hole. Tom was curious. He looked inside and saw something shiny.
Tom looked closer, and it was not a shiny thing. It was a key! He was very surprised. He took the key
 and ran home. He showed his mom the key.
Tom's mom said the key was for a sneeze. The sneeze was a sneeze. Tom's mom put the key next to her p
ocket. Tom said, "Now you can have a sneeze too!"
Tom put his nose under his ears. He went home and took a nap. When he woke up, he had a small sneeze
from the key. It was not food or water. Tom was happy and laughed.
<s>
 Once upon a time, there was a bunny. The bunny was very restless and wanted to explore, so he hopped
 off his little house.
The bunny hopped and hopped until he saw a shiny silver carrot. He was so excited to eat it, he
achieved tok/s: 52.043098
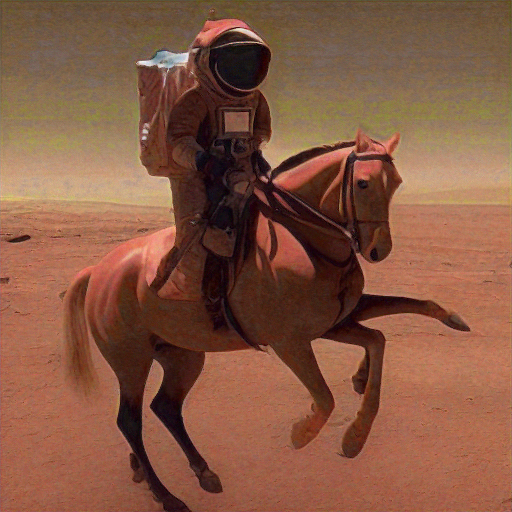
Stable Diffusion
This example runs Stable Diffusion on LPi4A with this project.
First, we need to build the XNNPACK:
git clone https://github.com/google/XNNPACK.git
cd XNNPACK
git checkout 3f56c91b492c93676a9b5ca4dd51f528b704c309
mkdir build
cd build
cmake -DXNNPACK_BUILD_TESTS=OFF -DXNNPACK_BUILD_BENCHMARKS=OFF ..
cmake --build . --config Release
Next, build the Stable Diffusion example:
git clone https://github.com/vitoplantamura/OnnxStream.git
cd OnnxStream
cd src
mkdir build
cd build
cmake -DXNNPACK_DIR=<此处替换为clone的XNNPACK存放路径> ..
cmake --build . --config Release
Now we have the runnable Stable Diffusion example file sd, run with the following parameters:
. /sd --models-path . --rpi
Where --models-path is the model file downloaded from the project's Release page, which can be placed in the directory where the sd file is located.
The runtime configuration is as follows:
----------------[start]------------------
positive_prompt: a photo of an astronaut riding a horse on mars
negative_prompt: ugly, blurry
output_png_path: . /result.png
steps: 10
The result is the result.png file, and the image from the above prompt is as follows:
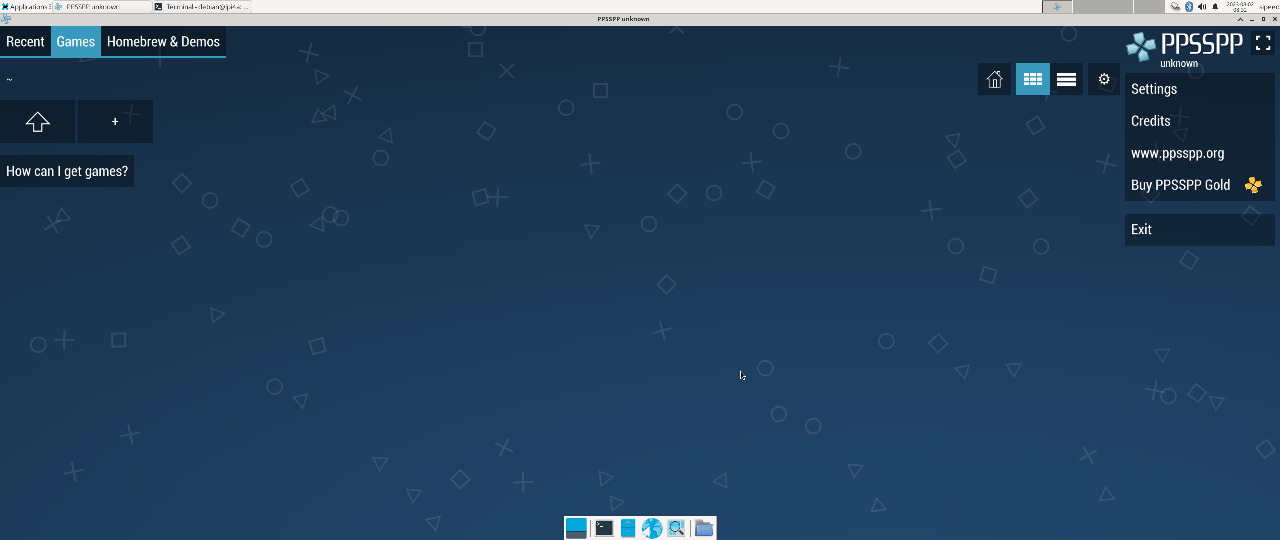
PSP Simulator
This example runs the PSP simulator on LPi4A through this project.
Firstly, we need to build PPSSPP:
#Install the required packages first
sudo apt install build-essential cmake libgl1-mesa-dev libsdl2-dev libvulkan-dev mesa-common-dev  libglu1-mesa-dev  libsdl2-dev libcurl4-openssl-dev
git clone --recurse-submodules https://github.com/hrydgard/ppsspp.git
cd ppsspp
git submodule update --init --recursive
git pull --rebase https://github.com/hrydgard/ppsspp.git
cmake .
make -j4
Compilation may take some time, and successful compilation occurs when the following output occurs:
sipeed@lpi4a:~/ppsspp$ make -j4
[  0%] Built target unix_based_hardware_detection
[  0%] Built target utils
[  0%] Built target gason
[  1%] Built target snappy
[  1%] Built target cityhash
[  1%] Built target vma
[  2%] Built target png17
[  3%] Built target udis86
[  3%] Built target basis_universal
[ 16%] Built target libzip
[ 16%] Built target glew
[ 16%] Built target sfmt19937
[ 17%] Built target kirk
[ 18%] Built target xbrz
[ 18%] Built target xxhash
[ 19%] Generating something_that_never_exists
[ 21%] Built target miniupnpc
[ 25%] Built target libzstd_static
-- Could NOT find Git (missing: GIT_EXECUTABLE)
CMake Warning at git-version.cmake:16 (message):
  git not found, unable to include version.


[ 25%] Built target GitVersion
[ 25%] Built target GenericCodeGen
[ 25%] Built target OGLCompiler
[ 25%] Built target OSDependent
[ 31%] Built target armips
[ 31%] Built target spirv-cross-core
[ 34%] Built target rcheevos
[ 35%] Built target cpu_features
[ 35%] Built target discord-rpc
[ 36%] Built target spirv-cross-glsl
[ 41%] Built target MachineIndependent
[ 41%] Built target spirv-cross-cpp
[ 41%] Built target spirv-cross-msl
[ 41%] Built target spirv-cross-hlsl
[ 41%] Built target glslang
[ 42%] Built target SPIRV
[ 58%] Built target Common
[ 59%] Built target native
[ 95%] Built target Core
[100%] Built target PPSSPPSDL
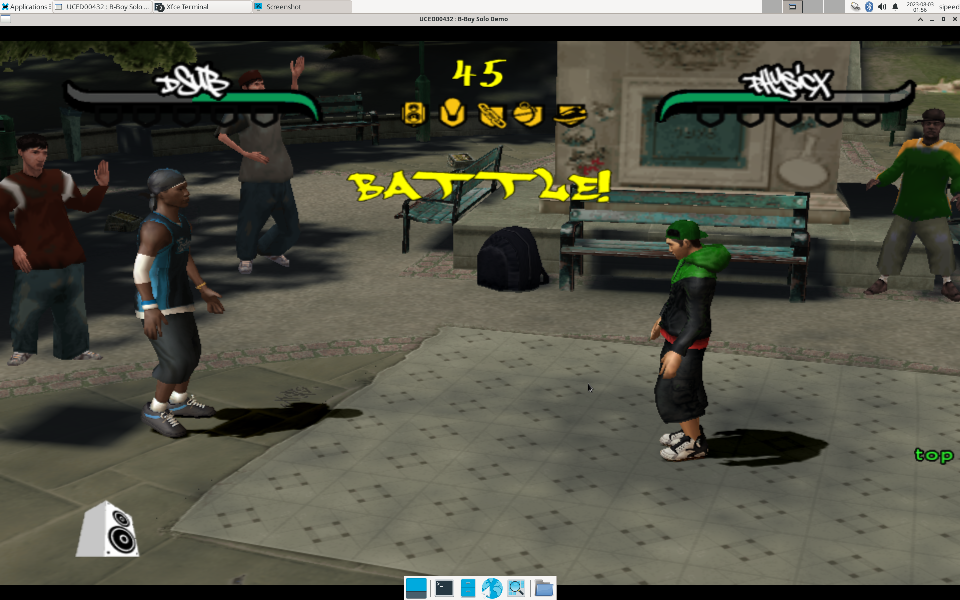
After installation, you can try running it (in root mode):
./PPSSPPSDL
As shown in the figure:
Game download:
Download completed:
We only need to use the EBOOT.PBP file in the compressed package
If using a graphical interface, extract directly
If using the command line, you need to change the compressed package to a zip suffix before decompressing it
Mv [compressed package name] [compressed package name]. zip

Unzip [compressed package name]. zip
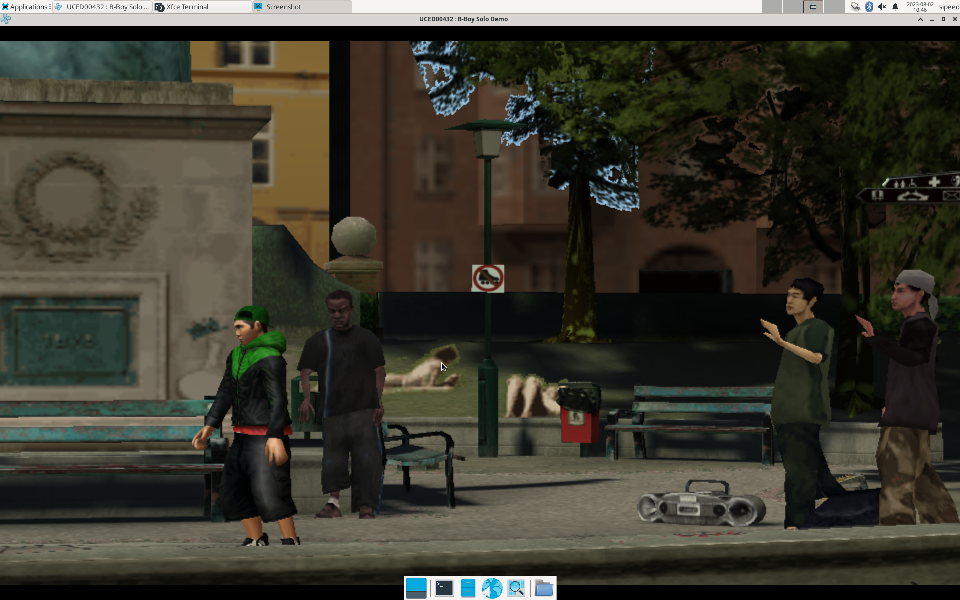
Start the game: Open EBOOT.PBP under the PPSSPPSDL command
./PPSSPPSDL ./game/01/EBOOT.PBP
The operation effect is shown in the figure:
Use of OpenCV
First, install the dependencies and the Python 3 environment
sudo apt install python3 python3-pip
sudo apt install python3-opencv
sudo apt install libqt5gui5-gles
OpenCV reads image demo:
#!/bin/bash
import cv2

img2 = cv2.imread('aContour.jpg', cv2.IMREAD_UNCHANGED)
cv2.namedWindow('show_img', 0)          # 定义窗口名称,三个函数(namedWindow、 resizeWindow、 imshow)中窗口名称要一致
cv2.resizeWindow('show_img', 736, 416)
cv2.imshow("show_img",img2)
cv2.waitKey(0)
cv2.destroyAllWindows()
cv2.destroyWindow("show_img")
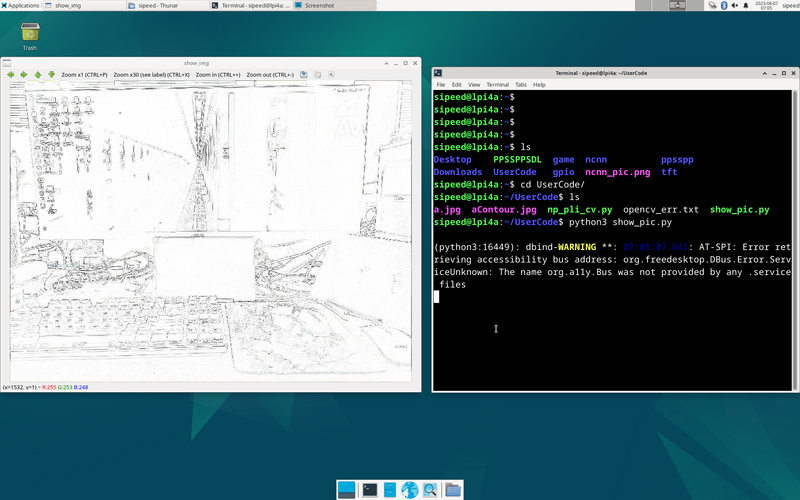
Run program:
python3 show_pic.py
Running results:
PIL numpy opencv comprehensive test demo:
#!/bin/bash
from typing import List, Any, Tuple
import matplotlib.pyplot as plt
import cv2

import numpy as np
from PIL import Image
from PIL import ImageFilter

im = Image.open('a.jpg')
om = im.filter(ImageFilter.CONTOUR)
om.save('aContour.jpg')

b = np.random.randint(0, 255, (200, 300), dtype=np.uint8)
g = np.random.randint(0, 255, (200, 300), dtype=np.uint8)
r = np.random.randint(0, 255, (200, 300), dtype=np.uint8)
print(b)

img=np.empty([20,30,3],dtype=np.uint8)
bgr=()
rowlist=[]
collist: List[List[Tuple[Any, Any, Any]]]=[]
for row in range(200):
    rowlist=[]
    for col in range(300):
        bgr=(r[row][col],g[row][col],b[row][col])
        rowlist.append(bgr)
    collist.append(rowlist)

img=np.asarray(collist)

img2 = cv2.imread('aContour.jpg', cv2.IMREAD_UNCHANGED)
cv2.namedWindow('show_img', 0)
cv2.resizeWindow('show_img', 736, 416)
cv2.imshow("show_img",img2)
cv2.waitKey(0)
cv2.destroyAllWindows()
cv2.destroyWindow("show_img")
USB camera demo
import cv2

# Open the camera
cap = cv2.VideoCapture(0)

# Check if camera opened successfully
if not cap.isOpened():
    print("Unable to open camera")
    exit()

# Loop to capture continuous frames
while True:
    # Capture frame-by-frame
    ret, frame = cap.read()

    # Check if frame is read correctly
    if not ret:
        print("Can't receive frame")
        break

    # Display the resulting frame
    cv2.imshow("USB Camera", frame)

    # Exit on ESC key
    if cv2.waitKey(1) == 27:
        break

# Release camera and close windows
cap.release()
cv2.destroyAllWindows()
Use of NCNN
Firstly, the Git source code and installation related dependency libraries
git clone https://github.com/Tencent/ncnn.git
cd ncnn
git submodule update --init

sudo apt install build-essential git cmake libprotobuf-dev protobuf-compiler libvulkan-dev libopencv-dev
Compile source code
cd ncnn
mkdir -p build
cd build
cmake -DCMAKE_BUILD_TYPE=Release -DNCNN_VULKAN=OFF -DNCNN_BUILD_EXAMPLES=ON ..
make -j$(nproc)
Download the relevant model files and parameters, and place them in the same folder as the executable file:
~/ncnn/build/example
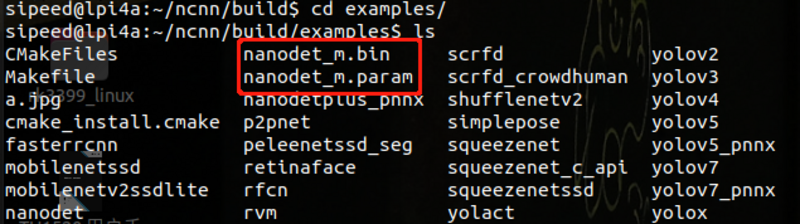
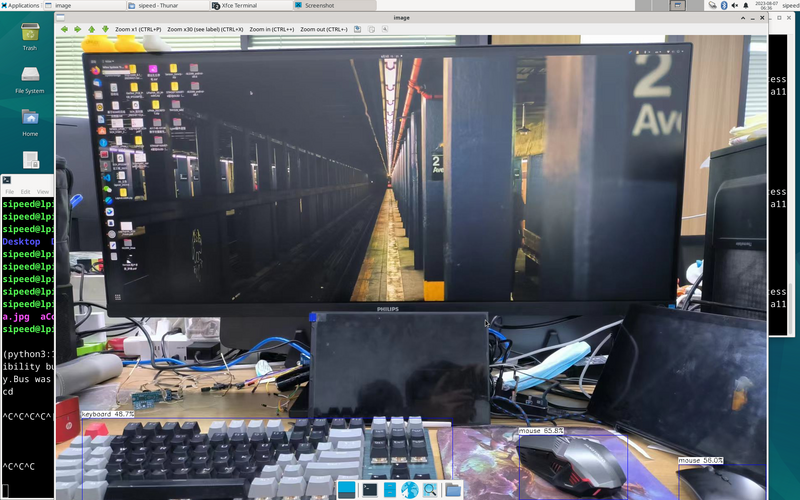
execute
./nanodet a.jpg
Running results

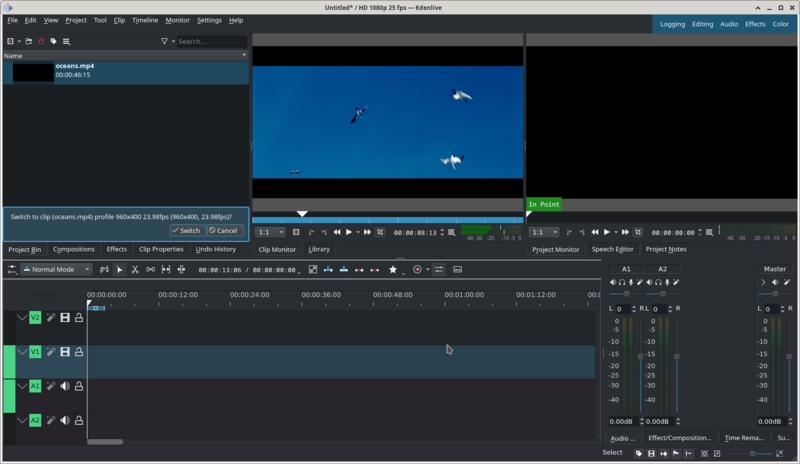
Use of Kdenlive
Installation steps:
sudo apt update
sudo apt install libqt5gui5-gles
sudo apt install kdenlive
If kdenlive installed through the commands above can't operate properly, run the following command instead:
sudo apt update
sudo apt reinstall libqt5gui5-gles
sudo apt reinstall kdenlive
After the installation is complete, you can use the command to open kdenlive:
kdenlive
The video editing view is as follows:
GStreamer
GStreamer is a pipeline-based multimedia framework based on GObject and written in C. It is designed to be used with a wide variety of applications and applications. With GStreamer, it is easy to create a wide range of multimedia-capable components, including simple audio playback, audio and video playback, recording, streaming and audio editing. Based on the pipelined design , you can create many multimedia applications such as video editors , streaming media broadcasting and media players and so on .
Next, a demo showing how to run GStreamer on LPi4A.
First, you need to install the relevant dependencies:
sudo apt install git build-essential libgstreamer* gstreamer1.0-tools
Then pull the relevant source code repository
git clone https://gitlab.freedesktop.org/gstreamer/gst-docs
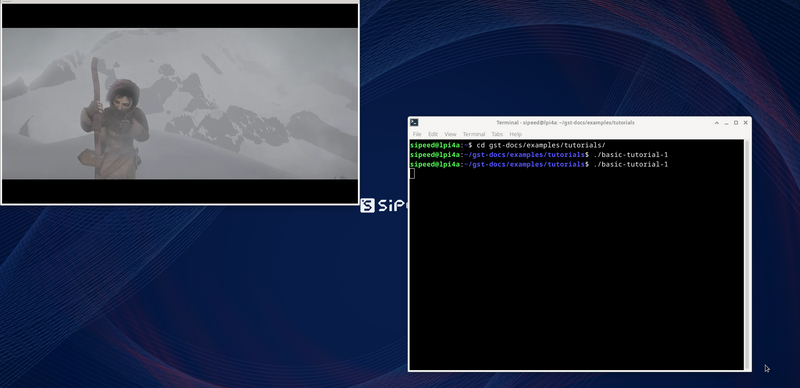
Go to the gst-docs/examples/tutorials directory and compile, we'll get the basic-tutorial-1 executable
cd gst-docs/examples/tutorials
gcc basic-tutorial-1.c -o basic-tutorial-1 `pkg-config --cflags --libs gstreamer-1.0`
After successful compilation, an executable program will be generated in the current directory, use the following command to run
./basic-tutorial-1
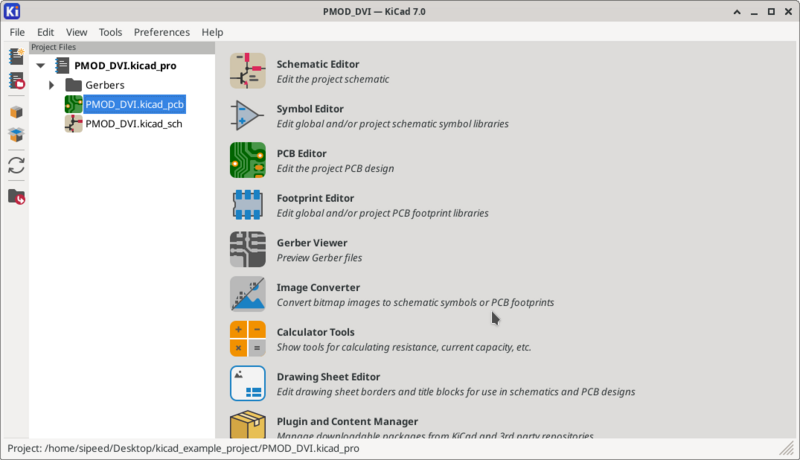
Kicad
Note, only versions 20231023 and above support Kicad!
First install Kicad:
sudo apt update
sudo apt install kicad
After installation, run the following commands before launching Kicad:
sudo switch-gl gl4es
rm ~/.cache
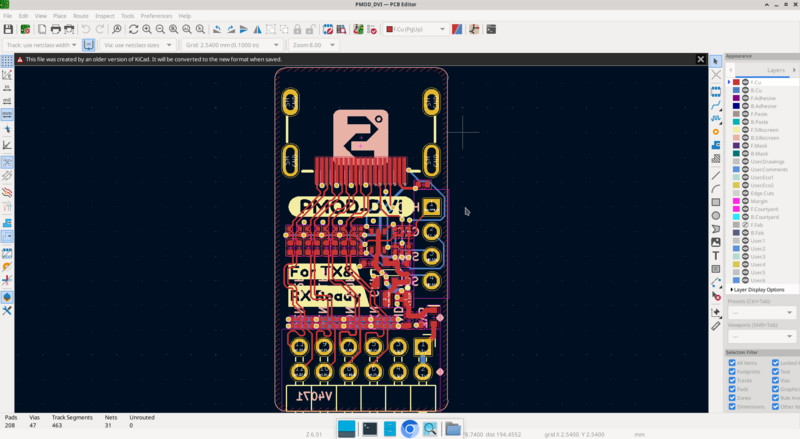
Launch Kicad:
kicad
After using Kicad, run these commands to avoid compatibility issues:
sudo switch-gl mesa
rm ~/.cache
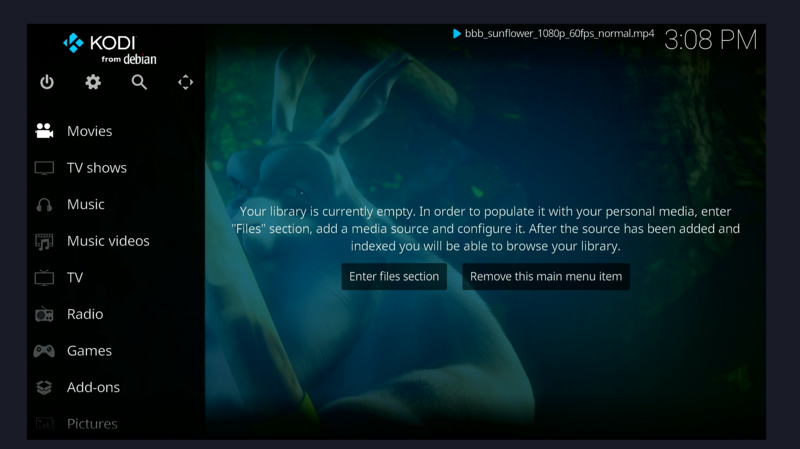
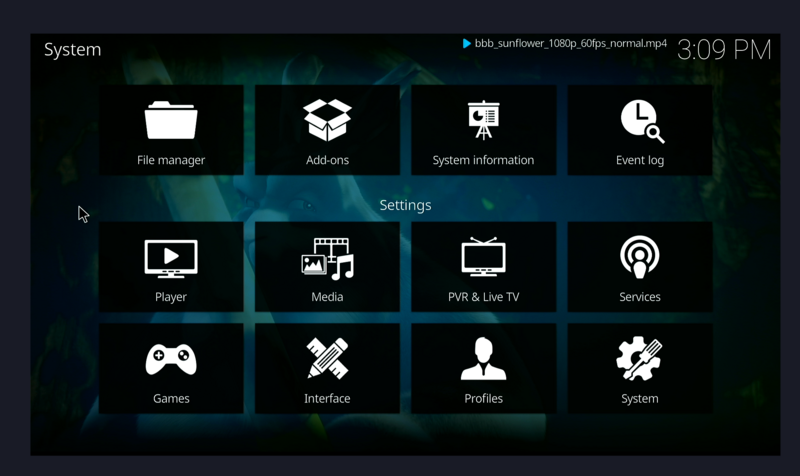
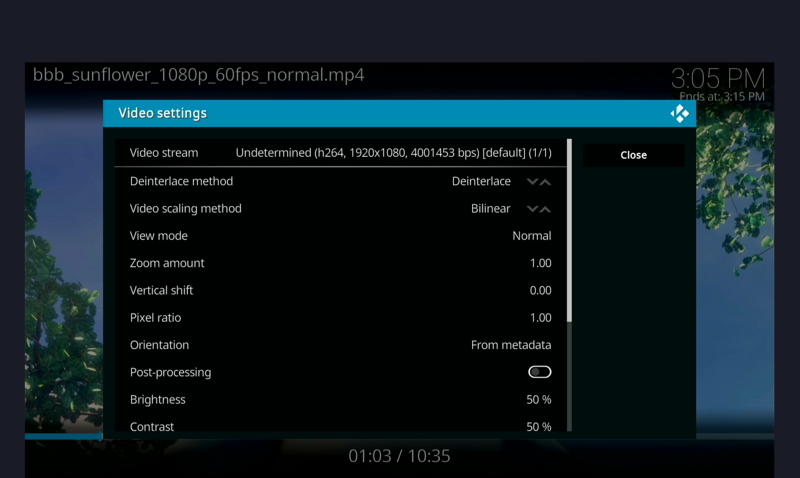
KODI
Install and launch directly:
sudo apt install kodi
kodi
Other
Contributions are welcome~ You can get ¥5~150 ($1~20) coupon if your contribution is accepted!
