

 English
LicheeRV Nano PicoClaw Expansion Board
Update history
| Date | Version | Author | Update content |
|---|---|---|---|
| 2026-04-07 | v0.0.1 | 916BGAI |
|
PicoClaw Expansion Board
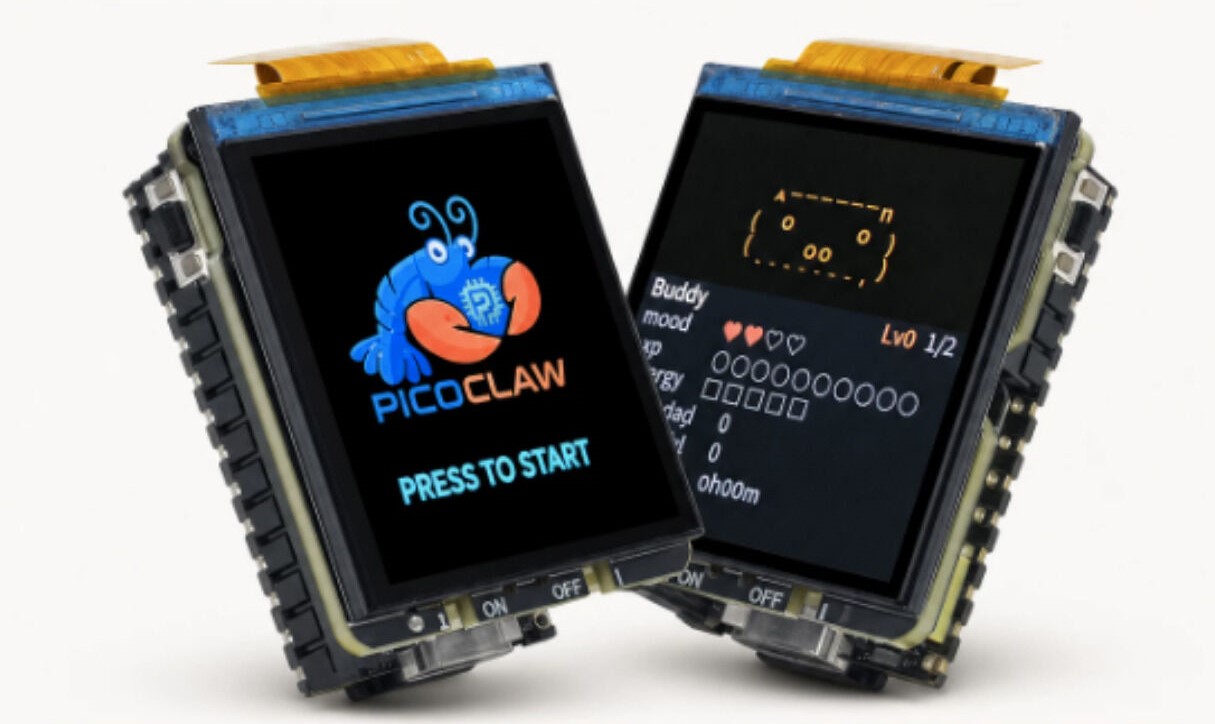
The PicoClaw Expansion Board is a feature extension board built for PicoClaw interactive applications, based on the LicheeRV Nano development board. It is designed for voice interaction and local display scenarios, integrating display, buttons, status LEDs, battery management, and audio peripheral interfaces to quickly build a complete HMI terminal.
The board includes a 240×240 LCD for system status, recognized text, conversation output, and UI menus. It also provides 2 onboard buttons for mode switching and confirmation, and 2 LEDs for power/running/status indication. A Battery connector is provided with charging support, with a maximum charging power of 3W. Speaker connection for voice playback is also supported.
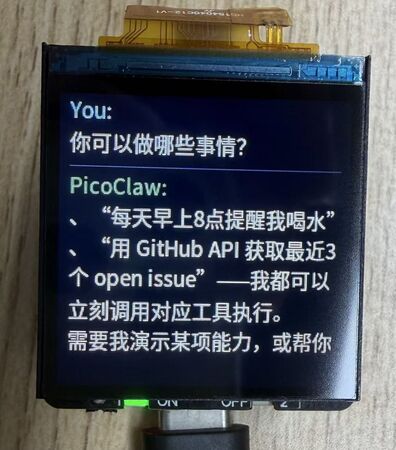
With the customized image, the board can work with PicoClaw for real-time voice conversation: audio capture, ASR, generation, with key results shown on the LCD for a complete local interaction experience.
Main features of the PicoClaw Expansion Board:
- 240×240 LCD display
- 2 function buttons
- 2 status LEDs
- Battery interface (charging supported, max 3W)
- Speaker connection and voice output support
- Real-time conversation and result display (with customized image)
If you want to print the enclosure yourself, download the PicoClaw Expansion Board enclosure 3D model files.
About PicoClaw

PicoClaw is an open-source personal AI assistant project for low-resource devices, written from scratch in Go. It targets complete Agent capability on low-cost, low-power hardware. The project focuses on being lightweight, fast, and deployable across resource-constrained Linux devices and multiple CPU architectures.
Key PicoClaw features:
- Ultra-light deployment: optimized for low-memory devices.
- Fast startup: suitable for always-on local interaction.
- Cross-platform: supports RISC-V, ARM, MIPS, and x86.
- Multi-channel access: supports Telegram, Discord, WeChat, QQ, Slack, and more.
- Rich model & tool ecosystem: supports multiple LLM providers, MCP, web search, and skills.
- Multiple operation modes: WebUI, TUI, and CLI.
For the LicheeRV Nano + PicoClaw Expansion Board scenario, PicoClaw provides the upper software layer for voice interaction and local display. By configuring models, channels, and tools, you can quickly build a usable local AI interaction terminal.
Project URL: https://github.com/sipeed/picoclaw
Image Download
Customized PicoClaw expansion-board image:
File name: picoclaw-rv-nano-YYYYMMDD.img.xz
Flashing method: You can use balenaEtcher to write the image directly to an SD card, or extract the
.xzfile first and then flash it using theddcommand.Expansion-board side code in the image is based on Python, located at
/opt/app_picoclaw(source: https://github.com/sipeed/rvclaw), which is convenient for custom development.
Quick Start with PicoClaw
Select an Application
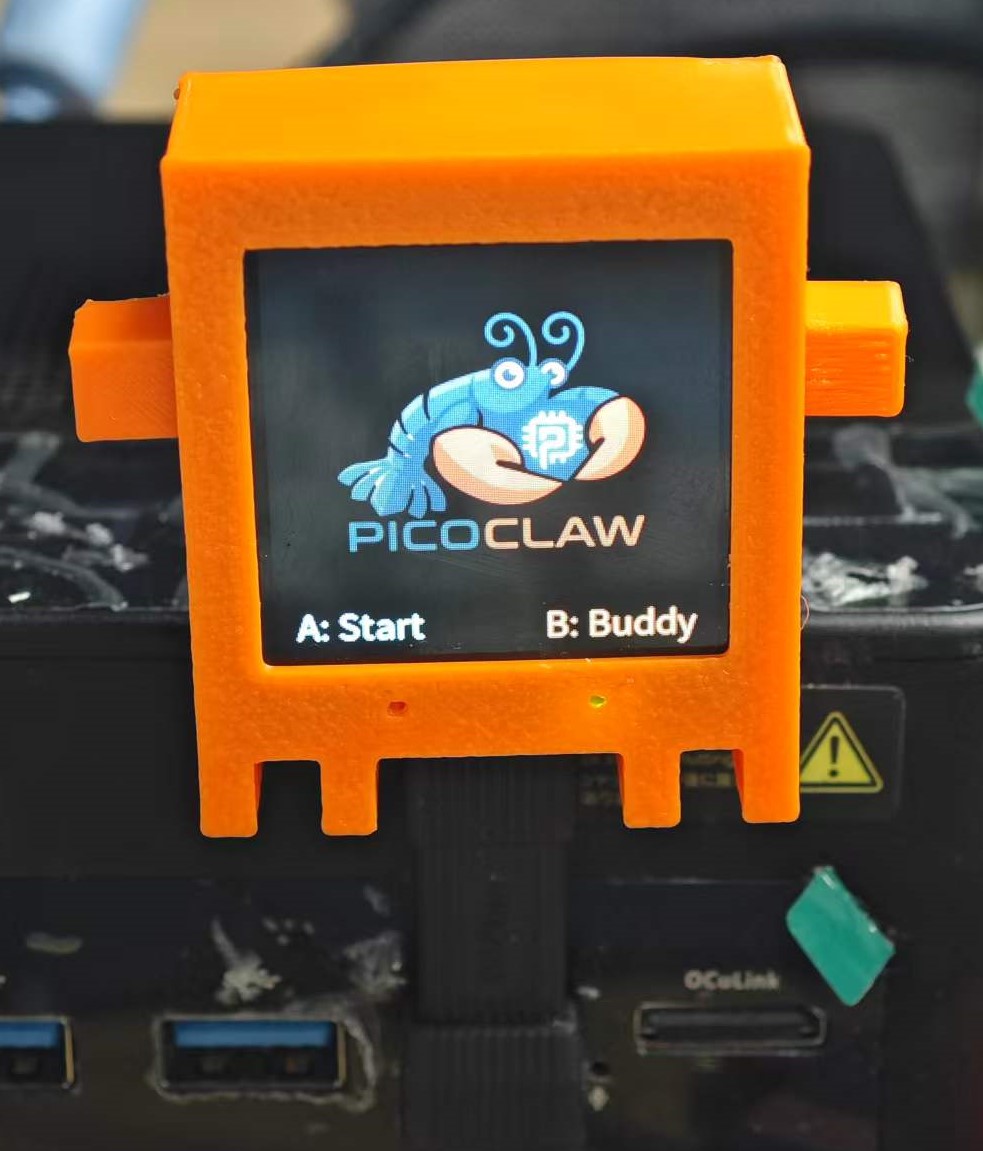
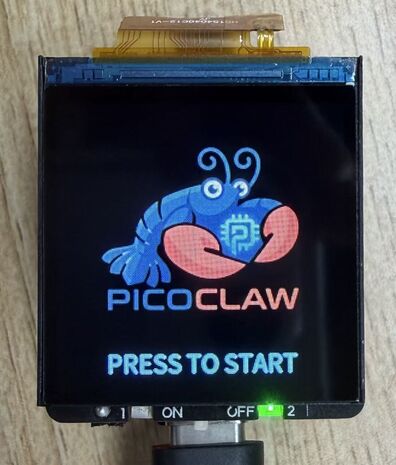
After startup, the system enters the application selection screen by default. Press KEY1 to select the PicoClaw application, or press KEY2 to select the CC Buddy application. In the PicoClaw application, long-press KEY2 to return to this application selection screen. CC Buddy is a customized virtual pet application that provides a cute interactive interface and simple conversation features, making it suitable for first-time users to try out.
Connect Wi-Fi
First, access the device console. Recommended methods:
Serial connection: Use UART0 exposed on SBU1/SBU2 of the USB connector. With a USB Type-C breakout board, route RX0/TX0 and connect using a serial tool.
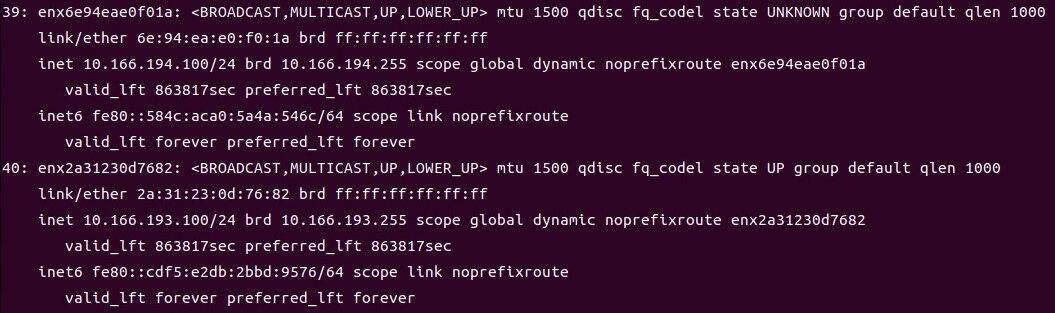
USB NIC connection: The device creates both RNDIS and NCM USB NICs by default. Check the USB NIC IP assigned on the host, then replace the last octet with
1as the device IP. Example: if host IP is10.166.194.100, device IP is10.166.194.1.
Then log in with SSH or serial. Default username/password are both root.
After logging in, connect Wi-Fi as follows.
Connect Wi-Fi
# Create wifi.sta in the first SD-card partition to enable STA mode:
touch /boot/wifi.sta && rm -f /boot/wifi.ap /boot/wifi.mon

# Then write the AP SSID and password into files:
echo ssid > /boot/wifi.ssid
echo pass > /boot/wifi.pass

# Finally restart the Wi-Fi service
/etc/init.d/S30wifi restart
Configure PicoClaw
On first boot, PicoClaw is not initialized yet. You need initial configuration first. You can use Web UI or TUI. The following uses Web UI.
Web UI Setup
Open http://<device-ip>:18800 in your browser to enter the PicoClaw Web UI. On first access, you need to set a password. You can use this password to log in later. If you forget the password, delete the /root/.picoclaw directory or re-flash the image to reset it.
Chat Model Setup
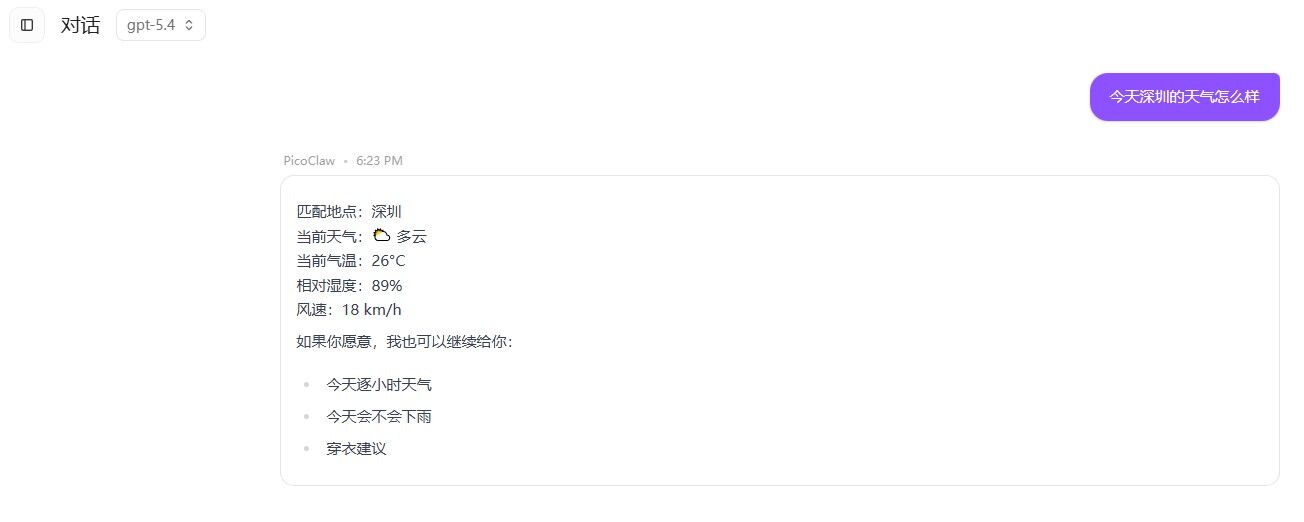
Open settings, select Model, then choose a provider and model. For example, you can use openai/gpt-5.4 as the default model.
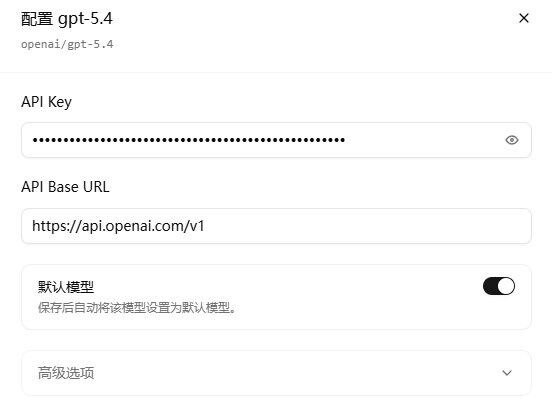
- After configuration, click save and return to the chat page. You will see
Service is not running, please start it before chatting.ClickStart Serviceat the top-right, then wait for startup and begin chatting.
Voice Model Setup
Currently, PicoClaw's WebSocket channel does not support direct audio-stream input, so PicoClaw ASR cannot be called directly for voice conversation. ASR is currently independent from PicoClaw, but still reads PicoClaw config files for model settings.
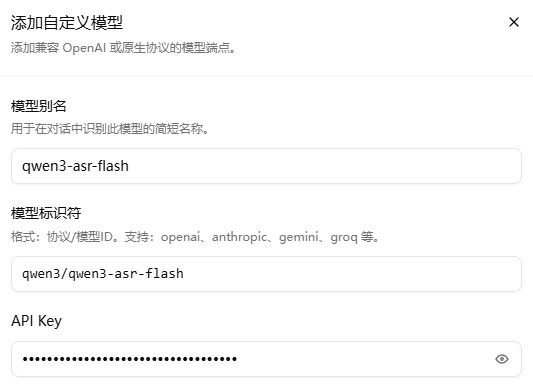
To enable voice interaction, configure a voice model first. In the model page, click Add Model and configure an ASR model. Example: qwen3/qwen3-asr-flash.
Currently supported ASR models:
| Model | Provider |
|---|---|
qwen3/qwen3-asr-flash-realtime |
Qwen |
qwen3/qwen3-asr-flash |
Qwen |
openai/whisper-1 |
OpenAI |
groq/whisper-large-v3 |
Groq |
groq/whisper-large-v3-turbo |
Groq |
elevenlabs/scribe_v1 |
ElevenLabs |
Note: keep
model aliasaligned with the model ID. For example, alias forqwen3/qwen3-asr-flash-realtimeshould beqwen3-asr-flash-realtime.
Try Voice Chat
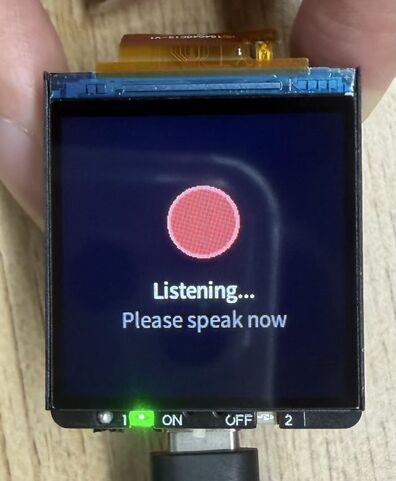
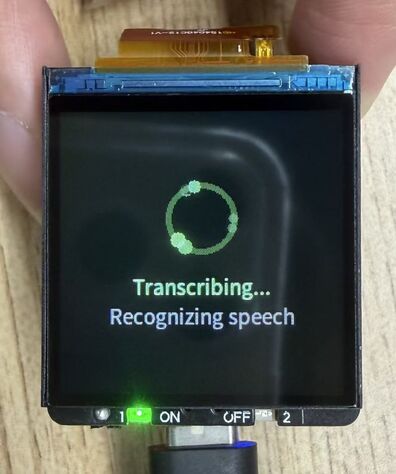
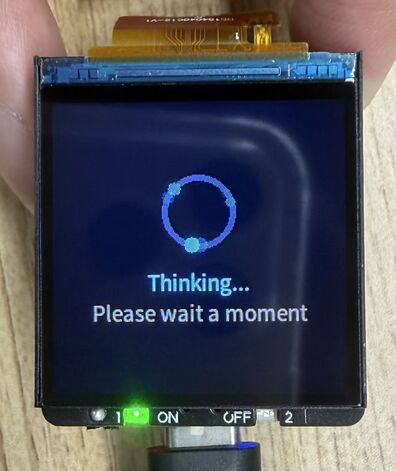
After saving, press and hold the left KEY1 button on the expansion board to record voice input. Release to trigger ASR and send the result to PicoClaw. After processing, ASR text and reply are displayed on screen.
CC Buddy Application
About CC Buddy
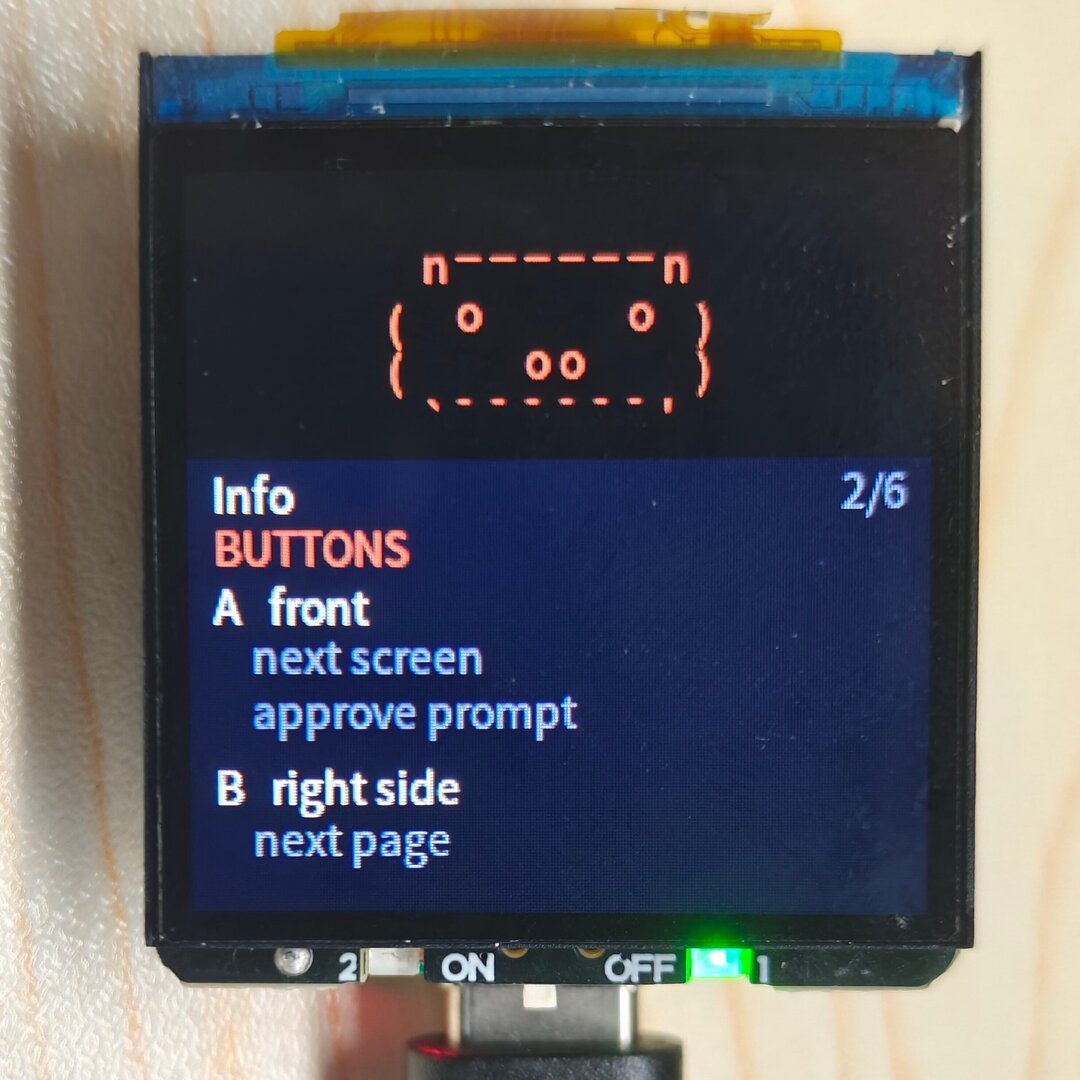
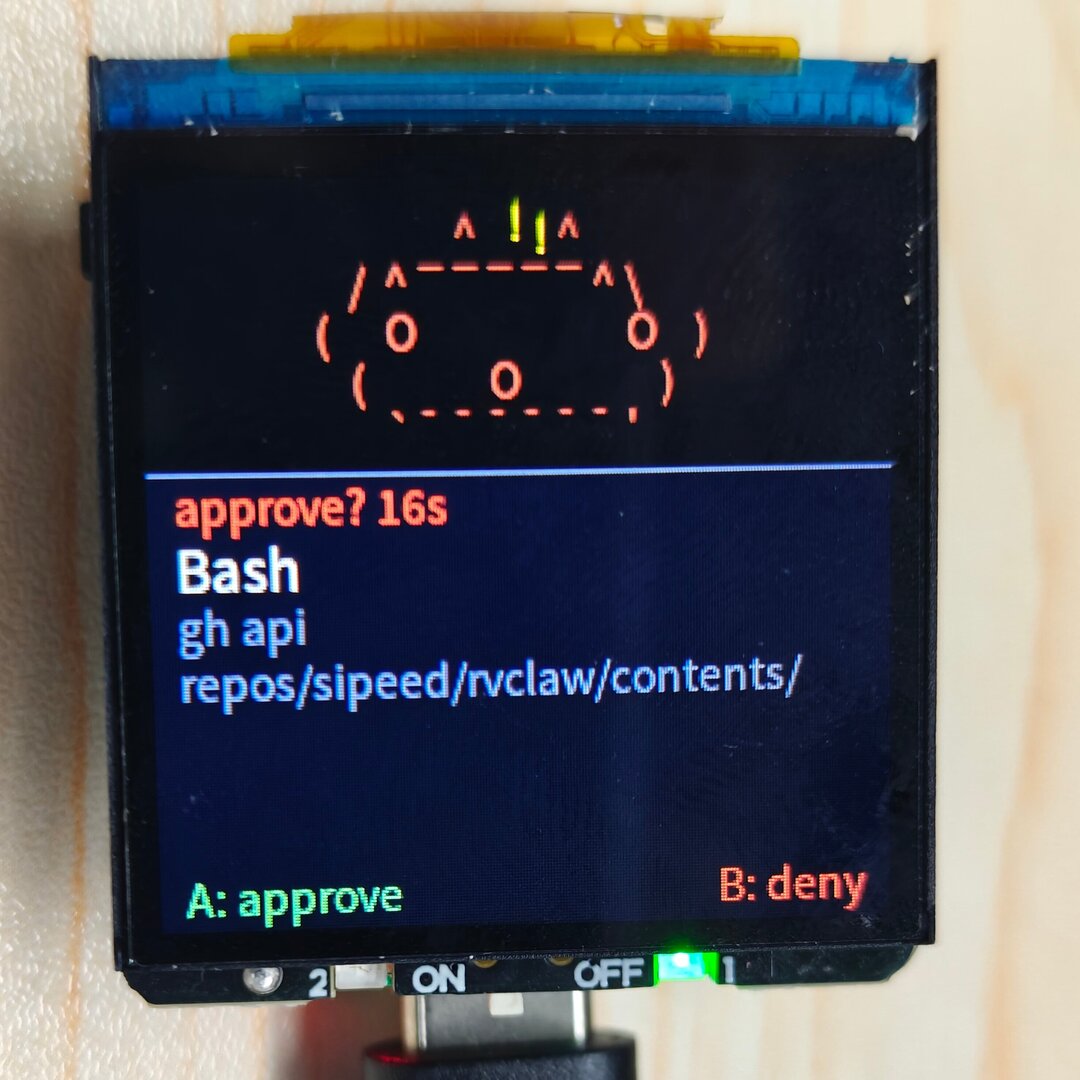
CC Buddy is another application built into the PicoClaw Expansion Board image. It is positioned as a companion device for Claude Code. It turns Claude Code activity into a cute virtual pet (ASCII Pet), and moves permission approval requests generated by Claude Code tool or command execution from the computer to the LicheeRV Nano screen. You can approve or deny requests directly with the device buttons, and the decision is sent back to Claude Code, so you do not need to switch back to the computer window.
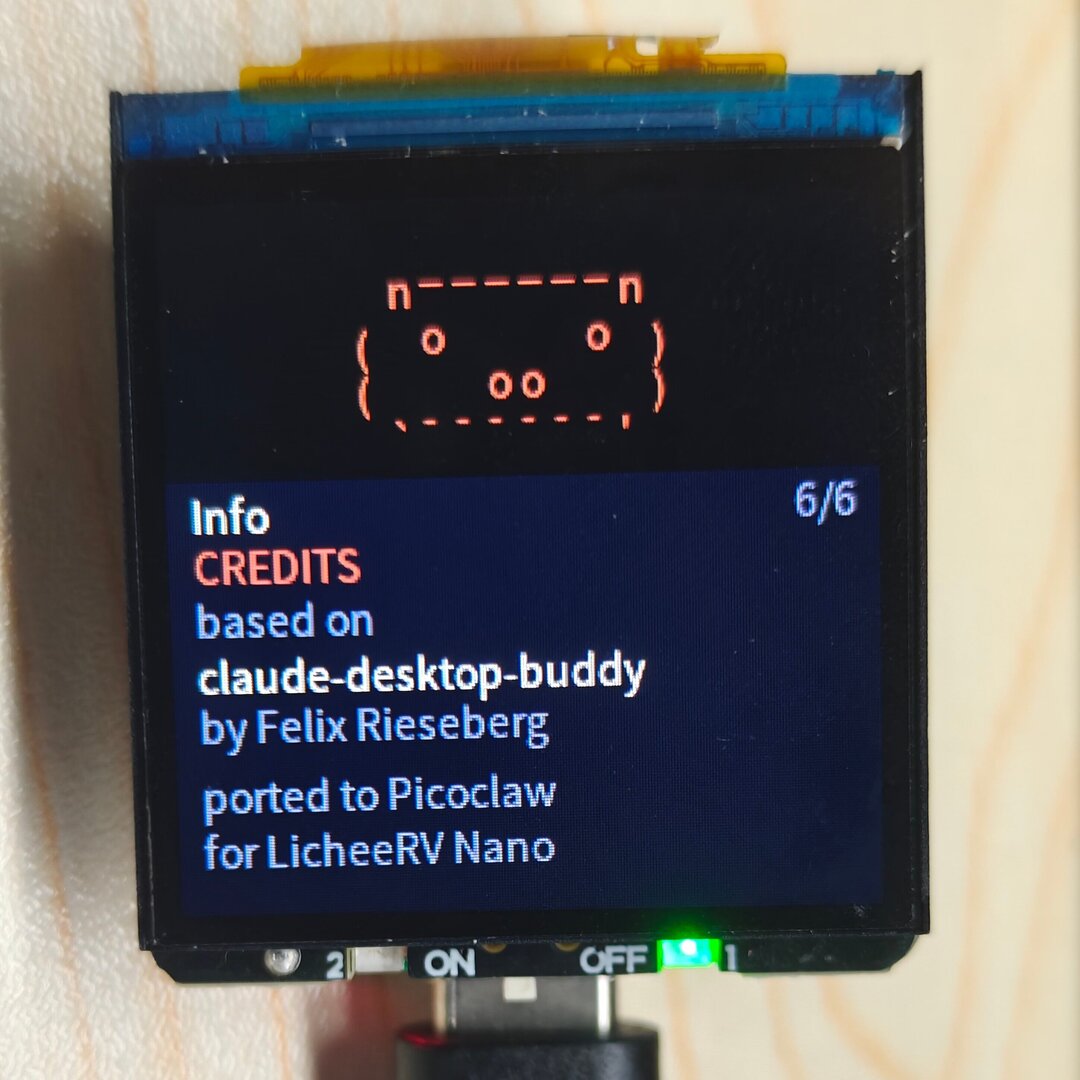
CC Buddy is ported from Felix Rieseberg's claude-desktop-buddy project, with dedicated adaptations for LicheeRV Nano + PicoClaw Expansion Board: 240×240 ST7789 display, KEY1(A)/KEY2(B) buttons, onboard LEDs, and more. The source code is located at /opt/app_cc_buddy in the system image.
Core design ideas:
- Embodied feedback: Map Claude Code states (idle, busy, waiting for approval, task completed, etc.) to pet emotions and actions, making invisible Agent behavior visible.
- Nearby approval: Permission requests are pushed to the device screen. Press A/B to approve or deny directly, reducing context switching.
- CLI bridge: Uses Claude Code's official Hook mechanism plus a local daemon to bridge events to the device TCP port, without modifying Claude Code itself.
Main Features
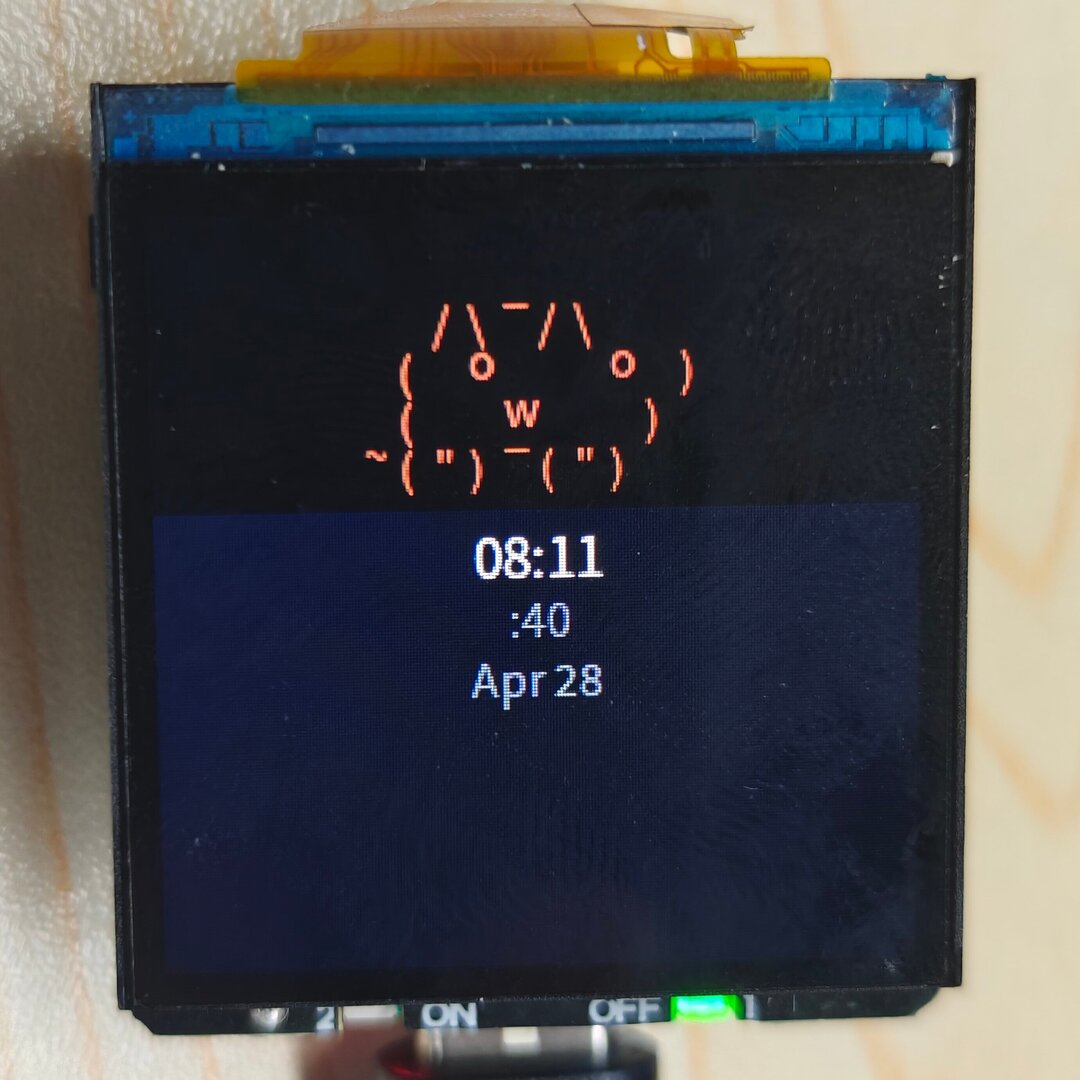
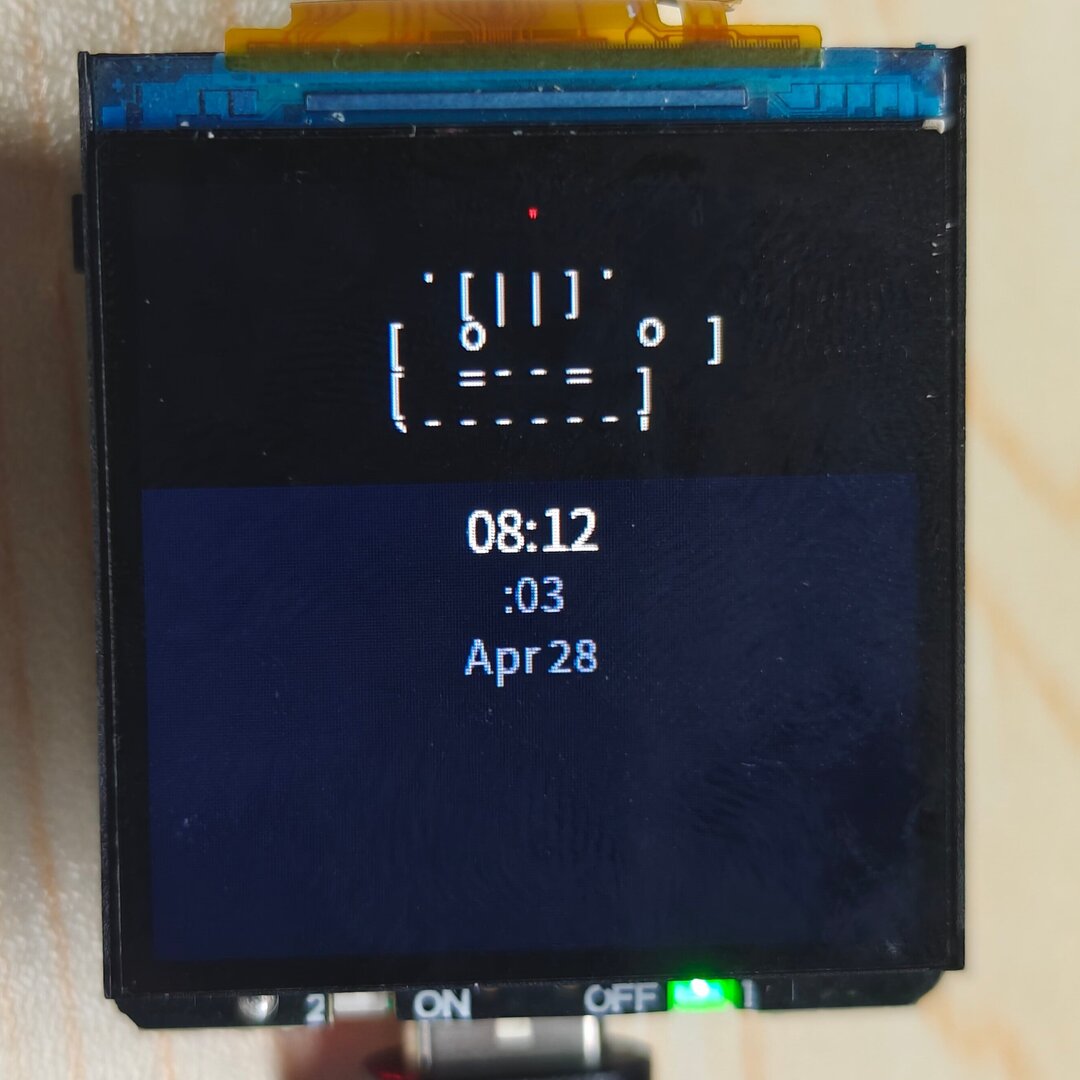
- Display an ASCII pixel-style pet on the 240×240 LCD (
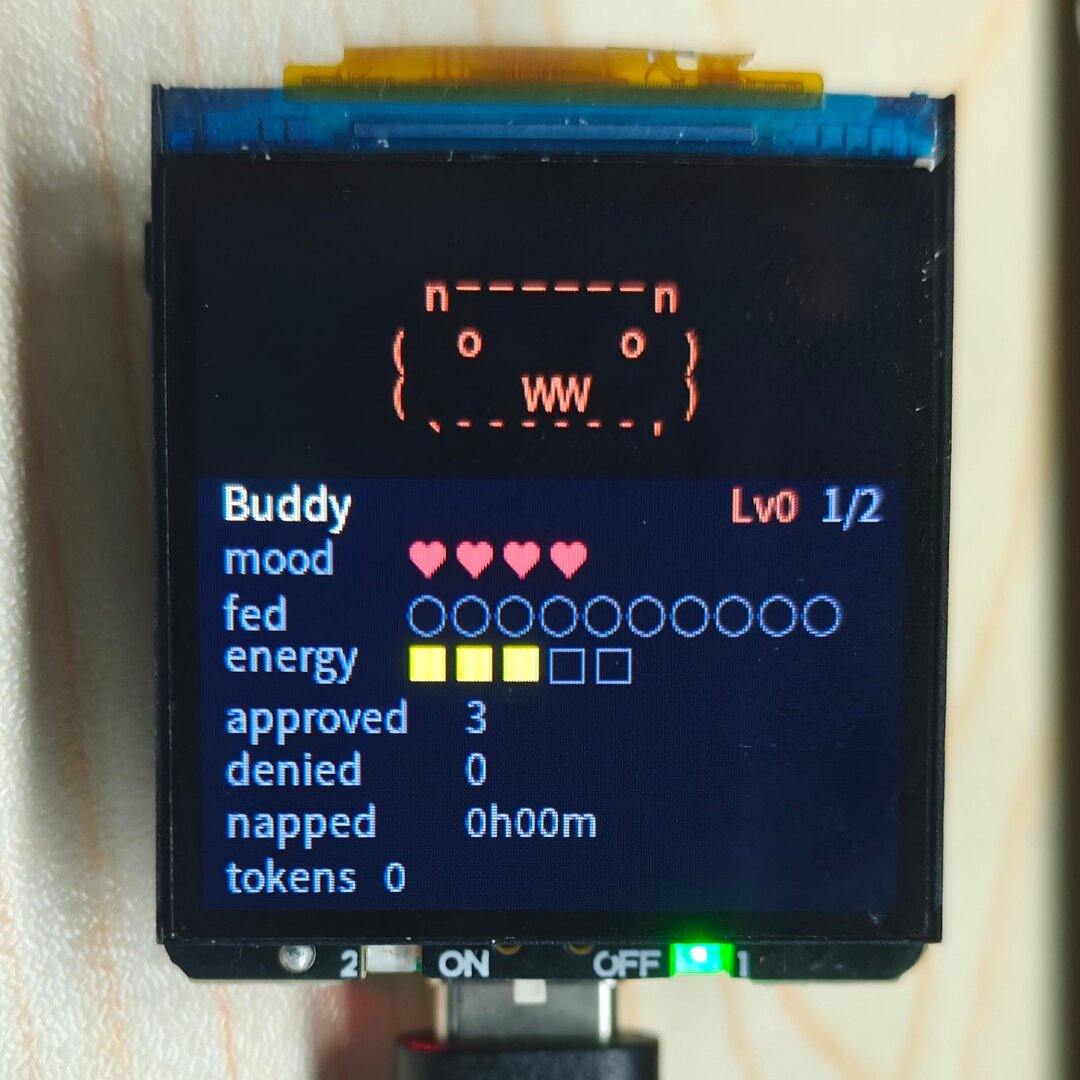
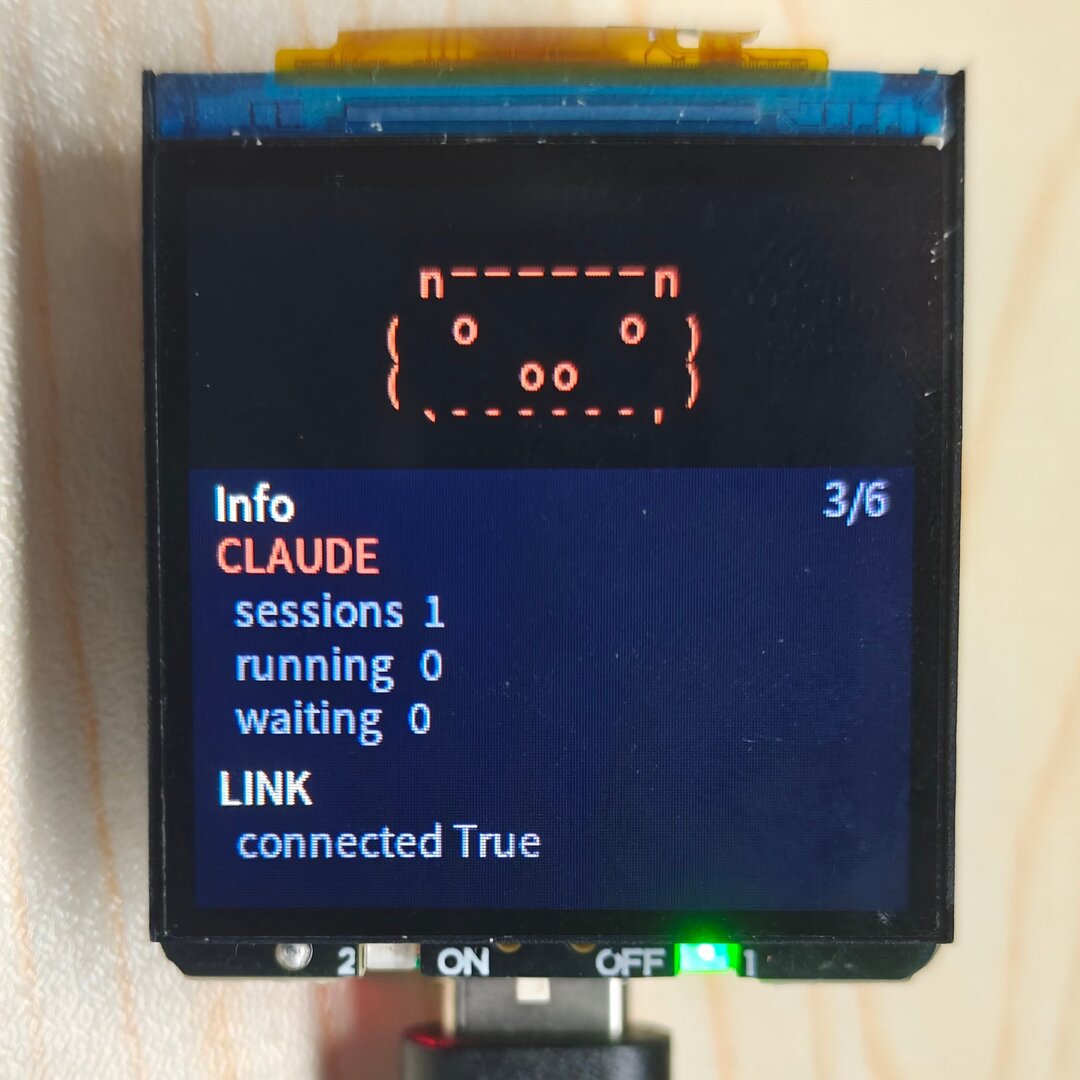
capybara,cat, androbotare provided by default and can be switched in settings) - Show Claude Code session status in real time: total sessions, running, waiting, token usage, and latest command/output line
- Permission approval dialog: shows tool name, prompt message, and waiting time, with highlight after 10 seconds
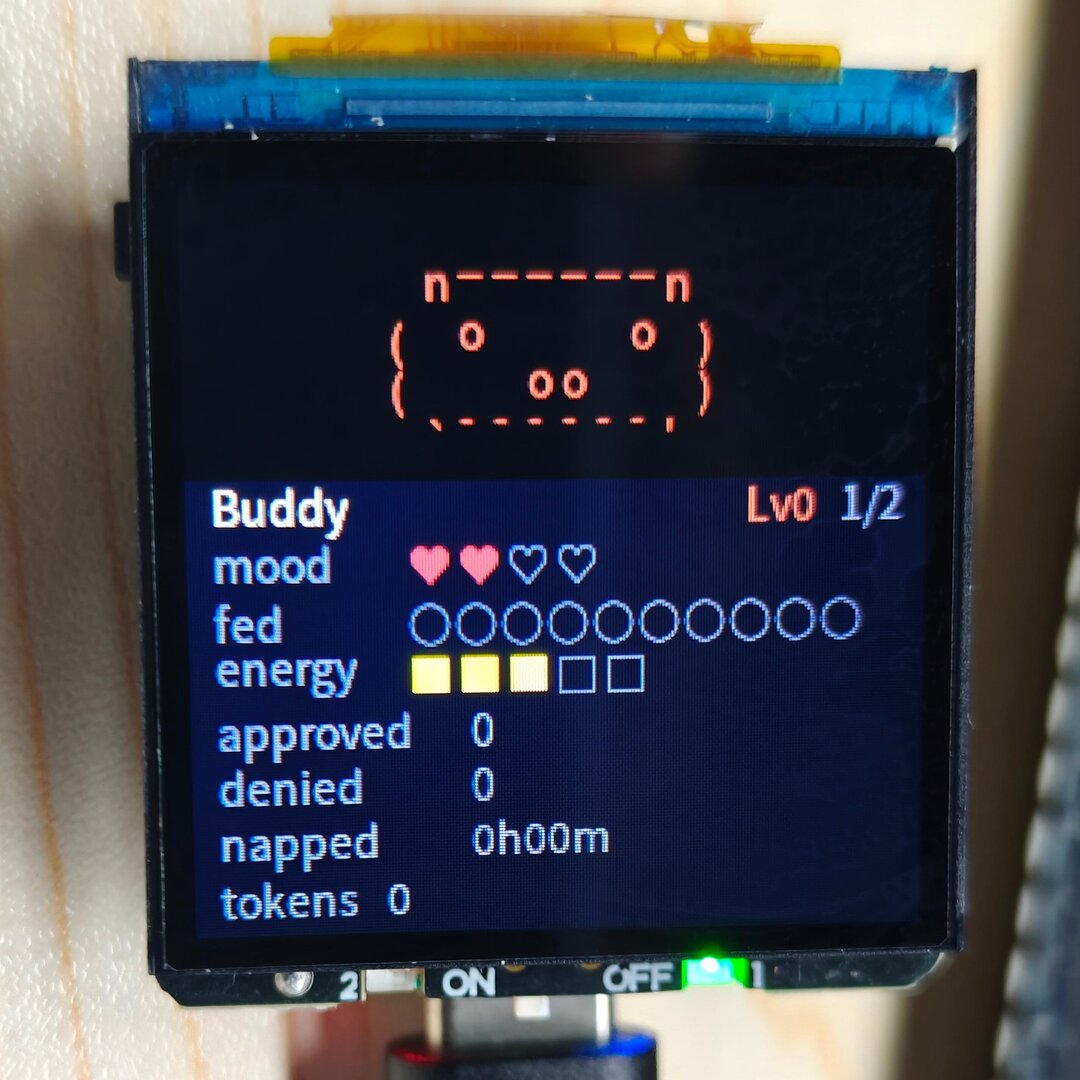
- Pet growth system: calculates mood, fed, and energy from approval speed, denial count, and token usage; accumulated tokens trigger level-up animation
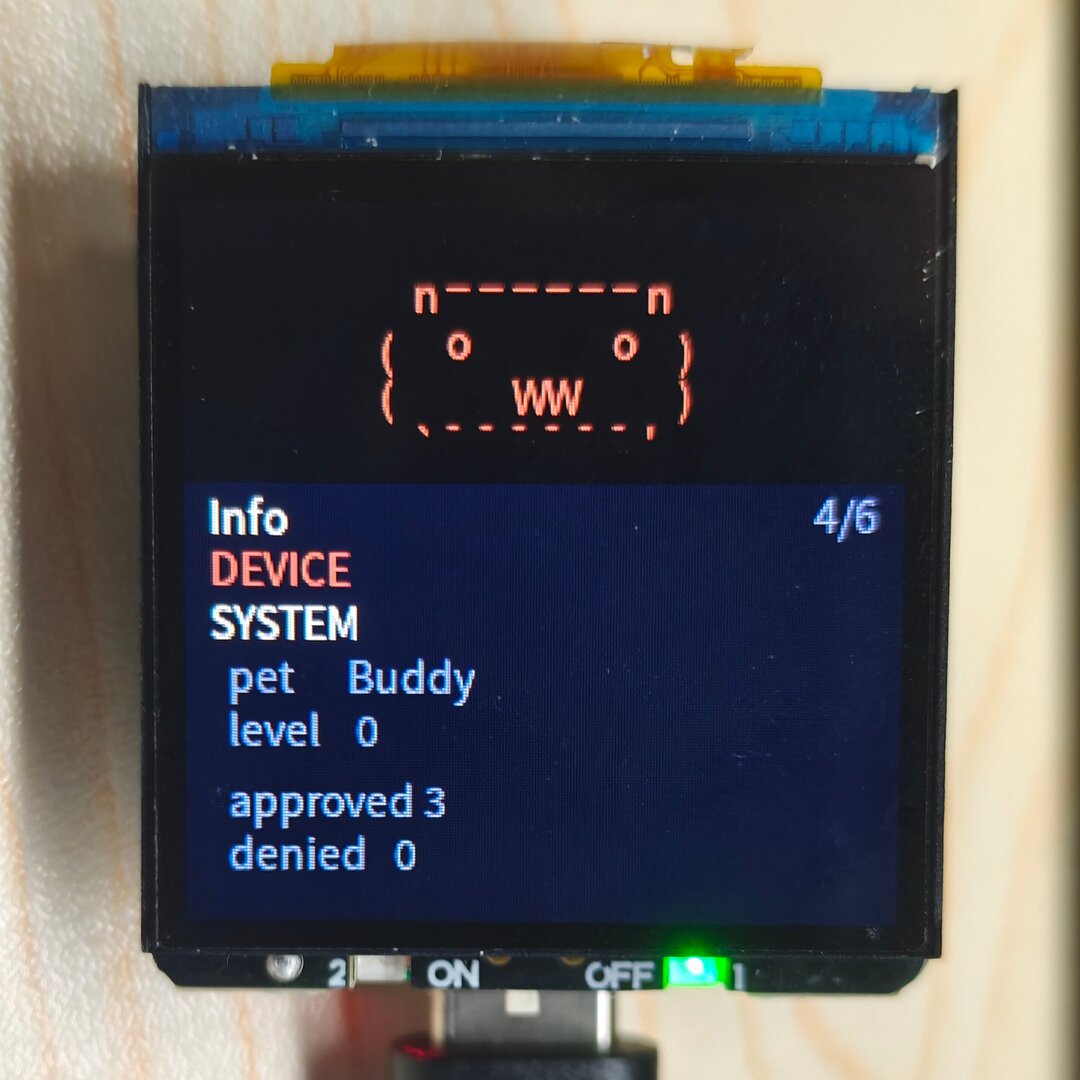
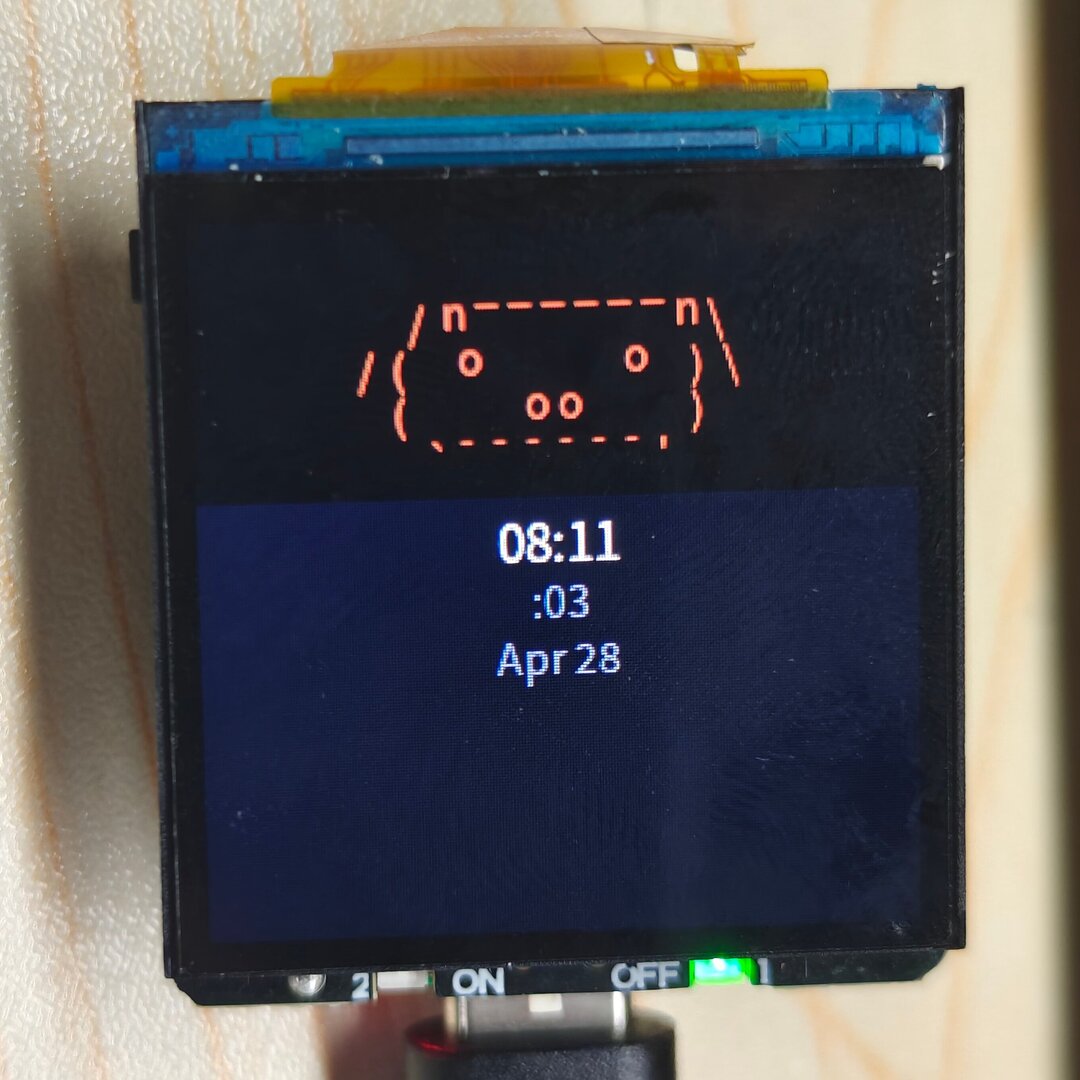
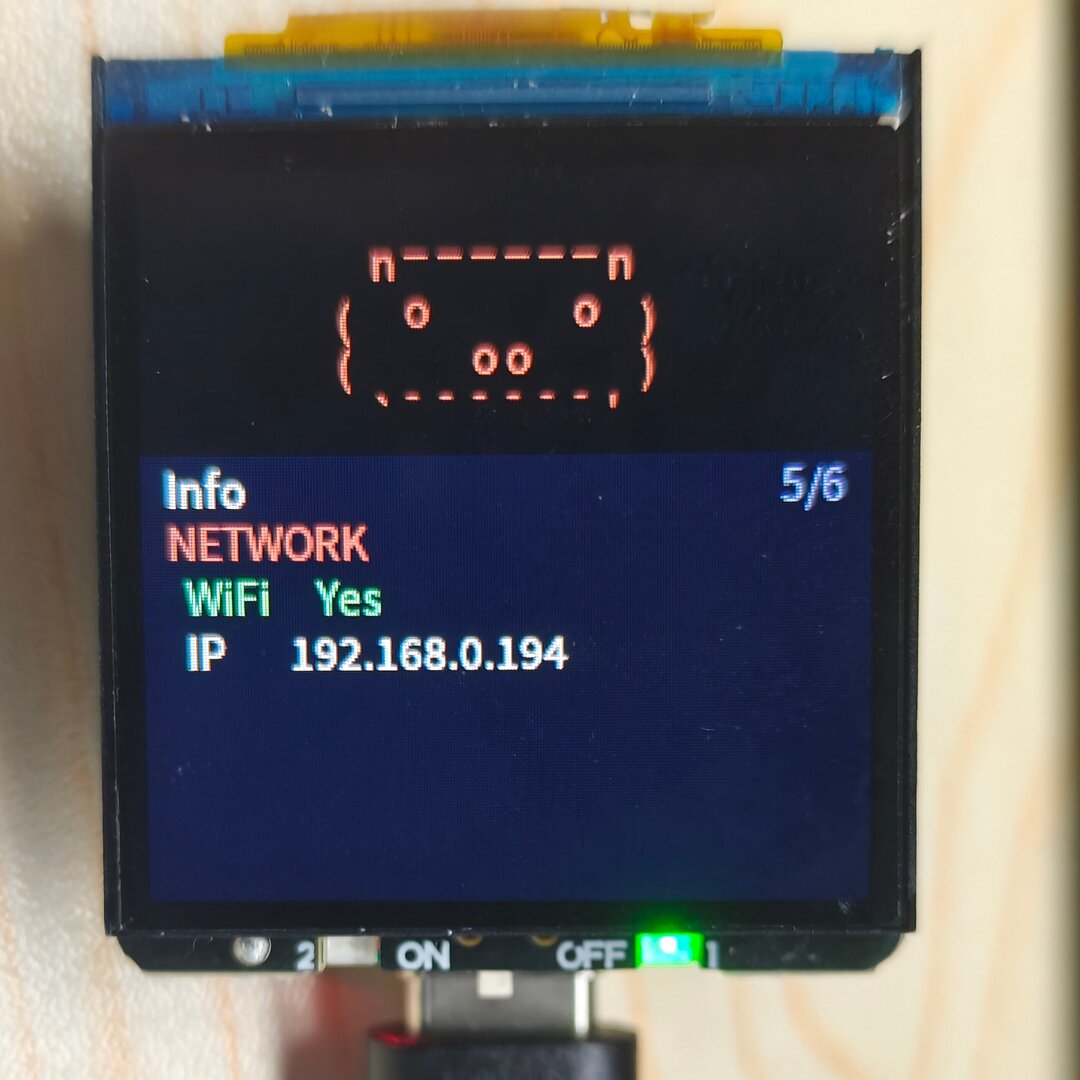
- Multiple display modes: HUD (script/transcript), INFO (device/network/statistics), PET (pet status page), CLOCK (shown when no Claude connection exists)
- Optional LED status blinking, auto screen sleep after 30 seconds of inactivity, and sound feedback (configurable in settings)
- One-click switch back to the PicoClaw application from the app menu without rebooting

Full Mode

Connection Method
CC Buddy communicates with the device through Claude Code CLI (Hooks + Daemon).
It is intended for users who use the claude terminal command. A daemon runs on the computer and bridges Claude Code Hook events to the device TCP port.
Claude Code CLI (sessions)
    	│ HTTP hooks (automatically injected into ~/.claude/settings.json)
    	▼
cc_buddy_daemon.py (default :9876)
    	│ TCP
    	▼
RVClaw device (:19000)
Start the daemon on the computer (download script here):
python3 cc_buddy_daemon.py --device <RVCLAW_IP>
# Custom port
python3 cc_buddy_daemon.py --device <RVCLAW_IP> --port 9877
After startup, the daemon automatically:
- Writes the following Hooks into
~/.claude/settings.json, and automatically cleans them up on exit (Ctrl+C / SIGTERM) - Listens on
http://127.0.0.1:9876for Claude Code Hook events - Connects to the RVClaw
19000TCP port to send heartbeats and receive button decisions
| Hook | Purpose |
|---|---|
| SessionStart / SessionEnd | Maintain active session count |
| PreToolUse | Mark running state and build command transcript |
| PostToolUse | Clear running state |
| Stop | Mark session generation completed |
| PermissionRequest | Block and wait for device button decision (default timeout: 30s) |
| PermissionDenied | Clear waiting state |
| PreCompact | Sync token count |
Then use claude normally. When Claude needs permission, the device switches to the approval page. Press A to approve / B to deny, and the daemon sends the decision back to Claude Code.
Button Operations
CC Buddy reuses the two buttons for multiple functions. Behavior changes with the current UI:
| Operation | A (left) | B (right) |
|---|---|---|
| Short press on main screen | Switch display mode (NORMAL / PET / INFO) | Turn pages in INFO/PET pages; scroll transcript in HUD mode |
| Long press (≥ 600ms) | Open main menu (settings / help / about / demo / to picoclaw / close) | — |
| Approval page | Approve (once) | Deny (deny) |
| Menu/settings opened | Move selection | Confirm/trigger selected item |
| Screen sleeping | Wake screen (first press does not trigger function) | Wake screen (first press does not trigger function) |
Select
to picoclawin the main menu to switch back to the PicoClaw application without rebooting. The CC Buddy service stops and the PicoClaw service starts.
Settings and Persistence

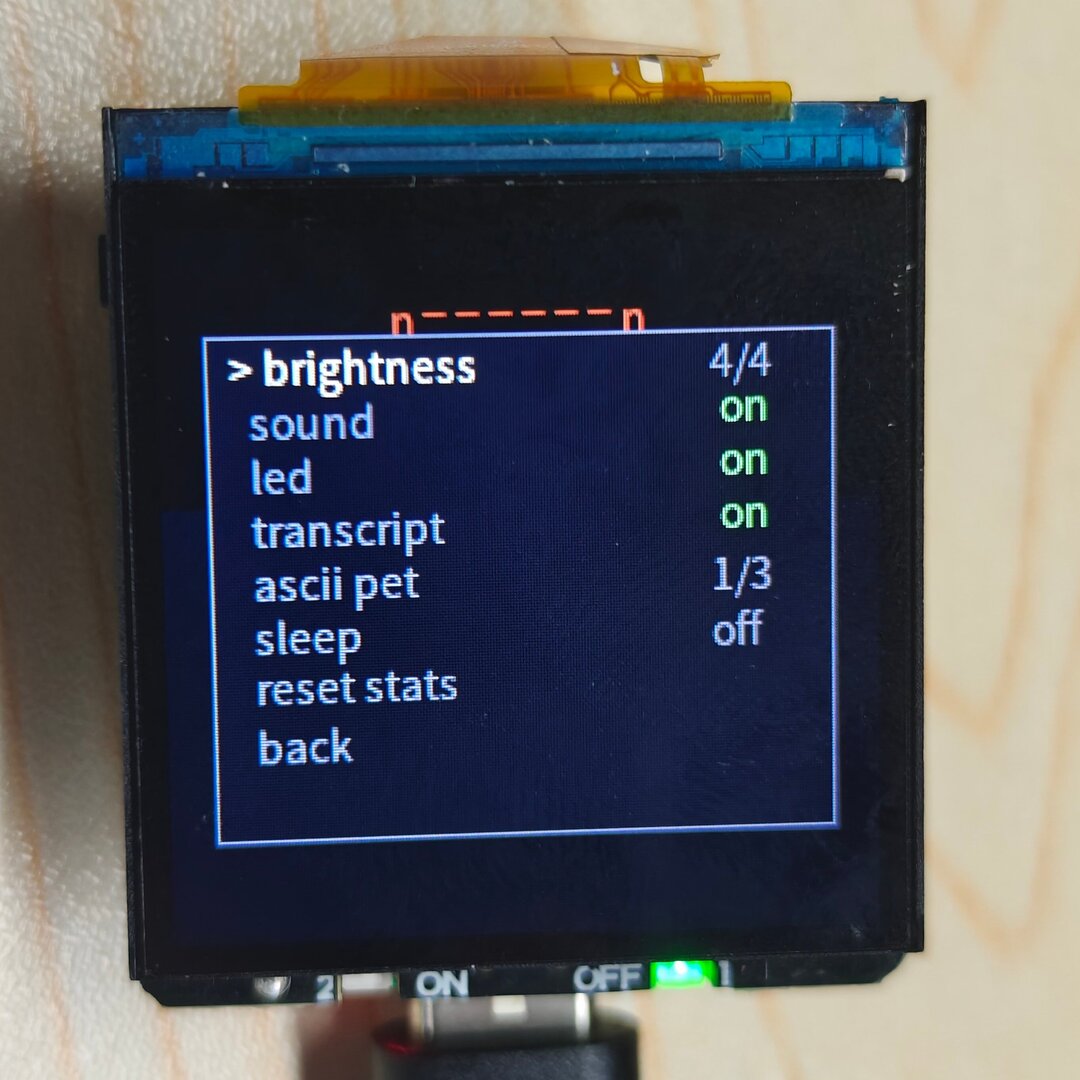
Go to main menu → settings to configure:
| Setting | Description | Values |
|---|---|---|
| brightness | Display brightness level | 0–4 |
| sound | Sound feedback switch | on / off |
| led | Status LED switch (blinks while waiting for approval) | on / off |
| transcript | HUD transcript display switch | on / off |
| ascii pet | Pet species selection | capybara / cat / robot |
| sleep | Auto screen sleep after 30s of inactivity | on / off |
| reset stats | Clear growth data and restore defaults | — |
Device data is persisted in /root/.cc_buddy/:
stats.json: level, accumulated tokens, approve/deny counters, pet species index, owner/pet names, etc.settings.json: the settings above
Pet Growth Rules
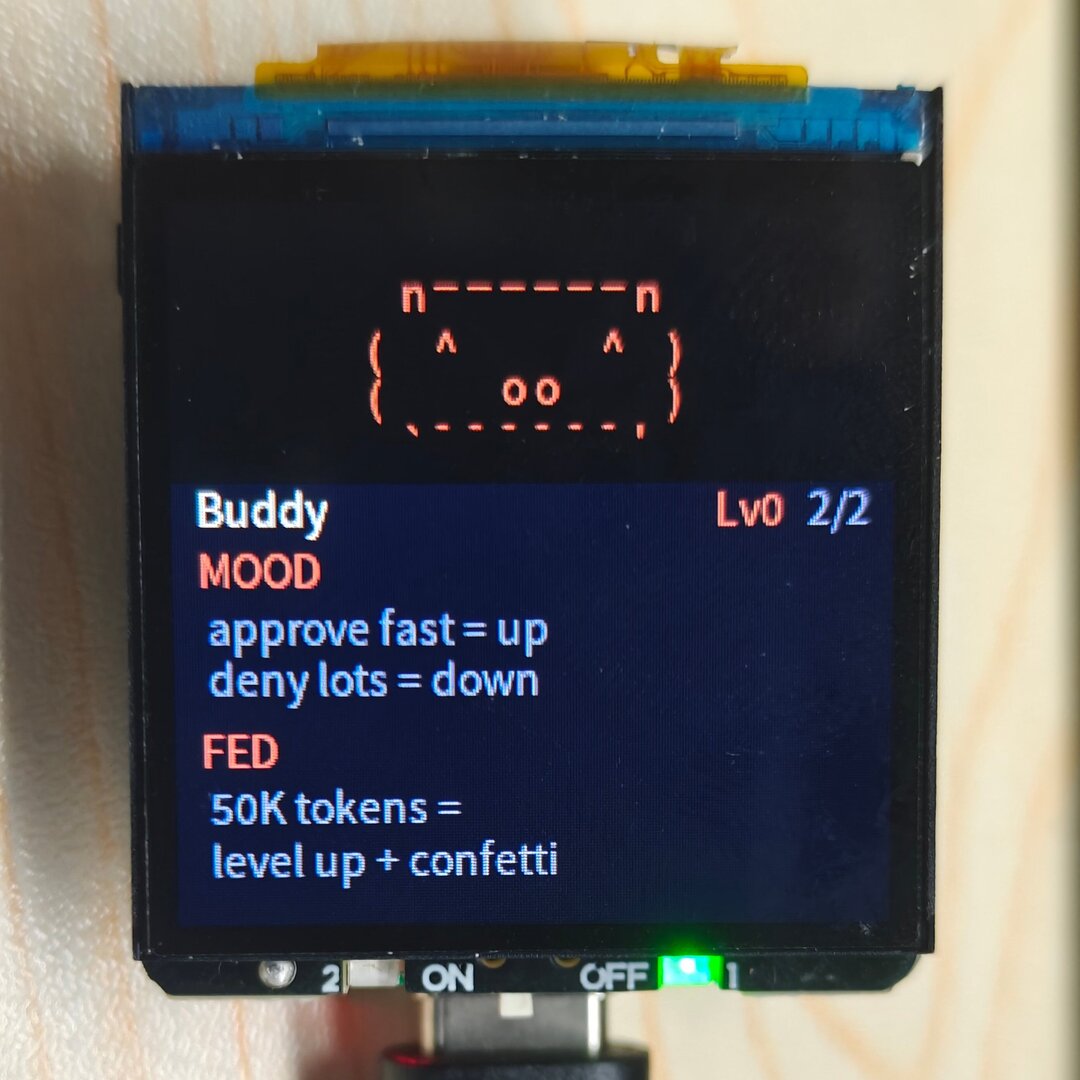
- MOOD: Faster approval means higher mood (< 5s triggers a one-time
HEARTanimation); frequent denials reduce mood. - FED: Levels up about every 50K accumulated tokens and plays the
CELEBRATEanimation. - ENERGY: Designed to recover after placing the screen face-down for a nap (currently unsupported).
- State mapping: disconnected → IDLE; waiting for approval → ATTENTION (with LED blinking); ≥ 3 sessions running → BUSY; recently completed → CELEBRATE; late night (1:00–7:00) without Claude connection → SLEEP (clock mode).
Custom Development
Development repository: GitHub app_cc_buddy.
CC Buddy is written entirely in Python with a clear directory structure:
| File | Purpose |
|---|---|
main.py |
Main event loop, button dispatch, state switching, display refresh |
config.py |
Pin definitions, SPI parameters, font paths, UI layout constants |
ui.py |
Draws splash screen, HUD, approval page, Info/Pet/Clock/Menu/Settings pages |
buddy.py + buddies/*.py |
Pet renderers (capybara, cat, and robot registered by default) |
state.py |
Data structures such as TamaState, PersonaState, and DisplayMode |
protocol.py |
JSON heartbeat/command parsing and permission-response packaging |
transport.py |
TCP communication implementation on port 19000 |
hooks/cc_buddy_daemon.py |
Host-side Hook bridge daemon |
S99cc_buddy_app |
Boot startup script |
To add a custom pet species, create a species file under buddies/ and register it with register_species() in buddies/__init__.py.
FAQ
Errors during conversation
- The model may be misconfigured, or unavailable. Check logs in Web UI for detailed errors.
- Check
/var/log/picoclaw-launcher.logand/var/log/picoclaw-worker.logfor error details. - You can try deleting
/root/.picoclawand rebooting, then reconfigure.
Errors when using
groqvoice modelsgroqis currently not accessible in mainland China. Use another provider or access through a proxy.
