

 English
This guide provides detailed instructions for two system flashing methods for the M4N development board series:
- booting and flashing eMMC via TFCard
- flashing using the AXDL tool
Please choose the appropriate method based on your needs.
Image File
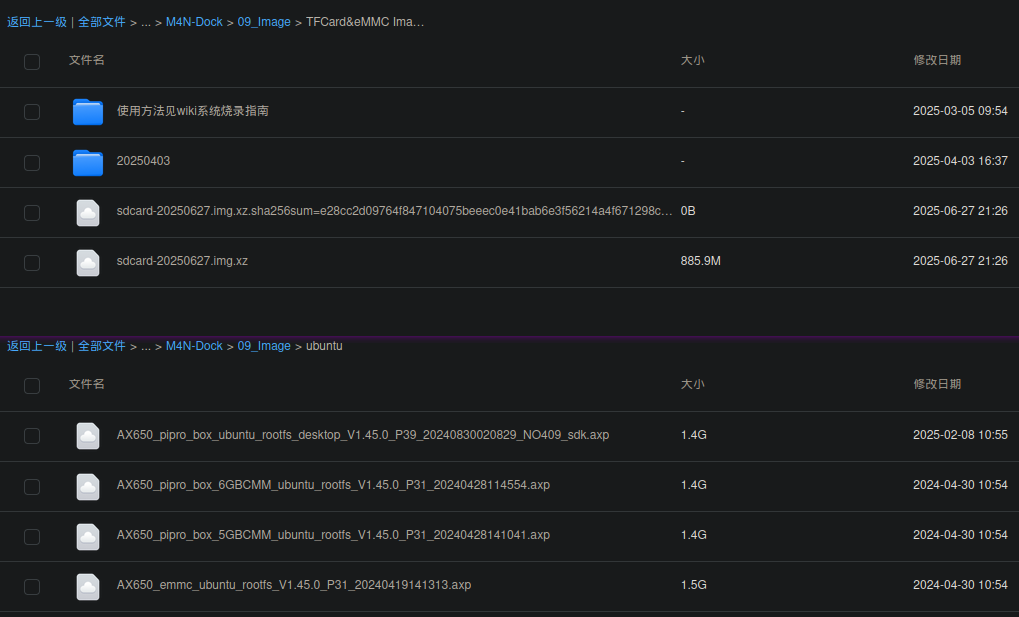
Due to the large size of the image packages used in the flashing methods described on this page and limited bandwidth on the download site, they are stored exclusively on Mega Drive in the same directory. The entry link can be found in the top side of the download site。
| Image Type | How to Boot | Filename | How to Obtain |
|---|---|---|---|
| TFCard&eMMC Image | power-up Boot from eMMC or Manual boot from TFCard |
sdcard.img |
path: MaixIV/M4N-Dock/09_Image/TFCard&eMMC Images |
| AXSDK AXP | power-up Boot from eMMC |
xxx.axp |
path: MaixIV/M4N-Dock/09_Image/ubuntu |
f the downloaded image file has an .xz extension, decompress it first. Linux users can use the xz tool, while Windows users can use tools like 7-zip.
Booting and Flashing eMMC via TFCard
Booting into the Live System (Manual Intervention Required)
Step 1: Prepare TFCard and Flash the Image
Prepare a TFCard with at least 8GB capacity and use any card reader tool or the computer's built-in card slot for reading/writing.
Note: The following operations will erase all data on the TFCard. Back up important data beforehand.
| HOST OS | Flashing Method |
|---|---|
| Linux | sudo dd if=sdcard.img of=/dev/sdX bs=4M conv=fsync status=progress |
| Windows | Use Win32DiskImager, Rufus or balenaEtcher to flash the image |
Example for Linux:
# Assuming the TFCard is mounted as /dev/sdb
% sudo dd if=sdcard.img of=/dev/sdb bs=4G conv=sparse,fsync status=progress
0+3 records in
0+3 records out
5754429440 bytes (5.8 GB, 5.4 GiB) copied, 89.2665 s, 64.5 MB/s
Step 2: Booting into the Live System Using the Flashed TFCard
TFCard Boot Method
| Board | Device Tree Blob | TF Card Slot Location | BOOT Button Location |
|---|---|---|---|
| Dock | dtbs/m4nbox.dtb |
Top-left corner, diagonal to Type-C port | Next to Type-C port (labeled BOOT) |
| Hat | dtbs/m4nhat.dtb |
Behind USB3 port, near the notch | Next to HDMI port (labeled BOOT0) |
| Cluster | dtbs/m4ncluster.dtb |
Below M.2 slot | Next to Type-C port (labeled BOOT) |
Mount the TFCard and modify the
dtb_img_name=dtbs/m4nbox.dtbline in the FAT32 partition'sconfig.txtfile to match your board.Insert the TFCard into the TF card slot.
Hold the
BOOTbutton and reset the board:- Option 1: Power cycle (unplug and replug power).
- Option 2: Press and release the
RSTbutton while powered on.
Note for M4N-Dock: If the front panel is obstructed, remove it by unscrewing the 3 screws and rotating it open.
After completing these steps, the Live system should boot. You can observe the boot logs via UART0.
This Live system is fully functional and ready for immediate use. If you want the system to boot automatically without manual button operations, proceed to flash the image to eMMC as described below.
Flashing eMMC from the Live System (Automatic Boot on Power-Up)
The onboard eMMC is always recognized as /dev/mmcblk0, while the TFCard is /dev/mmcblk1. Be careful to distinguish between them.
There are two methods are provided below for flashing the image to eMMC:
Method 1: Directly Recovery from the Live System
Boot into the Live system as described earlier and open a terminal for the following steps.
Use
ddto recovery the Live system from the TFCard to eMMC:dd if=/dev/mmcblk1 of=/dev/mmcblk0 bs=3M count=1 conv=fsync sync # 确保分区表生效 dd if=/dev/mmcblk1p1 of=/dev/mmcblk0p1 bs=64M conv=fsync dd if=/dev/mmcblk1p2 of=/dev/mmcblk0p2 bs=1G conv=sparse,fsync status=progressAfter completion, remove the TFCard. Just press the
RSTbutton and the system will now directly boot from eMMC.
Method 2: Flash the Image within the Live System
Prerequisite: The second partition (ext4) of the TFCard must be accessible and writable. If unsure, use Method 1.
Copy the sdcard.img file to any location in the second partition (Live system root directory).
Flash the image to eMMC:
dd if=/path/to/sdcard.img of=/dev/mmcblk0 bs=1G conv=sparse,fsync status=progressAfter completion, remove the TFCard. Just press the
RSTbutton and the system will now directly boot from eMMC.
Flashing via AXDL Software
The flashing file format has changed to be like xxx.axp.
For detailed steps, refer to the AXDL 工具使用指南.pdf in the official SDK documentation package.
Tip: The Download button on the official EVB corresponds to the BOOT button on other boards.
The AXDL software (Windows only) is located in the PC_Software directory on the download site.
Important Notes for M4N-Dock:
The USB flashing port is the bottom
USB-A portnear theHDMIconnector (Ethernet side). Use anA-to-Acable orA-to-Ccable if your PC has aType-C port.Do
notconnect the12V power supplyduring flashing. Use only the USB cable to avoid damaging thePC's USB port.
