

 English
Edit and execute the file
MaixPy has a built-in file system
As mentioned earlier, MaixPy supports SPIFFS used by Flash (currently does not support directory creation), by default, 3MB is allocated to SPIFF (from the address of flash 0xD00000, 3M), boot Automatically mount to the /flash directory
It also supports the Micro SD (TF) card of FAT32 format MBR partition, and it will automatically hang under the /sd directory when booting up
It should be noted that the root directory is only used to mount the Flash or SD card, and the specific files are in the /flash or /sd directory
Why need to edit and execute the file
In the previous experiment, we directly typed the code in the terminal to execute sentence by sentence. This is also simple and convenient. After we enter the command, it will execute immediately and get the returned result in time. This interactive method is called REPL (Read Eval Print Loop: Interactive interpreter),
The advantage of this method is that it is simple and convenient. It is very similar to the Linux terminal, except that the syntax used is replaced by MaixPy (Micropython) syntax.
But in actual operation, we want the code to be saved in the file system, and we need to run the file directly, so that we don’t have to type the code every time, which reduces a lot of trouble.
Edit and save the file
Method 1: Use the built-in editor Micropython Editor(pye)
In MaixPy, we have built-in an open source editor Micropython Editor(pye)
Use os.listdir() to view the files in the current directory,
Use pye("hello.py") to create a file and enter the editing mode, and the instructions for using shortcut keys can be found in here
For example, we write code
print("hello maixpy")
Then press Ctrl+S and press Enter to save, press Ctrl+Q to exit editing
Note: The use of this editor has certain requirements for the serial tool used. The BackSpace key must be set to the DEL function, otherwise pressing BackSpace will call the same function as Ctrl+H ( That is character replacement).
It is recommended to use minicom under Linux, you need to use sudo minicom -s to set, refer to previous tutorial
The same is true under Windows, search the setting method according to the tool you use, such as xshell search xshell How to set backspace to del to get the result:
File -> Properties -> Terminal -> Keyboard,
Change the sequence of delete and backspace to ASCII 127.
Method 2: Use MaixPy IDE
Open MaixPy IDE, connect the development board
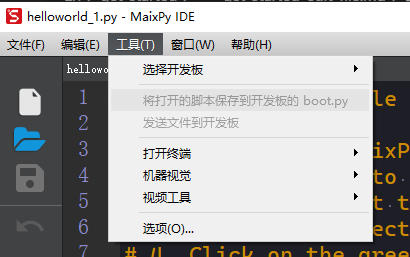
Edit the file, then in the top Tool menu, use the send file function in the top Tool menu to send the file, it will be saved to the development board and the file name is the same as the file name on the computer
Of course, you can also click Save the opened file as boot.py to save the code to the boot.py file of the development board. This file will be executed automatically next time the development board is powered on.
Method Three: Use the tool uPyLoader to read to the PC (computer), edit and then save to the development board
Download the executable file: release
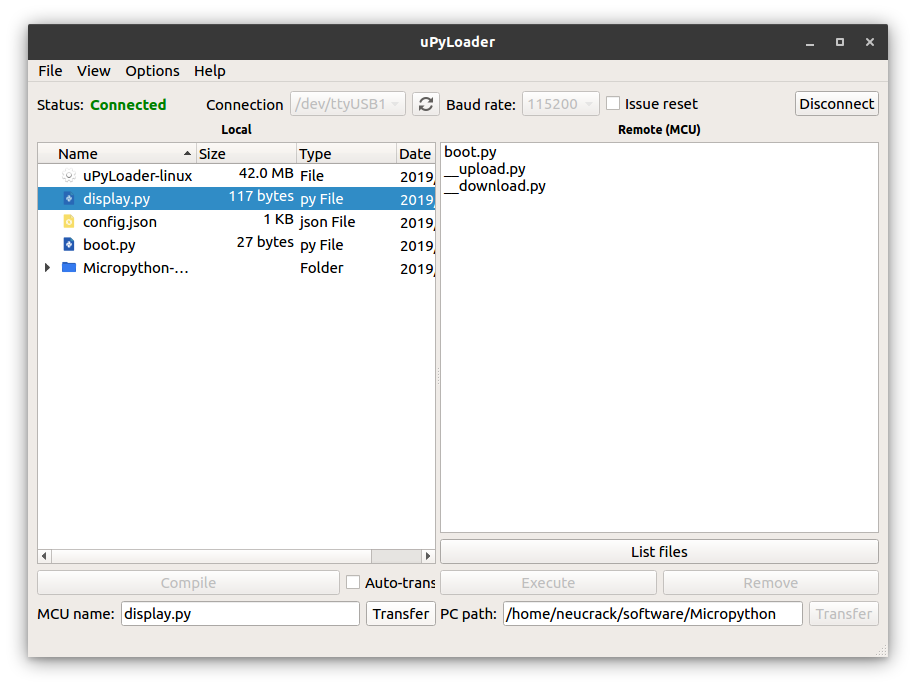
Select the serial port and click the Connect button to connect to the board
The first time you run the software, you need to initialize. Click on File->Init transfer files to complete the initialization. This will create two files in the board, namely __upload.py and __download.py.
Then double-click the file name to open the file and edit it. After editing, click save to save to the development board.
Method 4: Use the tool rshell to read it on the PC (computer) and edit it and then save it to the development board
Follow the instructions of rshell Project Homepage to install rshell
sudo apt-get install python3-pip
sudo pip3 install rshell
rshell -p /dev/ttyUSB1 # Here, choose the serial port according to the actual situation
Edit file
ls /flash
edit /flash/boot.py
# The editor is used in the same way as vim
executable file
Use os.chdir() to switch the current directory to the directory of the file, such as os.chdir("/flash")
Method 1: import
Then execute import hello
You can see the output hello maixpy
Using this method is simple and easy to use, but it should be noted that currently import can only be used once. If the second import, the file will not be executed again. If you need to execute it multiple times, the following method is recommended
And import will not execute the code under the condition of if __name__ == "__main__":, you need to pay attention
Method 2: exec()
Use the exec() function to execute
with open("hello.py") as f:
    exec(f.read())
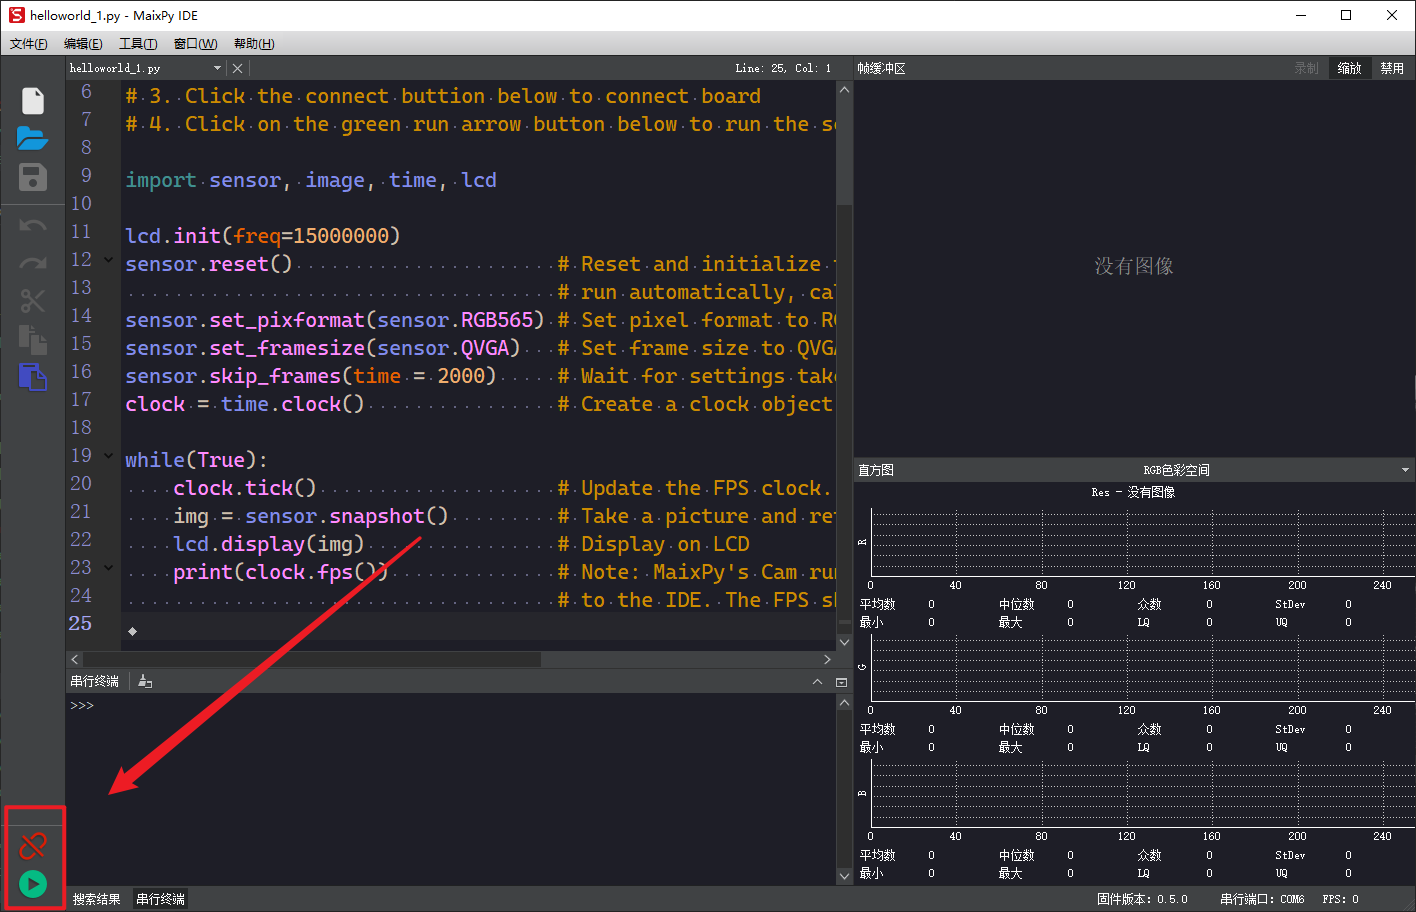
Method 3: Use MaixPy IDE to execute
Open the file, and then click the execute button to execute it. Note: The execution code is similar to the REPL execution code, except that the program is sent to the development board and not saved to the file system. It is executed once
Method 4: Use uPyLoader to execute
After connecting, select the file and click the excute button to execute the file
Method 5: Use ampy to run files on the computer directly
Execute the command ampy run file_in_PC.py to execute the file located on the computer (the file will not be saved to the development board)
Does MaixPy support mounting file systems to the computer?
Not supported, because the chip k210 used has no USB function and cannot simulate a U disk device, so it cannot be a virtual U disk like Microbit and STM32 Micropython
