MaixPy Quick Start

The only official website for MaixPy: wiki.sipeed.com/maixpy
MaixPy examples and source code: github.com/sipeed/MaixPy

For an introduction to MaixPy, please see the MaixPy official website homepage

Get a MaixCAM Device

Purchase the MaixCAM development board from the Sipeed Taobao or Sipeed AliExpress store.

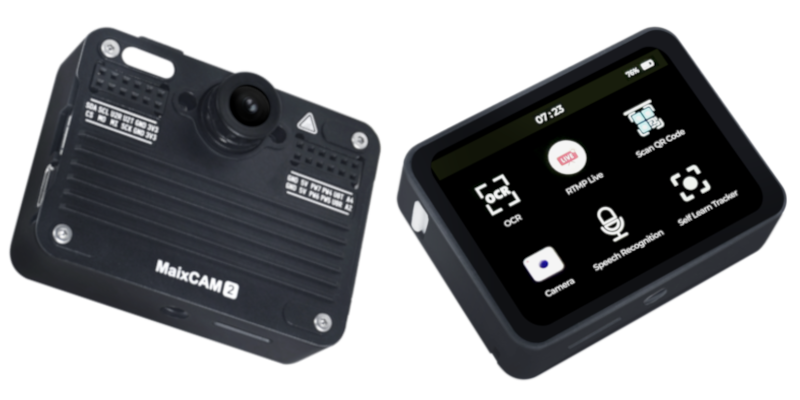
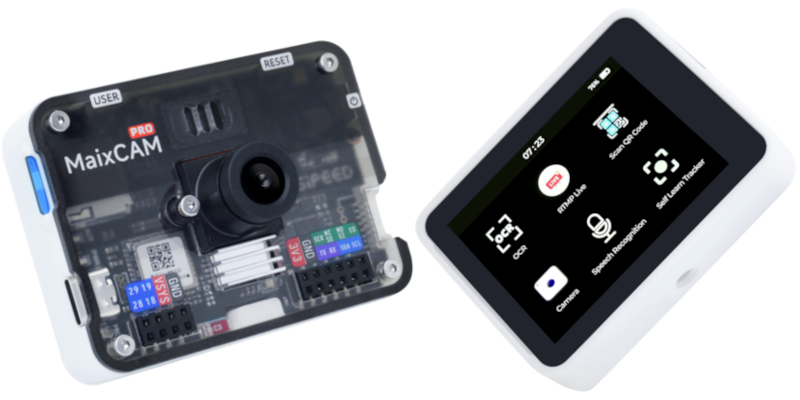
It is recommended to purchase the bundle with a TF card, camera, 2.3-inch touchscreen, case, Type-C data cable, Type-C one-to-two mini board, and 4P serial port socket+cable, which will be convenient for later use and development. The following tutorials assume that you already have these accessories (including the screen).

If you did not purchase a TF card, you will need to prepare a TF card reader to flash the system.

Note that currently only the MaixCAM development board is supported. Other development boards with the same chip are not supported, including Sipeed's development boards with the same chip. Please be careful not to purchase the wrong board, which could result in unnecessary waste of time and money.

Getting Started

Prepare the TF Image Card and Insert it into the Device

If the package you purchased includes a TF card, it already contains the factory image. If the TF card was not installed in the device at the factory, you will first need to carefully open the case (be careful not to tear the ribbon cables inside) and then insert the TF card. Additionally, since the firmware from the factory may be outdated, you can follow the instructions on Upgrading and Flashing the System to upgrade the system to the latest version.

If you did not purchase a TF card, you need to flash the system onto a self-provided TF card. Please refer to Upgrading and Flashing the System for the flashing method, and then install it on the board.

Power On

Use a Type-C data cable to connect the MaixCAM device and power it on. Wait for the device to boot up and enter the function selection interface.

maixcam_font

If the screen does not display:

  • Please confirm that you purchased the bundled TF card. If you confirm that you have a TF card and it is inserted into the device, you can try updating to the latest system.
  • If you did not purchase the TF card bundle, you need to follow the instructions in Upgrading and Flashing the System to flash the latest system onto the TF card.
  • Also, ensure that the screen and camera cables are not loose. The screen cable can easily come off when opening the case, so be careful.

Connect to the Network

For the first run, you need to connect to the network, as you will need it later to activate the device and use the IDE.

  • On the device, click Settings, select WiFi, and click the Scan button to start scanning for nearby WiFi. You can click several times to refresh the list.
  • Find your WiFi hotspot. If you don't have a router, you can use your phone as a hotspot.
  • Enter the password and click the Connect button to connect.
  • Wait for the IP address to be obtained. This may take 10 to 30 seconds. If the interface does not refresh, you can exit the WiFi function and re-enter to check, or you can also see the IP information in Settings -> Device Info.

Update the Runtime Libraries

This step is very important!!! If this step is not done properly, other applications and functions may not work (e.g., they may crash).

  • First, ensure that you have completed the previous step of connecting to WiFi and have obtained an IP address to access the internet.
  • On the device, click Settings, and select Install Runtime Libraries.
  • After the installation is complete, you will see that it has been updated to the latest version. Then exit.

If it shows Request failed or 请求失败 (Request failed), please first check if the network is connected. You need to be able to connect to the internet. If it still doesn't work, please take a photo and contact customer service for assistance.

Use Built-in Applications

Many applications are built-in, such as Find Blobs, AI Detector, Line Follower, etc. For example, Find Blobs:

Please explore other applications on your own. More applications will be updated in the future. For usage documentation and application updates, please see the MaixHub App Store.

Note: The applications only include a part of the functionality that MaixPy can achieve. Using MaixPy, you can create even more features.

Use as a Serial Module

If you want to use the device as the main controller (or if you don't understand what a serial module is), you can skip this step.

The built-in applications can be used directly as serial modules, such as Find Blobs, Find Faces, Find QR Codes, etc.

Usage:

  • Hardware connection: You can connect the device to the Type-C one-to-two mini board, which allows you to connect the device via serial to your main controller, such as Arduino, Raspberry Pi, STM32, etc.
  • Open the application you want to use, such as QR code recognition. When the device scans a QR code, it will send the result to your main controller via serial.

The serial baud rate is 115200, the data format is 8N1, and the protocol follows the Maix Serial Communication Protocol Standard. You can find the corresponding application introduction on the MaixHub APP to view the protocol.

Prepare to Connect the Computer and Device

To allow the computer (PC) and the device (MaixCAM) to communicate later, we need to have them on the same local area network. Two methods are provided:

  • Method 1 (strongly recommended): Wireless connection. The device uses WiFi to connect to the same router or WiFi hotspot as the computer. You can connect to your WiFi in the device's Settings -> WiFi Settings.
  • Method 2: Wired connection. The device connects to the computer via a USB cable, and the device will act as a virtual USB network card, allowing it to be on the same local area network as the computer via USB.

Method 2 may encounter some problems due to the need for USB and drivers, so it is recommended to start with WiFi instead. You can find common issues in the FAQ.

Method 2 has different setup methods on different computer systems, click to expand
  • Linux: No additional setup is required. Just plug in the USB cable. Use ifconfig or ip addr to view the usb0 network card. Note that the IP address you see here, e.g., 10.131.167.100, is the computer's IP. The device's IP is the last octet changed to 1, i.e., 10.131.167.1.
  • Windows: You can first confirm if a RNDIS device has been added in the Network Adapters. If so, you can use it directly. Otherwise, you need to manually install the RNDIS network card driver:
    • Open the computer's Device Manager.
    • Then find a RNDIS device with a question mark under Other Devices, right-click and select Update Driver Software.
    • Select Browse my computer for driver software.
    • Select Let me pick from a list of available drivers on my computer.
    • Select Network Adapters, then click Next.
    • On the left, select Microsoft, on the right, select Remote NDIS Compatible Device, then click Next, and select Yes.
    • After installation, the effect is as follows:
      RNDIS
  • MacOS: No additional setup is required. Just plug in the USB cable. Use ifconfig or ip addr to view the usb0 network card. Note that the IP address you see here, e.g., 10.131.167.100, is the computer's IP. The device's IP is the last octet changed to 1, i.e., 10.131.167.1.

Prepare the Development Environment

  • Download and install MaixVision.
  • Connect the device and computer with a Type-C cable, open MaixVision, and click the "Connect" button in the bottom left corner. It will automatically search for devices. After a short wait, you will see the device, and you can click the connect button next to it to connect to the device.

If no device is detected, you can also manually enter the device's IP address in the device's Settings -> Device Info. You can also find solutions in the FAQ.

After a successful connection, the function selection interface on the device will disappear, and the screen will turn black, releasing all hardware resources. If there is still an image displayed, you can disconnect and reconnect.

Here is a video example of using MaixVision:

Run Examples

Click Example Code on the left side of MaixVision, select an example, and click the Run button in the bottom left to send the code to the device for execution.

For example:

  • hello_maix.py: Click the Run button, and you will see messages printed from the device in the MaixVision terminal, as well as an image in the upper right corner.
  • camera_display.py: This example will open the camera and display the camera view on the screen.
from maix import camera, display, app

disp = display.Display()          # Construct a display object and initialize the screen
cam = camera.Camera(640, 480)     # Construct a camera object, manually set the resolution to 640x480, and initialize the camera
while not app.need_exit():        # Keep looping until the program exits (you can exit by pressing the function key on the device or clicking the stop button in MaixVision)
    img = cam.read()              # Read the camera view and save it to the variable img, you can print(img) to print the details of img
    disp.show(img)                # Display img on the screen
  • yolov5.py will detect objects in the camera view, draw bounding boxes around them, and display them on the screen. It supports detection of 80 object types. For more details, please see YOLOv5 Object Detection.

You can try other examples on your own.

If you encounter image display stuttering when using the camera examples, it may be due to poor network connectivity, or the quality of the USB cable or the host's USB being too poor. You can try changing the connection method or replacing the cable, host USB port, or computer.

Install Applications on the Device

The above examples run code on the device, but the code will stop running when MaixVision is disconnected. If you want the code to appear in the boot menu, you can package it as an application and install it on the device.

Click the Install App button in the bottom left corner of MaixVision, fill in the application information, and the application will be installed on the device. Then you will be able to see the application on the device.
You can also choose to package the application and share your application to the MaixHub App Store.

The default examples do not explicitly write an exit function, so you can exit the application by pressing the function key on the device. (For MaixCAM, it is the user key.)

If you want the program to start automatically on boot, you can set it in Settings -> Boot Startup.

Next Steps

If you like what you've seen so far, please be sure to give the MaixPy open-source project a star on GitHub (you need to log in to GitHub first). Your star and recognition is the motivation for us to continue maintaining and adding new features!

Up to this point, you've experienced the usage and development workflow. Next, you can learn about MaixPy syntax and related features. Please follow the left sidebar to learn. If you have any questions about using the API, you can look it up in the API documentation.

It's best to learn with a specific purpose in mind, such as working on an interesting small project. This way, the learning effect will be better. You can share your projects and experiences on the MaixHub Share Plaza and receive cash rewards!

Share and Discuss

  • MaixHub Project and Experience Sharing: Share your projects and experiences, and receive cash rewards. The basic requirements for receiving official rewards are:
    • Reproducible: A relatively complete process for reproducing the project.
    • Showcase: No detailed project reproduction process, but an attractive project demonstration.
    • Bug-solving experience: Sharing the process and specific solution for resolving a particular issue.
  • MaixPy Official Forum (for asking questions and discussion)
  • Telegram: MaixPy
  • MaixPy Source Code Issues: MaixPy issue
  • For business cooperation or bulk purchases, please contact support@sipeed.com.